The icwrapper.dll failed to register QuickBooks error emerges while installing or updating the application. The impact of the error message lies in QuickBooks’ functioning. Although the user’s accounting data remains in good shape, facing this error and program performance lag is troublesome. So here we have brought this detailed guide regarding this issue, which will help QuickBooks users to target the root triggers and eliminate the problem effectively.
QuickBooks uses DLL files to run correctly on the system. Users who try installing or updating QuickBooks on their system encounter an error interrupting the process, indicating that the DLL files couldn’t register. Although it doesn’t affect the accounting data directly, prolonged exposure to the icwrapper.dll failed-to-register glitch can have significant negative impacts. The error may arise on its own or with an error code 1904.
Regardless of its appearance, knowing how to troubleshoot it quickly and effectively is critical. Here’s an in-depth guide with the error’s explanation, causes, signs, and troubleshooting methods. Everything’s available step-wise so that you can apply things without issues.
Resolution Methods to Resolve icwrapper.dll failed to register QuickBooks error
Before beginning with the rectification of the icwrapper dll failed to register QuickBooks 2023 error, check if any of the following cases apply to you:
- If you use BitDefender, get to the exceptional cases section for rectification.
- You may have installed Adobe Flash recently.
- QBVersionTool.dll gets mentioned in the error message.
Now, let’s dive into the solutions to resolve this glitch:
Solution 1: Use QuickBooks Tool Hub and Install Diagnostic Tool
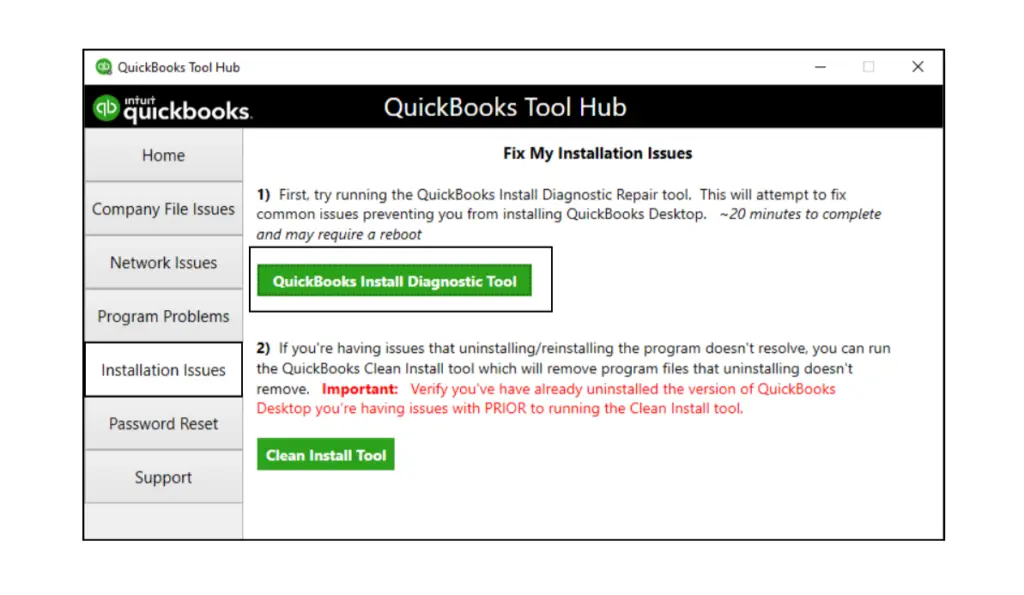
QuickBooks Tool Hub holds power to fix numerous common errors by attacking their root triggers. Since it contains several sections like Installation Issues, Program Problems, Company File Issues, Network Issues, etc., users can use the tools available in these tabs to fix their problems.
Step 1: Download QuickBooks Tool Hub
You’ll need to shut down QuickBooks to use the Tool Hub. Also, it’s recommended you use the Tool Hub on Windows 10, 64-bit. Now, let’s look into the actions you must take to download and install QB Tool Hub:
- Shut down the QuickBooks application.
- Locate and download the link for the most recent QuickBooks Tool Hub version. Store the file in an easy-to-access location (the Downloads folder or your Windows Desktop). Do note that if you have Tool Hub already installed on your device, you should locate which version you have from the Home tab. You’ll find the version at the bottom.
- Now, launch the downloaded file at QuickBooksToolHub.exe.
- Execute the on-screen steps to fulfill installation and validate the terms and conditions.
- After installation, double-tap the icon on your Windows desktop to access the Tool Hub.
- If the icon is not visible, search for it in Windows by typing QuickBooks Tool Hub and hitting the program.
Step 2: Run the QB Install Diagnostic Tool from the Tool Hub
Running the QuickBooks Install Diagnostic Tool will help fix any issues with your Microsoft programs. The tool runs automatically and diagnoses and repairs problems. The steps involved in running the tool are as follows:
- Access the QB Tool Hub.
- Tap the Installation Issues tab in the tool hub.
- Choose the QuickBooks Install Diagnostic Tool and let it run. The tool will take at least 20 minutes.
- After the scanning, diagnosing, and repairing ends, you can restart your computer and launch QuickBooks.
If QuickBooks opens and works correctly, the problem is fixed. Otherwise, proceed to the next solution.
Solution 2: Repair Windows Components Manually
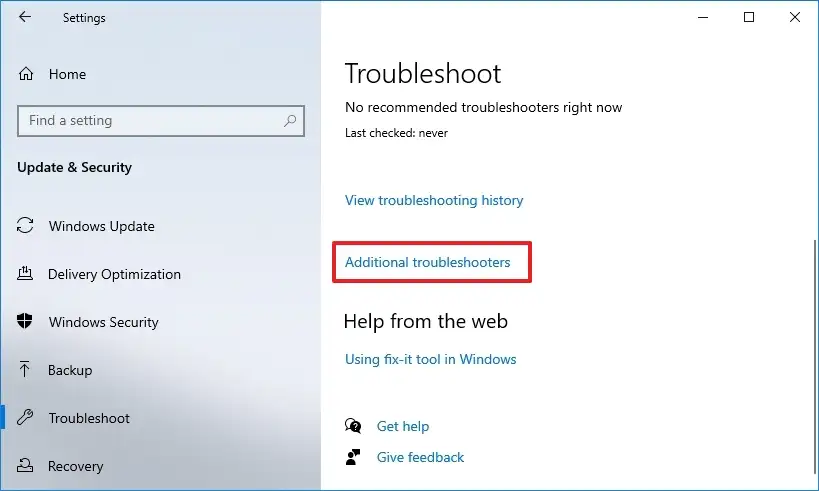
Fixing the specific Windows components yourself is critical to rectifying the Intuit icwrapper.dll failed to register QuickBooks error. Undertake these steps only if you’re a confident Windows user, an IT expert, or are working with MS support professionals.
Fix or Reinstall Microsoft .NET Framework
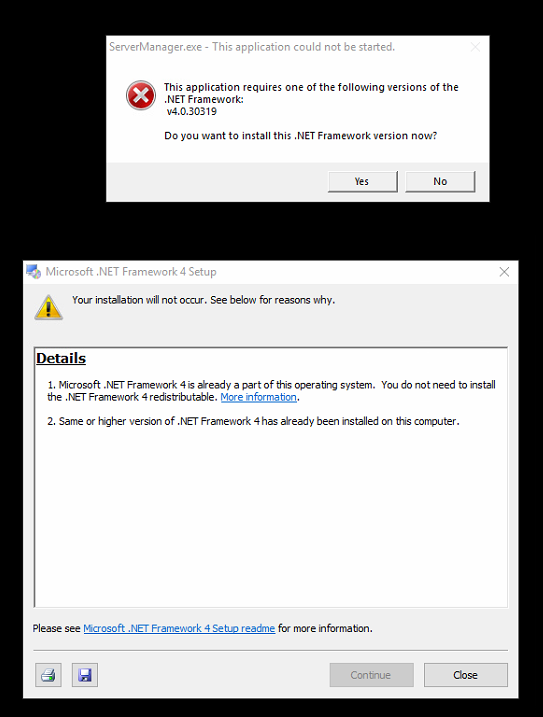
QuickBooks may not work correctly if the Microsoft .NET Framework has issues. MS programs are essential to run web-based apps. So, undertake the following steps if you have Windows 10 or newer:
- Shut down all open programs and tap the Windows Start menu.
- Type Control Panel through the keyboard in the search field and hit Enter.
- Launch the Control Panel program.
- Head to the Programs and Features tab.
- Opt for the uninstall a program option, but do not worry, as we aren’t removing anything from the computer.
- Click Turn Windows Features on or off.
- Look for .NET Framework on the list.
Further, verify the settings for both .NET Framework 4.5 (or later) and .NET Framework 3.5 SP1.
Check .NET Framework 4.5 or later
If the .NET Framework 4.5 or later checkbox hasn’t been checked yet, do the following:
- Tap the checkbox .NET Framework 4.5 to turn it on.
- Click OK and save your changes.
- Restart your computer.
If the .NET Framework 4.5 or later has been checked already, you’ll need to take the following steps:
- Hit the checkbox against .NET Framework 4.5 or later to turn it off. Do not enable it just yet.
- Instead, tap OK to save the changes and restart your computer.
- After signing back into Windows, execute the steps to enable .NET Framework 4.5.
Check .NET Framework 3.5 SP1
If the .NET Framework 3.5 SP1 box hasn’t been marked already, do the following:
- Tap the checkbox to turn .NET Framework 3.5 SP1 on.
- Then, click OK and save the changes.
- Start your computer again.
If the box has already been marked, you’ll need to do the following:
- Disable the framework by unmarking the box against .NET Framework 3.5 SP1.
- Hit OK and save the changes.
- Start your computer again.
- When you log into Windows again, execute the steps to turn .NET Framework 3.5 SP1 on.
If an error arises while you turn these frameworks on or off, you should consider reaching out to an IT expert or Microsoft professional.
Fix MSXML Files
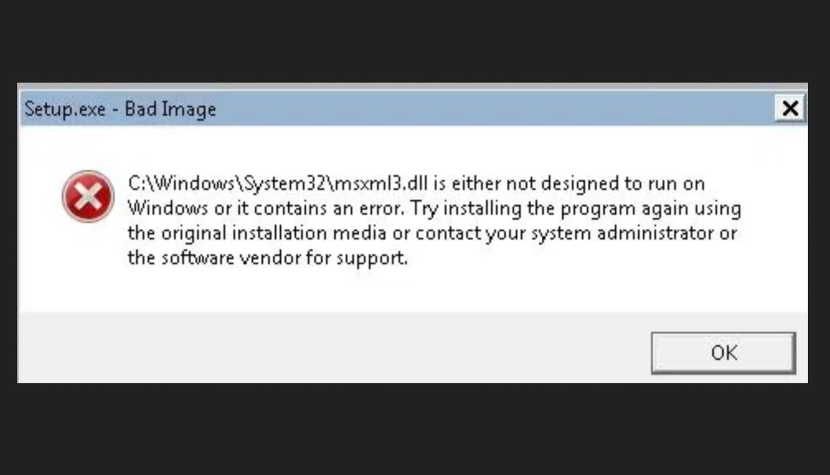
To repair MSXML files, you may need to register them. To register MSXML DLL files on a Windows computer, follow these steps:
For a 32-bit Windows Operating System:
- Open the Command Prompt as an administrator. To do this, click on the Start menu, type “cmd” in the search box, right-tap Command Prompt, and choose “Run as administrator.” Alternatively, press Windows + R to launch the Run window and enter cmd in the search space.
- In the Command Prompt, type “cd” and hit Enter to change the directory to the root of the C: drive.
- Type “cd windows\system32” and press Enter to navigate the system32 directory.
- Type “regsvr32 MSXML6.dll” and press Enter to register the MSXML DLL file.
- Repeat the above step with the appropriate file name if you need to register additional DLL files.
- Once the registration process is complete, you should receive a message indicating the registration was successful.
- Close the Command Prompt.
- Try installing QB Desktop and checking the error status.
In some situations, you may need to unregister and then re-register the MSXML DLL file to resolve issues with the file. To do this, follow the solutions above but replace step 4 with “regsvr32 /u msxml.dll” to unregister the file, then repeat the steps above to re-register it.
For a 64-bit operating system:
- Head to the Windows Start menu and type cmd.
- Right-click CMD and hit the Run as Administrator option.
- When the C: prompt emerges, type cd\windows\syswow64.
- Type and enter the command regsvr32 MSXML6.dll.
- Attempt to install QuickBooks Desktop and verify if the error persists.
Let an IT professional take over if this solution doesn’t fix the damaged components.
However, if the above methods let you open, install, and update QuickBooks error-free, you can proceed with your functioning. Else, step to the next solution.
Solution 3: Modify your Windows Account Settings
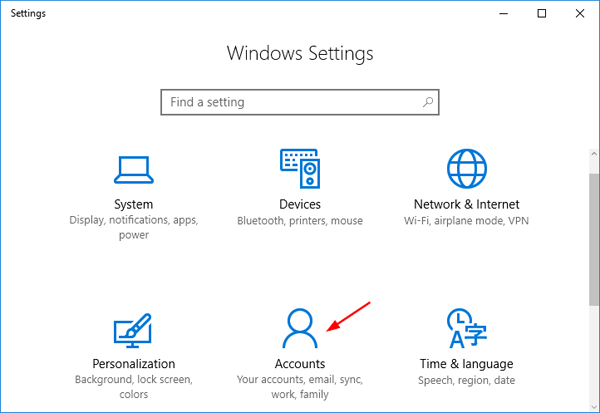
It would help if you turned to the Windows Administrator account to make some alterations to the settings.
Undertake the Switch to your Windows Admin Account
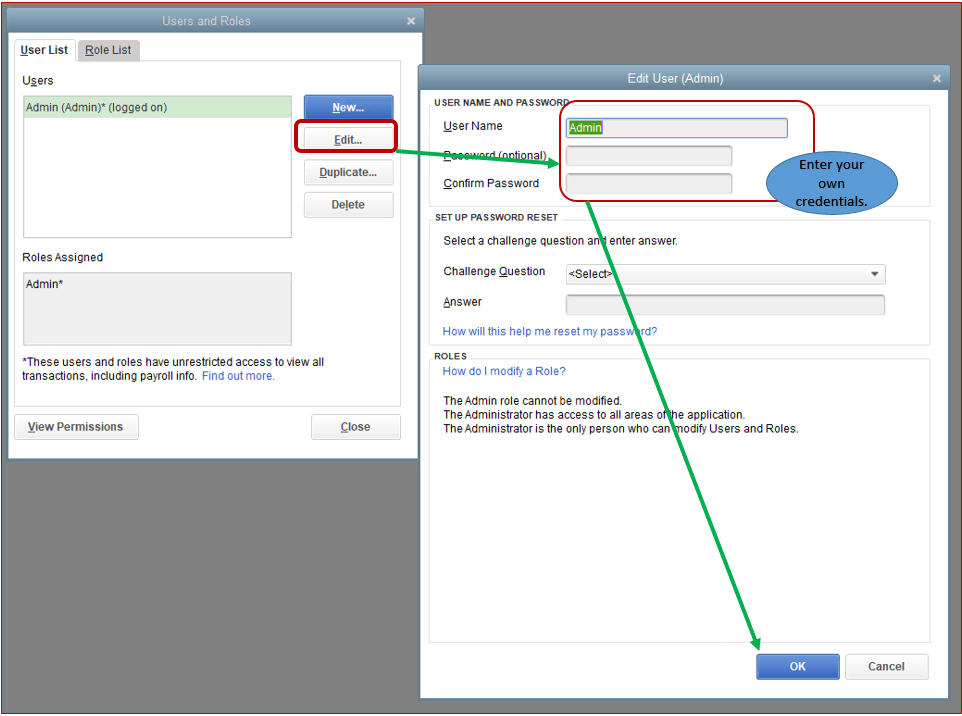
Begin the resolution for QuickBooks install icwrapper dll failed to register error by shifting to the Windows Admin account:
- Head to the Windows Start menu by tapping the Windows icon on the keyboard.
- Type CMD in the search space and when the CMD run icon appears in the search results, right-tap and allow them to Run as administrator.
- When the command prompt window with administrator rights opens, type “net user administrator /active: yes.” Hit Enter, and when the command finishes, close the Command Prompt window.
- Again, launch the Windows Start menu and click Sign Out.
- Tap the Account, which says Administrator, and log back into Windows. You won’t require a password.
Alter the User Permissions
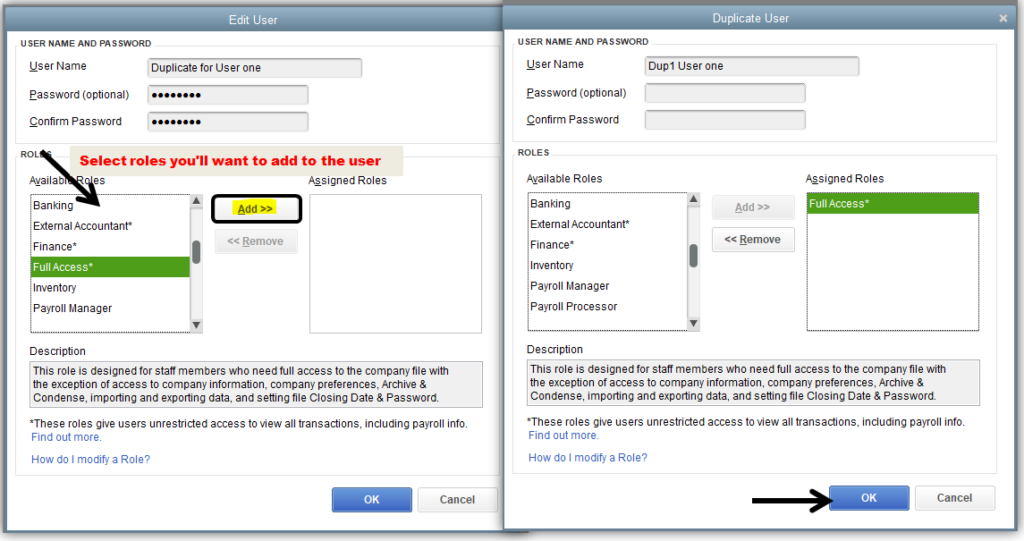
Further, you should change your user permissions through the following steps:
- Access the Windows Start menu.
- In the search space, type and enter File Explorer. The File Explorer window will open.
- Look for the path C:\Program Files\Common Files and right-tap the Common Files folder. Now, click Properties.
- Head to the Security tab, then tap Edit.
- Choose Users in the Group or User Names tab.
- Turn the following permissions on in the Permission for Users section:
- Modify
- List Folder Contents
- Read
- Write
- Read & Execute
- Finally, tap Apply and OK.
Undertake QuickBooks Reinstallation and Sign Out
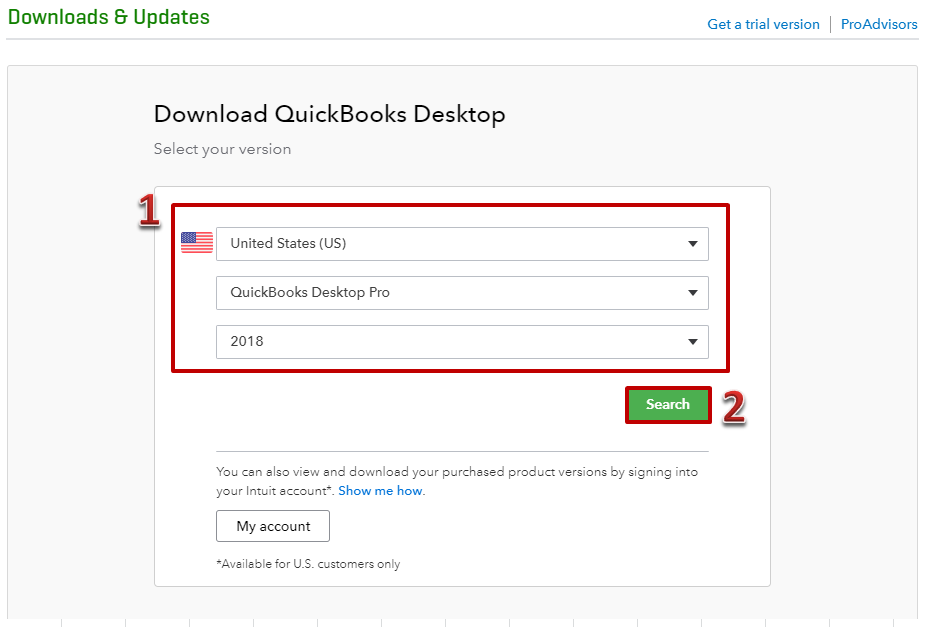
Now, it’s time to reinstall QuickBooks Desktop:
- You should download QuickBooks Desktop from an official and authentic source. Install the tool either through Express or Custom Install after double-tapping and following the instructions of QuickBooksToolHub.exe. Complete the instructions and finish the reinstallation thoroughly. Your existing company file data won’t get affected by the reinstall process.
- After installation, access the Windows Start menu and log out of the administrator account on Windows.
- You can sign back into your usual user account.
- Launch the Windows Start menu.
- Look for CMD in the search window. When the CMD run icon appears on the screen, right-click it. Further, select the Run as Administrator option. Type the words “net user administrator /active: no” in the command wizard and hit Enter. It will hide your administrator account.
If QuickBooks opens with your regular account, no errors remain, and you can continue using the program. However, you should contact the IT professionals if the error keeps arising. General issues with the computer may be leading to the problem.
Recommended article:- QuickBooks Data Recovery Services Guide
Solution 4: Repair the QB program
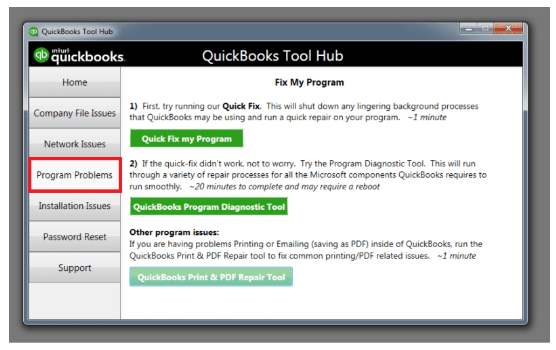
If the QuickBooks application is not running well, you should rectify the issue by repairing the problem. You can do so through Settings or Control Panel. The steps involved in repairing QB through Control Panel are as follows:
- Open your Control Panel from the Start menu.
- Head to the Programs and Features section and select the Uninstall a Program option.
- Locate QuickBooks Desktop from the list and click the Repair the program option.
- Execute all the steps to fix the QuickBooks installation and let the scan finish.
- Hopefully, all the issues will get removed after QuickBooks gets repaired through Control Panel.
Alternatively, you can follow the same solution through your system’s Settings:
- Tap the Settings icon from the Start menu.
- Head to the Apps section.
- Further, select Apps and Features.
- Search for the QuickBooks application in the app list on the screen.
- Tap the three dots at the end of the QB app option.
- Opt for the Modify option.
- The repair process will run and repair the QB app.
- See if the error vanishes after this solution.
Solution 5: Update Windows and QuickBooks Application
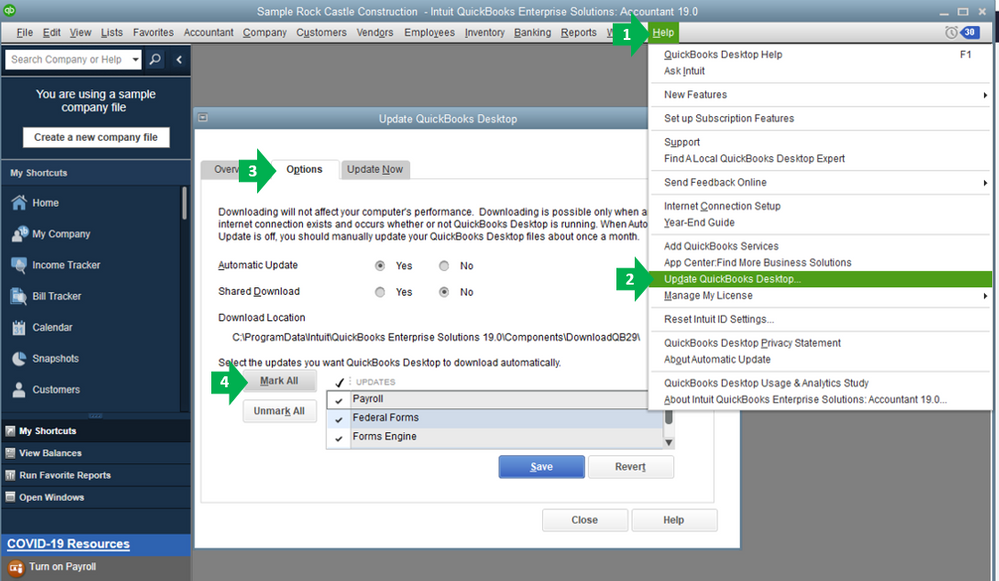
If you have old QuickBooks and Windows versions on your system, you need to update them to prevent any errors. The following steps will help update Windows 10:
- Tap the Windows Start menu and search for the Update and Security tab.
- Click the Windows Update option, followed by the Check for Updates button.
- If any Windows update becomes available, tap the Update Now button.
- Finish updating Windows successfully and reboot your device.
For Windows 8, 8.1, etc., undertake the following steps to update Windows:
- Navigate to the Settings tab and select the Change PC Settings option.
- Click the Update and Recover icon > Windows Update.
- Now, tap the Check Now link.
- Head to the View Details tab and notice opportunities for different download sizes.
- Opt for a desirable one and restart the system after the update ends.
- Sign back into QuickBooks and verify if the error persists.
Then, try installing QuickBooks updates as follows:
- Launch the QB application and head to the Help menu.
- Opt for the Update QuickBooks Desktop option.
- Then, select Get Updates.
- Further, click Update Now and finish updating the application.
Special Cases and Their Resolutions
If you fall into any of the exceptional cases, you should follow the specific steps below to rectify the icwrapper.dll failed to register QuickBooks error:
Case 1: If you possess Bitdefender
Rectify this issue by adding QuickBooks Desktop to your Bitdefender exclusion list. You can’t resolve the issue by disabling Bitdefender. The folders you must add to the exclusion list of Bitdefender are as follows:
- For a 32-bit Windows operating system, add “C:\Program Files\Common Files” to the exclusion list.
- For a 64-bit Windows operating system, add “C:\Program Files\Intuit (C:\Program Files(x86)\Intuit” to the list.”
If you don’t know your operating system version, you should check out Microsoft articles online or consult a technical expert.
Case 2: If the error arises while you install Adobe Flash Player
If your Adobe Flash Player installation causes the icwrapper.dll failed to register quickbooks error, you should take the following actions:
- Begin by downloading, installing, and running QuickBooks Install Diagnostic Tool.
- After the scan ends, you should head to the Windows Start menu.
- Look for Control Panel in the search space and access the Control Panel window.
- Here, find and click the Uninstall a program option under the Programs and Features section.
- Choose Adobe Flash Player ActiveX from the list. Now, click the Uninstall option.
- Execute the on-screen steps to remove the application from the system.
- Finally, you can download and install the Flash Player again.
Case 3: If the error message refers to QBversionTool.dll
Try to run the QB Install Diagnostic Tool and modify your account admin settings firstly.
Further, follow the steps to fix the issue in the following tabs:
Begin by testing your permissions
Run the test through the steps mentioned below if the error keeps arising despite following all the methods:
- Launch the Windows Start menu by tapping the Windows icon on the keyboard.
- Type Notepad in the search field and hit Enter. Open the Notepad app from All Programs.
- Write QBTEST in the note.
- Head to the File menu and tap the Save As option. Save the file to either of the two locations: “C:\Program Files\Common Files” or “C:\Program Files(x86)\Common Files.”
If you are unable to save this note to the folder, you should sign in and install the QB program as an administrator.
Undertake QuickBooks Installation as an Administrator
It’s time you install the QuickBooks program as an administrator:
- Tap the Windows icon to access the Start menu and opt for the sign-out option.
- Pick the option that says Administrator and sign back in. No password should be required here.
- Now, undertake QuickBooks installation as an administrator.
Additional Guidelines to Rectify the Error
Here are some additional points you must consider to rectify the icwrapper.dll failed to register QuickBooks error:
- You’ll need to install the .exe files, as the solutions won’t work if your QuickBooks installer setup fails or you’re working with the QB Database Server Manager.
- When you don’t operate the installation as an administrator, it runs in general Windows.
- Before you install Avalara Avatax, you should ensure exe is installed on the server.
- If you don’t install QB exe, you may see issues while trying to install the connector on a server.
- Tap OK on the error after the installation.
- Head to the File menu > AvaTax > Configuration.
- Ensure to run QuickBooks as an administrator.
- Finally, tap the Test Connection Alternative.
Hopefully, you won’t get the icwrapper.dll failed to register QuickBooks error again.
What is icwrapper.dll failed to register QuickBooks error?
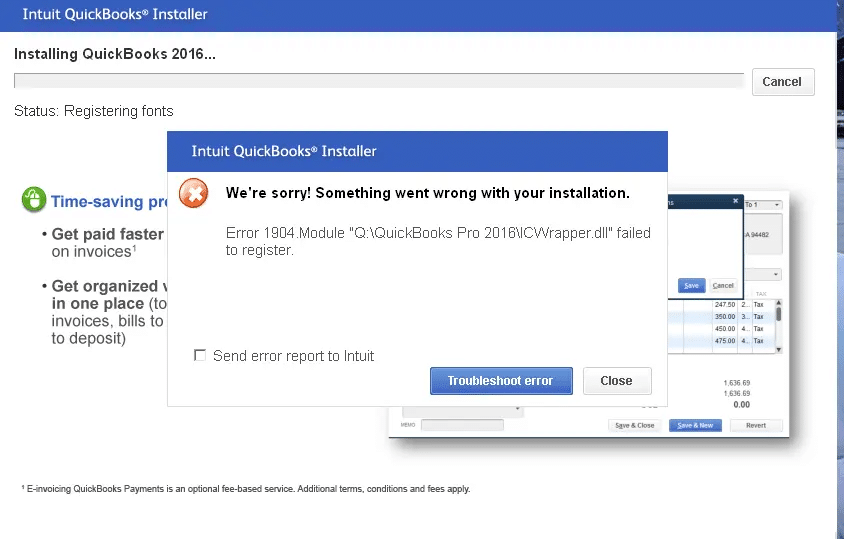
“icwrapper.dll failed to register QuickBooks“ is an error message that can emerge when installing or updating QuickBooks. This error message indicates that the DLL file (icwrapper.dll) was not registered properly on your system. The error message accompanying this glitch says, “Error 1904: [file path/name/extension] failed to register.”
What are DLL files?
DLL files are crucial software program components that enable the app to run without hassles or glitches on the computer. So, when these files fail to register correctly, users face error codes and messages.
QuickBooks users face QuickBooks icwrapper dll failed to register error due to a damaged or missing file component. However, finding the root cause is critical to rectifying the issue effectively. The following section deals with the triggers of this issue so that users can keep using QB seamlessly.
Read more :- Affordable cloud migration services
Why do users face QuickBooks icwrapper.dll failed to register error?
The following points explain why users encounter the icwrapper.dll failed to register QuickBooks error:
Corrupted or missing DLL file
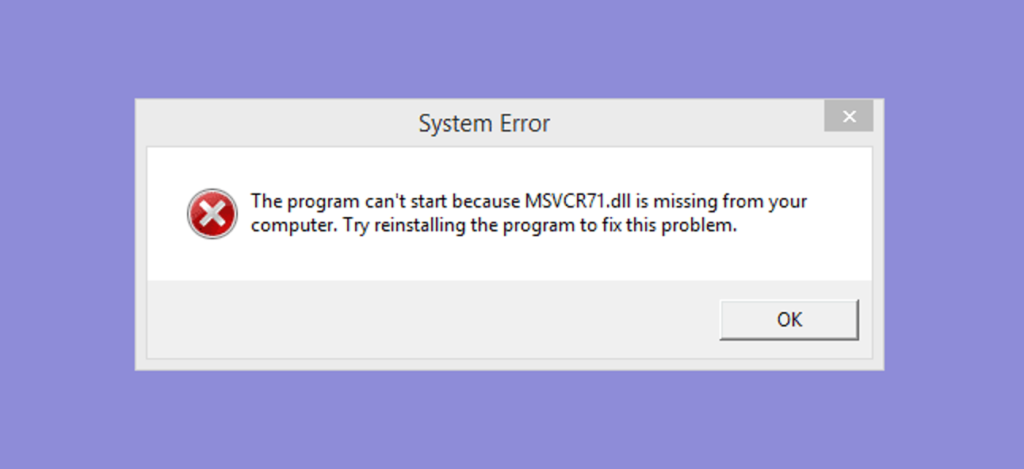
The icwrapper.dll file may be corrupted or missing, which prevents it from being appropriately registered during installation or update.
Insufficient permissions
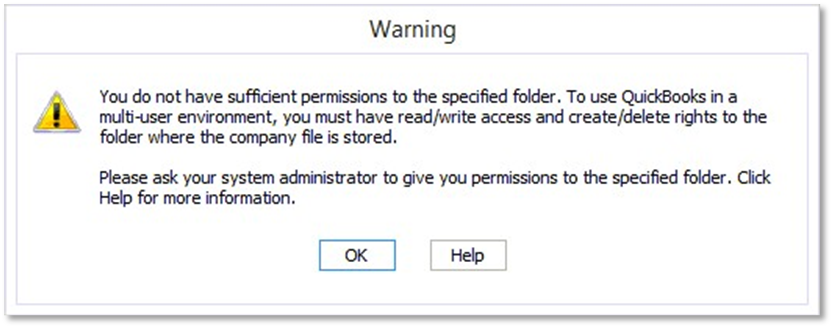
QuickBooks may not have adequate permissions to access or register the DLL file. The read-write permissions by the hard drive may also be inadequate.
Antivirus software
The antivirus software on your system may be blocking QuickBooks from accessing or registering the DLL file.
Windows user account control
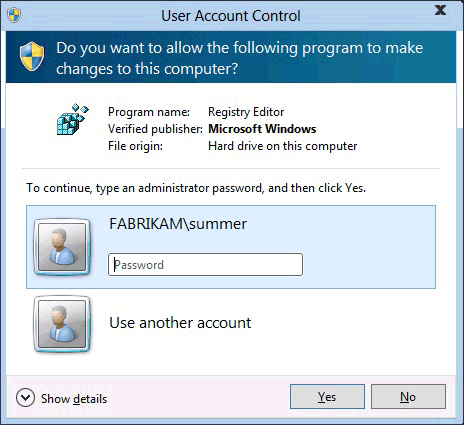
The Windows User Account Control (UAC) feature may block QuickBooks from registering the DLL file.
Compatibility issues
The QuickBooks version you are trying to install or update may not be compatible with your system or other software installed on your computer.
Outdated QuickBooks or Windows
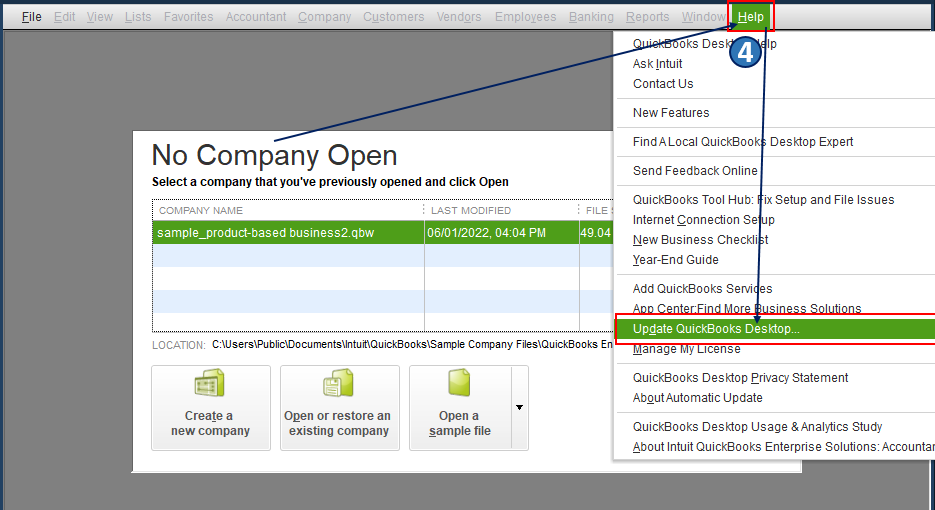
When users keep using the outdated versions of QuickBooks or Windows for a prolonged time, they may encounter the icwrapper.dll failed to register QuickBooks error.
Installation Problems
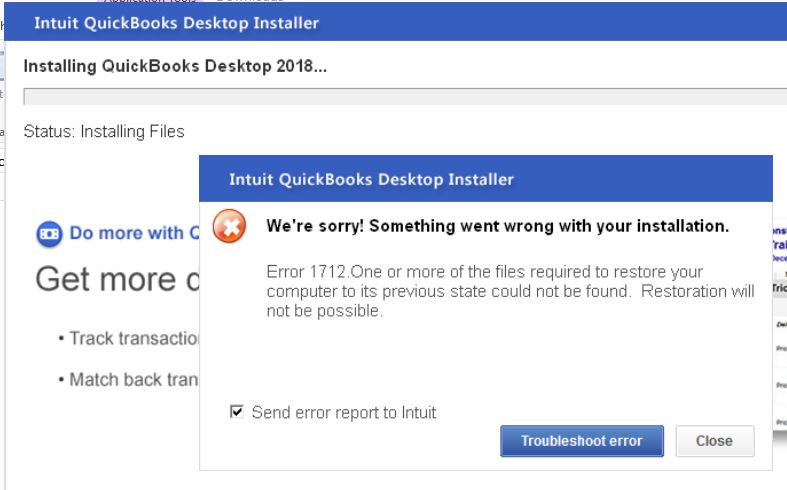
If QuickBooks isn’t installed correctly on the device, users may see the dll failure in registration. Similar things happen when Windows isn’t updated or installed correctly.
Damaged Windows Registry
After upgrading QuickBooks, the Windows registry may have been damaged. It may lead to an error dll failed to register in QB.
Corrupt Microsoft Components
If crucial Microsoft components like MS Visual C++, .NET Framework, and MSXML get compromised, users may see issues like dll problems in registration.
Damaged Windows Installer
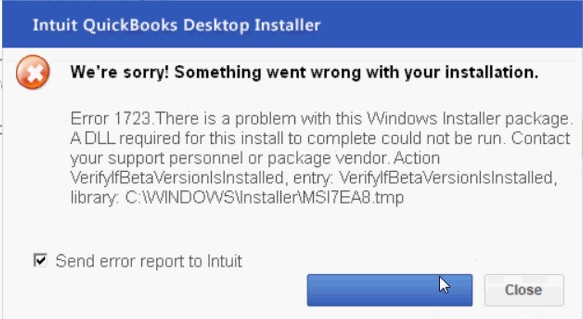
A corrupt Windows Installer may also bring forth error 1904 failed to register module.
Thus, zeroing in on the reasons leading to icwrapper dll failed to register QuickBooks is critical. It will allow for appropriate troubleshooting to resolve the error. For now, let’s dive into the section explaining the signs highlighted when this error emerges.
Signs of the icwrapper.dll failed to register QuickBooks error
When users receive the dll failure in registration error, they may experience the following signs as well:
- The QuickBooks installation or update won’t work.
- The error message will emerge on the screen.
- You may experience the Windows hanging or lagging in performance.
- The system may take too long to respond.
- QuickBooks installer setup failure issues may arise on the screen.
- Some crucial QuickBooks files may be reported missing due to the problem.
- If your QB program is set for automatic updates, you may not see them at all.
- Due to inadequate access permissions for the hard drive, problems may arise in several functions.
All these signs indicate the harsh reality of QuickBooks errors failing to register. Users will need to implement the troubleshooting methods quickly to prevent anything from going wrong.
Summing Up
We have detailed every issue and resolution regarding the icwrapper.dll failed to register QuickBooks error. The error should be gone now that you have tried and touched all the causes.
Frequently Asked Questions (FAQs)
What is icwrapper.dll?
icwrapper.dll is a dynamic link library file that is a component of QuickBooks software. It is used to integrate QuickBooks with other software applications and is required for the proper functioning of QuickBooks.
What causes the icwrapper.dll to fail to register?
The error may occur for various reasons, including a corrupted or missing DLL file, insufficient permissions, antivirus software, Windows User Account Control, or compatibility issues.
How do I fix icwrapper.dll failed to register error in QuickBooks?
You can fix the error by restarting your computer, running QuickBooks as an administrator, disabling your antivirus software, registering the DLL file manually, or installing the latest Windows updates. If none of these methods work, seek further technical assistance.
Can I ignore icwrapper.dll failed to register error in QuickBooks?
Ignoring the error is not recommended, as it can cause issues with the proper functioning of QuickBooks. Therefore, it’s best to resolve the problem as soon as possible.
How can I prevent icwrapper.dll failed to register error in QuickBooks?
You can avoid the error by ensuring that your system meets the minimum requirements for QuickBooks, keeping your system and QuickBooks software up-to-date, and regularly scanning your system for malware or viruses.
What are some additional solutions to fix the dll failed to register error?
The following steps can help fix the error:
– A thorough malware and virus scan can help fix the icwrapper.dll failed to register error.
– Check the internet bandwidth and ensure it’s appropriate for file installation.
– Unmark the shared updates box option in the multi-user mode.
You May Read Also-
QuickBooks Error Code 05396 40000: Eliminated in No Time
Fixing QuickBooks Error Code 30159 in Just Few Steps
Learn How to Install & Setup QuickBooks Desktop on Server
Eliminate QuickBooks Error Code 267: Rebuild not Working
All About QuickBooks Desktop Cloud Hosting Services

James Richard is a skilled technical writer with 16 years of experience at QDM. His expertise covers data migration, conversion, and desktop errors for QuickBooks. He excels at explaining complex technical topics clearly and simply for readers. Through engaging, informative blog posts, James makes even the most challenging QuickBooks issues feel manageable. With his passion for writing and deep knowledge, he is a trusted resource for anyone seeking clarity on accounting software problems.
