
With its multiple products and versions designed for varying business needs, QuickBooks is a robust accounting platform that caters to more than a million users around the world. Being a QB user allows you the accessibility to switch your software version according to convenience. For instance, you can pretty easily migrate QuickBooks Desktop to online, and vice-versa is also applicable. However, moving the financial data can be a little tricky, as the risk involved in doing the same can impact your business performance. To ease things a bit, this blog helps you explore the details of data migration, its challenges, benefits, and the expert-recommended procedure to move QB data securely. Read the blog till the end.
The need for QuickBooks Desktop to online migration and its benefits
Data migration is simply a term for transferring data from one device to another (Financial data in the case of QuickBooks). Nowadays, people are more inclined to use cloud-based platforms like QBO due to their rich features and convenience. Migrating data into QuickBooks Online helps users integrate their business with technology and use the latest accounting practices for the betterment of their organization. It also helps to remain a little ahead of your competitors who still use obsolete accounting software and provide your clients with streamlined financial management assistance.
QuickBooks Online is cloud-based bookkeeping software that can be accessed portably using a compatible web browser and internet connection. It means you do not have to install additional software on your computer, and you can utilize QBO in a system’s web browser for tracking sales, creating invoices, paying bills, managing your customers/vendors, monitoring business taxes, tracking business performance, budgeting, and much more. You can allow up to two accountants to access your QBO data after buying its subscription plan (simple start, essentials, plus, or advanced) using a debit or credit card.
QBO works as a virtual accountant for your business, and if you travel frequently, it acts as a mobile workplace to keep your business health in check. Sharing your financial data with the accountants also becomes easy as you can provide them access to the software’s features and your bookkeeping data. Users convert QuickBooks Desktop to Online due to its wide range of benefits mentioned below-
- QuickBooks Online helps users remain compliant with the federal government’s latest tax table with its extensive built-in features.
- QBO users can easily access their bookkeeping and tax data portably from anywhere in the world using a web browser and an internet connection.
- QuickBooks Online lets users assign SAC (Service Accounting Codes) and HSN (Harmonized System of Nomenclature) to their products/services for international trading.
- QBO automatically finds the tax rates and calculates the user’s business taxes according to them.
- QuickBooks Online is compatible to integrate with a wide number of third-party applications, which streamlines user’s business accounting.
- QBO users can create customized accounting reports to share their business performance with the clients or make informed business decisions.
- QBO provides cloud storage for storing business data and ensures bank-level security to avoid theft or unauthorized access.
- QuickBooks Online automatically backs up the financial data, so there’s no need to create manual backups after regular intervals.
The above-mentioned benefits of QB Online lure users to switch their accounting software for a more convenient bookkeeping experience.
You receive the following additional advantages when you use QuickBooks data migration services provided by professionals-
- Saves your time and effort- Data migration helps move financial records quickly to save you from the hassle of entering data manually and resuming your business within the minimum time possible.
- Security- Your data is secured with bank-level SSL encryption to avoid unauthorized access during the transfer.
- Avoiding Risks- Your data is moved with industry-level protocols to prevent data damage or permanent loss.
After reading the above section, you are now well aware of QuickBooks Online and its applications. You also read about the advantages of data migration to transfer your financial data from QuickBooks Desktop to Online.
If you think the intricate details of data migration are well understood, proceed to the next section of the blog, which explains the correct procedure for QuickBooks Desktop to online migration.
Requirements and Procedure for Migrating QuickBooks Desktop to Online
Intuit allows QB users to move their financial data according to their business needs using the QuickBooks Migration tool. However, there are some things to keep in mind before you start migrating your data. Check out the following list of QB requirements your system should have and the measures to take before migration to prevent any sort of interruption-
Security software should be disabled
We suggest you turn off all the security programs (Windows Firewall & antiviruses) before migrating your data as they can hinder the process. The data migration instantly fails if QuickBooks isn’t allowed to access the internet or system resources due to restrictions of the security programs.
You are signed as an Administrator in Windows
You can also face problems during QuickBooks Desktop to Online migration if the files in the system drives are inaccessible due to insufficient folder permissions or QB isn’t allowed to integrate with Windows applications. You can prevent the problem in two ways: either sign in as a Windows admin user or assign admin rights to QuickBooks. The steps for both the methods are discussed below-
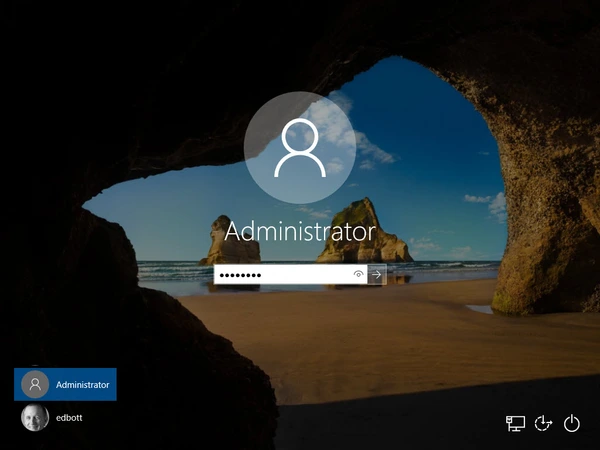
- Click the Windows Start button and tap your Username in the pop-up menu.
- Select the Sign-out option and sign in with your Admin account mentioned in the login screen.
OR
- Access the QB folder on the C: drive and right-click the QuickBooks.exe (Software launch icon).
- Select the Properties option and move to the Compatibility tab.
- Single-click the Run this program as Administrator checkbox to mark it and launch QuickBooks Desktop.
Both your QuickBooks and Windows are updated to their latest versions
You must also ensure QuickBooks and Windows on all the systems involved in data migration are updated to their latest released versions. This prevents compatibility issues during QuickBooks data migration. Here’s the correct method to download the latest Windows updates-
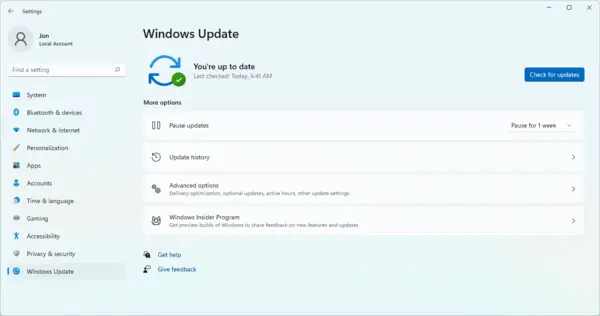
- Press Windows+X and click the Settings option in the menu to launch the control panel.
- Click the Windows Update in the left section and tap Check for Updates.
- Wait until the system finds the latest Windows version and click Download and Install to begin the Windows update.
- Wait until your system reboots automatically after the Windows update.
Once you have the latest Windows version, apply the following steps to update your QuickBooks Desktop-
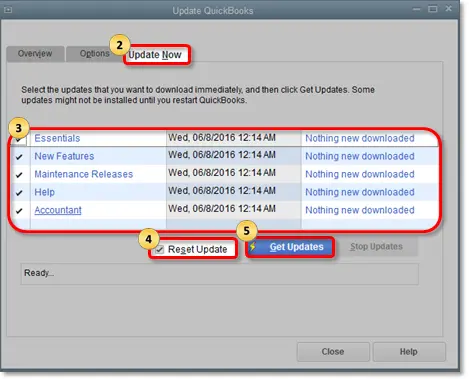
- Run the QB program on your system and click the File menu at the top.
- Select Utilities in the drop-down and tap Stop Hosting Multi-user access.
- Access QB’s Help menu and click the Update QuickBooks Desktop option.
- Go to the Options tab and check that the Shared Download location is correct.
- Navigate to the Update Now tab and click the Get Updates option.
- Wait until the QB updates are fully downloaded and reboot the software to install the updates using the on-screen instructions.
Your entire QB financial data is backed up
Intuit always recommends that users create regular backups of their QB data to deal with situations like data loss or damage. Creating a data backup becomes essential before data migration as the process is complex and can affect your data if it is terminated due to runtime issues. However, you can easily tackle the issues by creating a backup of your QB data using the following steps-
- Switch your QB to single-user mode and access its File menu.
- Select the Backup company option and click the Create local backup option.
- Tap Local Backup in the following window and hit Next.
- Single-tap Browse in the Local Backup Only section and select any desired location to save your backup file.
- Click the Complete Verification in the Online and Local Backup section to check that your backup file has no issues.
- Click Ok tap Save it now, and schedule future backups.
- Hit Next and click the Save backup copy automatically when I close my company file.
- You can set a specific time for creating backups by clicking New and filling in the data fields.
The targets in a company file do not exceed the permissible limit
You’ll bump into a ‘Your file is too big to export’ error message if the targets in the company file aren’t within the allowed limit. The company file size isn’t that significant when you migrate QuickBooks Desktop to QBO as compared to the company file targets. You can find the target by opening your data file and pressing F2 in Windows or CMD (?) +1 in MAC. Use the following list to check the allowed targets in different QB versions-
- QuickBooks Desktop Enterprise (2021 or newer) and QuickBooks Desktop Pro and Premier (2018 or newer) allow 7,50,000 targets.
- QuickBooks Desktop Enterprise (2020 or older), QuickBooks Desktop for MAC, and QuickBooks Desktop Pro and Premier (2018 or older) allow 3,50,000 targets.
Condense your company file using the following steps if its target exceeds the allowed limit-
- Go to the Utilities option in the QB File menu and tap Condense Data.
- Click Yes if a Budget Data may be moved during cleanup… message appears.
- Tap Transactions before a specific date in the Condense Data Window and click the Date option to set a range.
- Tap Next and click Help Me Choose to select a method to summarize your transactions.
- Click the Begin Condense option.
Company files mustn’t be damaged or have invalid characters in their name
QuickBooks also faces issues migrating your data if the company file gets damaged or invalid characters in its name make the file inaccessible to the software. You must run the QB File Doctor and rename the company file to ensure it doesn’t cause any issues while using the QuickBooks Online migration tool. Use these steps-
- Launch your QuickBooks Tool hub and go to the Company file issues menu.
- Select the Run File Doctor tool option and enter your data file location from Browse.
- Mark the Check your file and network option and start the tool by entering your QB admin password.
Visit the company file location after the File Doctor Tool repairs the data file and apply the following steps-
- Right-click your QB Desktop file and select the Rename option.
- Erase invalid symbols like <, >, &, %, etc., from the file name and remove spaces between the extension and file name.
Your system meets minimum QB requirements
QuickBooks has a certain set of PC requirements to run efficiently and perform accounting tasks smoothly. The system specifications must satisfy the QB requirements discussed below to prevent data migration failure-
RAM- Your system must have 16GB RAM (up to 15 users) on average and 8GB minimum (Up to 5 users).
Processor- Your system must have a minimum 2.4 GHz processor for seamless QB functioning.
Disk Space- You should have a minimum of 2.5GB space on your system for QB installation and additional data files.
Screen Resolution- QB’s display is best optimized for 1280×1024.
Operating System- You should have Windows 10 or above and a minimum MAC OS X v12.0 for best compatibility.
Internet Speed- QBO requires 3Mbps or higher.
Payroll is turned off on your QB Desktop file
You must turn off the QB payroll to prevent issues in the payroll service after the data migration is complete. Refer to these steps-
- Go to your QB’s Edit menu and click Preferences in the drop-down menu.
- Click the Payroll and Employees in the left menu and navigate to the Company Preferences tab.
- Click the No Payroll option.
The sales tax liability report is saved
You’ll need the sales tax liability report after migration to enter adjustment entries, and you can conveniently save or print its copy using these steps-
- Access QB’s Reports menu and click the Suppliers & Payables option.
- Tap the Sales tax liability option and select All in the Dates drop-down.
- Click the Print option at the top and select Save as PDF.
- Assign a name to the file and save it in any preferable location.
QB reports and lists are exported
You must export the reports and lists when you migrate from QuickBooks Desktop to Online to avoid entering them manually after the data is moved. Refer to these steps-
- Open your QB’s Report menu and click Reports Centre.
- Access the report you want to move and set a range in the Dates menu.
- Select Print/Email to save it as a PDF.
- Tap Excel and click the Create New Worksheet to update the report data in an existing workbook.
- Click Export and enter the location of the workbook on your system.
- Select Advanced in case you receive a message indicating too many columns in the report and unmark the Space between columns checkbox.
- Tap OK to export the reports and lists.
You must ensure all the conditions mentioned above are met to prevent issues when you migrate QuickBooks Desktop data to QBO.
After reviewing that everything is in place, you can proceed to learn how to migrate QuickBooks Desktop to QuickBooks Online. You can easily move your data using the QuickBooks Desktop migration tool as mentioned below-
- If you are QB Desktop pro or premier user, sign in to your company file as an admin.
- Access the Company menu and click Export Company file to QuickBooks Online.
- Click the Get Started option and tap Select Destination before signing in to your QB Online account.
OR
- If you want to migrate QuickBooks enterprise to Online, sign in to your data file as an administrator.
- Open the Product information window using F2.
- Press CTRL+B+Q on the keyboard and tap OK at the end of the Product information window to start.
Note: Apply the following steps if you have a QB inventory to import-- Click Yes to import the inventory and mark a starting date, or tap No if you want to add the inventory later in QBO.
- You’ll receive an email from the QB team after the conversion is complete.
- Tap Complete your setup in the email and enter the credentials of your QBO admin account.
- Select the data file you want to open and move your lists in the specified order- Chart of accounts, Products and Services, Customer, and Supplier.
- Click the Settings option in QBO and access the Account and Settings option to turn on inventory tracking.
- Click the Sales option and tap Edit in the Products and Services section.
- Enable the Show Product/Service column in the sales forms.
- Ensure both Track quantity and price rate and Track inventory quantity on hand options are turned On.
- Click Save and then Done at last.
- If you come across a Data type option, choose from CSV, Excel, or the data format of the accounting software (Xero, Sage, etc.) you are importing it from.
- Type Agree in the text field and click Replace.
- Tap Yes, go ahead and replace the data, and hit Replace.
You learned how to migrate QuickBooks Desktop files to Online after going through the procedure mentioned above. Now, you must acknowledge the conditions to meet before using QuickBooks Online
Actions to Take after Using the QuickBooks Migration Tool
You still need to check out a few things before you start using QuickBooks Online on your system. As you know, not all your financial data is imported, and there are still some unfinished tasks to perform before you record new transactions or update the financial data. These conditions must be fulfilled in your QuickBooks-
Check discrepancies in the reports of QB Desktop or QB online
You need to compare the original reports in QB Desktop with QuickBooks Online to check that the entire data is transferred correctly. Run the imported reports by All Dates and choose accrual as your accounting method for both QBO and QBDT. These are the reports you need to check-
- Trial balance
- Balance sheet
- Customer and supplier balance summary
- Latest sales tax summary report
Enter company details in QuickBooks Online
Your company name, address, and contact details (phone number & email) aren’t imported when you convert QuickBooks Desktop to Online. Enter them manually using these steps-
- Click the Settings option in QBO and tap Account and Settings.
- Fill in your company and contact info in the Company tab.
- Go to the Company email box and enter your company’s email address to receive your QBO subscription invoices from Intuit.
- Go to the Customer-facing email section and enter the email address you want to interact with.
- Tap Save.
Arrange the Sales tax settings
Your QBO must be calibrated with the correct CRA business number and filing frequency if your business is registered for sales tax. Use these steps-
- Access the Sales tax option in the Taxes menu.
- Click the Setup Sales tax option and choose the territory of your business.
- Fill in the details in the next window and tap Next.
- Click OK to save the settings.
Link your credit and debit card accounts
Your bank accounting details aren’t transferred during data migration as a security protocol. You’ll have to connect them using these steps manually-
- Go to the Bookkeeping menu in your QBO and click the Transactions option.
- Select the Bank Transactions option and tap the Connect Account option.
- Click Add Account and choose your bank name from the list.
- Tap Continue and type your credentials on the bank’s official website.
- Choose the bank accounts you want to connect and add them after selecting the account type in the drop-down menu.
- Select the date range to download the bank transactions and click Connect.
Reconcile your bank accounts up to date
QuickBooks won’t be able to reconcile future transactions until you mark all the transactions as reconciled. Refer to these steps-
- Select the Reconcile option in the Settings menu.
- Select your bank account and enter the Ending Balance and Ending Date.
- Click the Reconcile Now option and mark all the transactions using the checkboxes.
- Look for unchecked transactions that aren’t cleared, and when there’s no difference/discrepancy, it indicates the reconciliation is successful.
- Tap Finish Now and repeat these steps for all the bank accounts linked to QBO.
Set up the payroll in your QBO
After QuickBooks Desktop to Online migration, the payroll accounts and transactions are converted to reduce discrepancies. However, the software fails to convert payroll items list and employee year-to-date numbers. Your adjustment transactions, opening balance transactions, and liability refunds are converted as journal entries after the migration is completed. You must complete the payroll setup using the steps mentioned below-
- Access the Payroll menu of your QBO and select Employees.
- Go to the Paid in (year) column and mark all the employees who received pay cheques this year as Yes.
- Click the Complete Payroll setup option to verify that the employee details and year-to-date payroll amounts are correct (adjust if required).
- Use the on-screen instructions to complete the payroll setup and click the Run payroll option to start paying your employees via QBO.
Link Payments account to enable payments in QBO
The payment accounts you had in QuickBooks Desktop aren’t transferred to QBO. So, you have to create a new payment account in QBO to enable employee/contractor payments as shown below-
- Click the Settings icon in your QBO and click the Account and Settings option.
- Choose Payments in the drop-down and tap Learn More in the QuickBooks Payment section.
- Click Set Up Payments and tap Start in the Business section.
- Enter the info in the form and click Next.
- Navigate to the Owner/Proprietor section and tap Next after you fill out the form.
- Click Start in the Bank section and click the Add New Connection option.
- Choose your bank and select the account where you want to credit the customer payments.
- Fill in the bank account details and click Connect.
- Check that all the sections are appropriately filled and tap Activate Payments.
Add new users and accountants
You can add users who have authorized access to QBO using the following steps-
- Click the Settings option and select the Manage Users option.
- Tap Add User and choose the account type for the new user.
- Fill in the user’s details (username and address) and tap Save.
- The users you select can access the sign-in page using the link they receive in their email.
After the users are added, you can add up to two accountants with access to the QuickBooks Online company file. Refer to these steps-
- Go to the Bookkeeping menu of your QBO and click the My Accountant option.
- Fill in your accountant’s email address and tap Invite to share the invitation link with your accountant.
- Hover over the Settings icon and click the Manage Users option.
- Choose Accounting terms and click Invite in the options.
- Ensure all the required fields are filled and tap Save.
This is how to migrate from QuickBooks Desktop to Online and the actions you need to take before you start using QuickBooks Online. After applying the above-mentioned procedure, your entire QB Desktop file will be imported to QuickBooks Online.
Closure
This blog is a detailed guide on the procedure to migrate QuickBooks Desktop to online. You can also explore the benefits of switching to QBO, the advantages of using data migration, and the tasks that need to be performed to use QBO after migrating your data. We did our best to simplify QuickBooks Data migration through this blog.
FAQ
What is the need for QuickBooks Data Migration services?
You mainly require QuickBooks Data Migration services when you switch your QB version for varying or growing business needs. Data migration helps in the secure transfer of data and ensures your business gets back on track as soon as possible. You must use data migration for the automated transfer of your financial data, which saves you from entering it manually when you switch to QBO or any other version.
Can I use the QuickBooks Data Migration tool to move my data to QBO?
QuickBooks Data Migration tool is the best way to transfer your financial data without any risks of losing your data. You can quickly move your QB Desktop/Pro/Enterprise data to QBO using the built-in migration tool. However, you might have to manually add some of the financial data after migration, as the tool isn’t capable of moving all of your financial data.
What are the major things to keep in mind while migrating QuickBooks Desktop to Online?
Migrating QuickBooks Desktop Online can be troublesome if not done right, but you can do it manually by being careful while using the procedure. Some things you must ensure include turning off your security programs, checking the company file for damage or discrepancy, comparing your system specifications with QB requirements, creating data backups, and installing the latest updates for QuickBooks and Windows on your PC.
You may also like to read-
Restore QuickBooks Data Missing after Update with Easy Methods
Fix QuickBooks Error 12152 with Tried & Tested Solutions
QuickBooks Desktop Keeps Crashing, Closes, or Freezes: Fixes
QuickBooks Search Not Working? Here’s What to Do Now
Fix Quickbooks Payroll Update not Working in Windows or Mac

James Richard is a skilled technical writer with 16 years of experience at QuickBooks Data Migration. His expertise covers data migration, conversion, and desktop errors for QuickBooks. He excels at explaining complex technical topics clearly and simply for readers. Through engaging, informative blog posts, James makes even the most challenging QuickBooks issues feel manageable. With his passion for writing and deep knowledge, he is a trusted resource for anyone seeking clarity on accounting software problems.