Do you want to learn how to install and set up QuickBooks Desktop on server? If yes, this guide will break down the complete procedure in detail. Installing QuickBooks on a workstation is simple and can be done with just a few clicks. However, installing it on a server is extensive and requires several steps. Also, there are a number of prerequisites that your system must meet before you proceed to install QuickBooks Desktop on a server computer. However, with the help of the stepwise instructions in this article, all this can be done effortlessly. So, let’s delve into this guide and get your server computer ready to host the company file using QuickBooks Desktop.
Detailed Steps to Install QuickBooks Desktop on a Server
You can install QuickBooks on a dedicated server or a system that needs to host the company file by following the step-by-step process given below –
Step 1 – Prepare for the Installation
Before undertaking the QBDT installation process, make sure that the minimum system requirements are met. Follow these system requirements for installing QuickBooks Desktop 2024 –
Operating System Requirement:
- Windows 11, 64-bit, natively installed
- Windows 10, all 64-bit editions, natively installed
- Windows Server 2022, Standard and Essentials
- Windows Server 2019, Standard and Essentials
- Windows Server 2016, Standard and Essentials
Note: Linux, Windows 10 S Mode, and Windows Server 2012 are not supported.
Browser Requirement:
A stable internet connection and Internet Explorer 11 (32-bit)
Hardware Requirement:
Server RAM
| 1-5 Users: 8GB RAM |
| 10 Users: 12GB RAM |
| 15 Users: 16GB RAM |
| 20 Users: 20+GB RAM |
Disk space
2.5 GB of free disk space and an additional 60 MB for Microsoft .NET 4.8 Runtime.
After confirming the system requirements, move to step 2 and install the software.
Step 2 – Install QB Desktop
Before you install & set up QuickBooks Desktop on a server, keep the product and license details handy and ensure an active internet connection. Then, to install QuickBooks on your PC, follow the detailed steps given below –
- Firstly, go to CAMPs or the download site and download your QB Desktop version, then save the file to an easily accessible location on the PC.
- Now, open the QuickBooks.exe setup file, follow the on-screen instructions, and accept the QB software license agreement.
- Click Next, enter the product and license numbers, and then hit Next again.
- Now you will need to select the Installation Type.
- Select Customer and Network Options, then hit Next and choose among the following options –
- Select “I’ll be using QuickBooks Desktop on this computer, AND I’ll be storing our company file here so it can be shared over our network” to install QBDT on a server PC and host files on the same PC.
- Lastly, click “I will NOT be using QuickBooks on this computer. I will be storing our company file here so it can be shared over our network” to install only the QB Database Server Manager on the server PC.
- Further, select Next to start the installation process.
- If you want to change the installation location, click Change the install location, then click Browse and decide where to put your QuickBooks folder.
- When QuickBooks installation is complete, select Open QuickBooks and launch it.
Now, move to step 3 and activate QB Desktop.
Step 3 – Activate QB Desktop
To complete setting up QuickBooks on a Windows server, activate QBDT by implementing the following steps –

- Open QuickBooks, go to the Help section, then click the Activate QuickBooks Desktop option.
- Now, follow the on-screen steps to verify your information and complete the activation process.
Once done, create and open your company file by following the next step.
Step 4 – Open your QB Company File
The last step is to create a folder to store your company file. If the company file data will be shared over a network, you need to set up a shared folder and get admin rights to the server where the file is stored. Follow the steps given below to learn how to open a company file in QB saved on a server –
To Open the File on a Single Computer with No Network
If you want to open the company file on a single PC, either create a company file or update your company file to the new QBDT version. To create the QB company file on a single PC –
- Open QBDT, go to the File menu and select New Company. Alternatively, you go to the No Company Open screen in QB by opening it while pressing and holding the Ctrl key and selecting Create a New Company.
- Now, click Express Start and follow the on-screen prompts to complete the process.
To Open the File on a Network
If you want to open the file on a network with multiple PCs having access to it, you must set up a shared folder on the server by following the steps given below –
- Install QuickBooks on all the workstations, then open QB on the server PC and go to the File menu.
- Now, select the Utilities tab and ensure the Stop Hosting Multi-User Access option is highlighted.
Note: If you only have the QB Database Server Manager installed, you will need to scan the company files. - Further, configure the Windows firewall settings (see Step 5 below), then map the network drive to the shared folder (see Step 6 below).
Note: Alternatively, if you already have a company file, upgrade it to the new QBDT version.
Step 5 – Configure Windows Firewall and Antivirus
You need to configure the Windows firewall to allow QuickBooks to connect with other systems in the network without restrictions. Follow the steps given below to configure Windows firewall and antivirus –
Download the Latest Version of QuickBooks Tool Hub
The QuickBooks Tool Hub program contains various tools and features to resolve common QB issues. To use these tools, download and install the latest version of QB Tool Hub in the following way –
- Close QuickBooks, click HERE to download the most recent QB Tool Hub version and then save the .exe file to an easily accessible location.
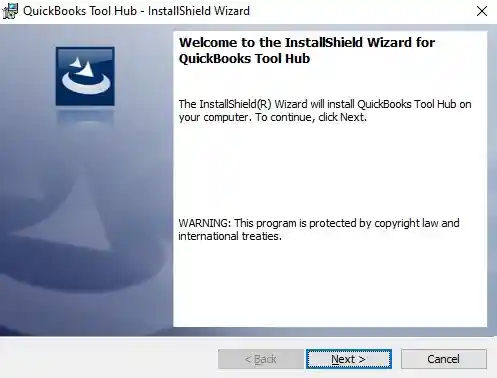
Note: If you already have QB Tool Hub installed on the PC, check the current version at the bottom of the Home screen. If you do not have the most recent (1.6.0.5) version, implement these steps to download and install it. - Now, double-click the QuickBooksToolHub.exe setup file, go through the installation instructions, and accept the terms and conditions.
- Wait for the installation process to complete, then double-click the QB Tool Hub icon on your Windows desktop to launch it.
Note: If you aren’t able to locate the QB Tool Hub icon, manually search for “QuickBooks Tool Hub” in the Windows search panel, then select it to launch the program.
Run the QuickBooks File Doctor Tool
This tool can resolve network problems and configure the firewall automatically. To run QB File Doctor, go through the following detailed steps –
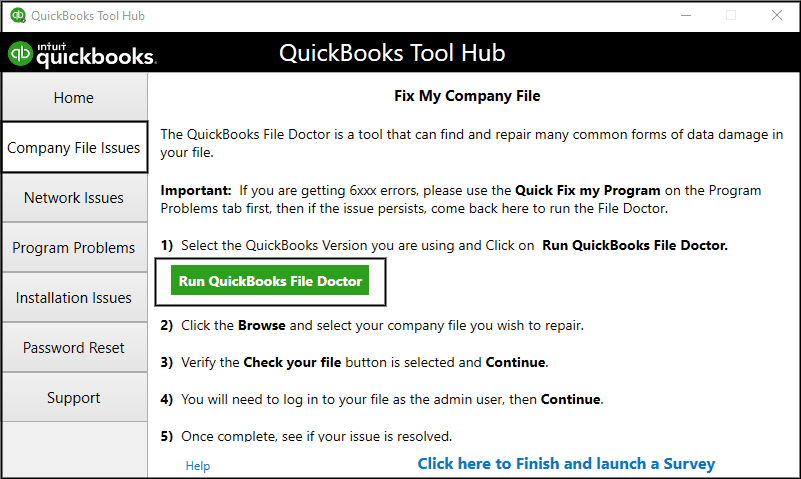
- Navigate to the Company File Issues tab in QB Tool Hub and select the QuickBooks File Doctor tool.
Note: The tool might take up to a minute to open, but if it isn’t accessible, you need to search for it manually. Type “QuickBooks Desktop File Doc” in the Windows search panel, and select the tool to run it. - Choose the QB company file from the drop-down menu or click Browse and Search, then find the company file you want to repair.
- Next, select Check your file and network, hit Continue, then enter admin login credentials for QB.
- Hit Next, and once the file scan is complete, launch QuickBooks again and open the company file.
Check if you are able to open the company file in QB, but if you are facing issues, manually configure the firewall in the next step.
Manually Configure the Firewall
If QuickBooks File Doctor didn’t help configure the firewall, manually configure it in the following manner –
Create Exceptions for QuickBooks Ports
You can create exceptions for QuickBooks ports to prevent firewall blockages in the following manner –
Note: You need to configure the firewall for each QuickBooks version you are using on the same PC. Moreover, add each QB version’s ports in the Specific Local Ports field in Step 4 below.
- Type “Windows Firewall” in the Windows search bar, select it and click Advanced Settings.
- Further, right-click Inbound Rules, click New Rule, and select Port.
- Hit Next, then ensure the TCP option is selected (if not, select it).
- Enter the specific ports (as per your QB version) in the Specific Local Ports field by referring to the following list –
- QuickBooks Desktop 2020 and later: 8019, XXXXX.
- QuickBooks Desktop 2019: 8019, XXXXX.
- QuickBooks Desktop 2018: 8019, 56728, 55378-55382.
- QuickBooks Desktop 2017: 8019, 56727, 55373-55377.
- To find the Dynamic Port Number for your QBDT version, open the QuickBooks Data Server Manager and follow this step –
- Go to the Port Monitor tab, find your QuickBooks version, and note the Port Number.
- Add the port number to the exceptions list, click Next, and select Allow the Connection.
- Click Next, and once all the profiles are marked, hit Next, create a new rule named “QBPorts(year),” and select Finish.
- Lastly, create Outbound Rules by following steps 1 to 7 above, but ensure to choose Outbound Rules instead of Inbound Rules in Step 2.
Now, open QuickBooks in multi-user mode and check if you are still facing firewall restrictions. If yes, move to the next step and create exceptions for QB executable files.
Create Exceptions for QB .EXE Files
If adding port exceptions don’t help, you will need to create exceptions for the executable files in the following way –
- Search for “Windows Firewall” in the Windows search bar, open it, and click Advanced Settings.
- Now, right-click Inbound Rules, select the New Rule option, and select Program.
- Click Next, select This Program Path, then click Browse and pick a QB executable file from the table below –
| Executable files | Location |
| AutoBackupExe.exe | C:\Program Files\Intuit\QUICKBOOKS YEAR |
| Dbmlsync.exe | C:\Program Files\Intuit\QUICKBOOKS YEAR |
| DBManagerExe.exe | C:\Program Files\Intuit\QUICKBOOKS YEAR |
| FileManagement.exe | C:\Program Files\Intuit\QUICKBOOKS YEAR |
| FileMovementExe.exe | C:\Program Files\Intuit\QUICKBOOKS YEAR |
| QuickBooksMessaging.exe | C:\Program Files\Intuit\QUICKBOOKS YEAR |
| QBW32.exe | C:\Program Files\Intuit\QUICKBOOKS YEAR |
| QBDBMgrN.exe | C:\Program Files\Intuit\QUICKBOOKS YEAR |
| QBServerUtilityMgr.exe | C:\Program Files\Common Files\Intuit\QuickBooks |
| QBCFMonitorService.exe | C:\Program Files\Common Files\Intuit\QuickBooks |
| QBLaunch.exe | C:\Program Files\Common Files\Intuit\QuickBooks |
| QBUpdate.exe | C:\Program Files\Common Files\Intuit\QuickBooks\QBUpdate |
| IntuitSyncManager.exe | C:\Program Files\Common Files\Intuit\Sync |
| OnlineBackup.exe | C:\Program Files\QuickBooks Online Backup |
- Click Next, select Allow the Connection, then select Next again, and ensure all the profiles are marked.
- Hit Next, save the file exception as “QBFirewallException(name.exe),” and click Finish.
- Lastly, perform these same steps (steps 1 to 5 above) to make Outbound Rules, but select Outbound Rules instead of Inbound Rules in Step 2.
Open QB in multi-user mode and check if the firewall restrictions are removed. However, if QB is still facing issues due to firewall restrictions, it must be the antivirus that is creating the issues which you can configure with the help of the next section below.
Configure Antivirus Settings
Configuring the antivirus settings ensures that QB has proper permissions and is running without restrictions. To modify the settings, follow the specific steps and guidelines for your particular antivirus. You can either visit your official website or your antivirus or contact your vendor for instructions to configure it.
Once the antivirus is configured, rerun QuickBooks in multi-user mode. Now, try opening the company file over the network to ensure that the restrictions are removed.
Step 6 – Map the Network Drive to Share the Company File Folder
To successfully set up QuickBooks on the server, the last step is to map the network drive to share the company file folder. This ensures that you can access the company file folder on another computer over the network. To map the network drive in Windows 11, perform the steps given below –
- Press the Windows key, type “This PC” and select This PC.
- Select More, click Map network drive, then pick a drive letter in Drive.
Note: If you can’t find the Map network drive, right-click This PC and select the Map network drive option. - Further, enter the full path of the QB folder you want to map. Alternatively, you can only enter the path to the computer from which the file is hosted (select Browse to find the folder).
- Now, select Reconnect at sign-in to keep the drive mapped every time you sign in to your computer, and click Finish.
Now, your QuickBooks Desktop has been successfully installed and set up on the server. You can run it and host the company file in the network without any issues.
Steps to Install QuickBooks on a Terminal Server
A terminal server is a central server where multiple QB users can access the the company file. To install & setup QuickBooks Desktop on a terminal server, follow these steps –
- Ensure the system requirements are met and sign in to Windows as an admin user.
- Exit all applications, then open the Run window by pressing the Windows + R keys.
- Further, run the CMD command and click OK to open the command prompt.
- Now, change the User Mode, type “change user/install,” and press Enter.
- Follow the “Steps to install QuickBooks Desktop on a server” section above and complete the installation process.
- Next, reopen the Command Prompt, type “change user/execute,” then change to Execute Mode, and hit Enter.
Now, run the newly installed QBDT on the terminal server and ensure the installation succeeds.
Steps to Update QBDT to the Latest Version
After you complete the QuickBooks Desktop server setup, make sure that the software is up-to-date. Regular updates are necessary to ensure your QB Desktop version has the latest features and software improvements. To download the QBDT updates, implement the following steps –
- Open QBDT, move to the Help menu, then select Update QuickBooks Desktop, and click Update Now.
- Next, select the Reset Update checkbox, click Get Updates, then once downloaded, reopen QBDT.
- Lastly, select Install Now to install the downloaded QB updates.
Now, run the updated version and ensure that the company file and the payroll service are regularly updated.
FAQ’s
What are the various features of QuickBooks Desktop?
QBDT offers the following key features to users –
Chart of accounts with a search feature.
Customized inventory report.
Automatically add the customer’s PO to the email.
Multi-monitor support.
Display report toggling between cash and accrual basis.
Update email security.
Payroll liability and payment reminder.
Mobile inventory scanning.
Sales order fulfillment workflow.
Merge vendor record.
Can I use QuickBooks Desktop remotely?
You can install QuickBooks on a remote desktop server and use the software remotely. Remote access implies using QuickBooks from a location other than where the software is installed. This allows users to easily access and manage their financial data, transactions, reports, and other accounting tasks remotely via the Internet.
What are the different installation types for QuickBooks Desktop?
There are two installation options you get while installing QBDT –
Express install
This installation type is selected while installing QB on a single system or reinstalling the software. New QB users can prefer this option for installation.
Customer and network install
This option is selected to host your file on the server, setup a multi-user network, or install QuickBooks in any location other than the default location.
You May Also Like To Read-
QuickBooks Error 1601: Installer is not accessible [Fixed]
QuickBooks Error 40001- The Right Way to Fix it
Get Rid of QuickBooks Error: The File You Specified Cannot Be Opened
QuickBooks Error 1402: Could Not Open Key- Fixed
Resolve QuickBooks Error QBWC1085 Caused by the Log File

James Richard is a skilled technical writer with 16 years of experience at QuickBooks Data Migration. His expertise covers data migration, conversion, and desktop errors for QuickBooks. He excels at explaining complex technical topics clearly and simply for readers. Through engaging, informative blog posts, James makes even the most challenging QuickBooks issues feel manageable. With his passion for writing and deep knowledge, he is a trusted resource for anyone seeking clarity on accounting software problems.