
QuickBooks is a feature-rich accounting software preferred by over a million users across the globe for financial management, budget administration, tax submission, and executing other bookkeeping tasks. Regardless of its immaculate algorithms, users sometimes have to deal with QuickBooks error 1327 while installing/setting up the software on their computers. However, your system can be equally responsible for triggering the error, so you can’t put the entire blame on the software. Whatever the case, all your queries will be resolved after reading this blog, as we have put in our best efforts to bring forward the potential reasons for QuickBooks Error Code 1327 and the Intuit-recommended techniques that work as effective fixes to rectify the error.
Viable Methods to Resolve QuickBooks Error Code 1327 (Updated)
As we have discussed earlier, your PC is equally responsible for the occurrence of QuickBooks Error 1327 while installing or updating new applications. Even if you are able to install QuickBooks, it won’t run properly or crash in a few seconds after running. So, we have covered all the aspects while describing the techniques to help you fix the system issues and QuickBooks components that cause problems while setting up the software. The most effective ways to troubleshoot QuickBooks error code 1327 are discussed in detail, but before applying them on your PC, we recommend you go through the necessary conditions your system must have to install and run QuickBooks Desktop-
Condition 1- Your system must have an Internet speed of 3Mbps average and 1.5Mbps for running QuickBooks Desktop. It would be great if it is more than that because it helps to prevent data losses while downloading the QB Installation files. You can always run an Internet Speed Test to check.
Condition 2- Your system must have a storage space of 2.5GB for QuickBooks and extra for storing the company file. Go to the Control Panel> System> Storage to ensure QB installation doesn’t fail due to insufficient storage space.
Condition 3- You must have a 64-bit OS on your computer, as QuickBooks 2024 cannot run on a 32-bit OS. Also, note that LINUX and Windows 10 S Mode aren’t supported, so you must not try installing QB on such operating systems.
Once you check that all the above conditions are met on your computer, you can now apply the following techniques as described below-
Technique 1- Install the Latest Windows Version Available
An outdated Windows is a primary reason for compatibility issues that might stop the PC applications from performing at their full potential. QuickBooks Installation might also suffer if the Windows OS on your system isn’t fully updated. So, you must begin by installing the latest Windows version on your computer to ensure the other techniques are executed without problems as well. QuickBooks only supports Windows 10 or later versions, and installing the updates is no harm, even if you have Windows 10 on your system. Updating your Windows not only enhances security protocols but also removes glitches from the OS that might hinder QB installation. Refer to these steps-
- Access the control panel menu directly from the Windows Start button or open it through the search bar.
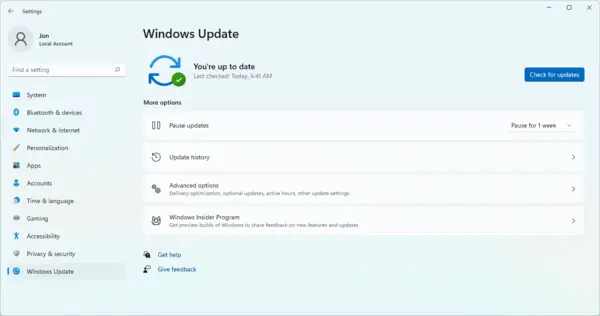
- Click the Windows Update option mentioned in the left section and tap Check for updates in the following window.
- Let the system find the latest Windows version for you and click Download and Install.
- Give your system appropriate time to install the Windows update and wait until your system reboots automatically.
- Use the on-screen instructions to set up the new Windows version on your PC and then retry installing QuickBooks Desktop.
Note: You can check this link to see the features available in the new Windows versions and download them directly.
If QuickBooks installation issue persists after updating Windows, you must move to the next solution that shows how to configure the system settings.
Solution 2- Arrange the User Account Control Settings
User Account Control, commonly known as UAC, is a system setting that prohibits applications from making any changes to the OS. When you update or install an application, a UAC prompt comes up to confirm if you want to ‘Allow this app to make changes to your PC?’ In case you receive any prompt before installing QuickBooks Desktop, it is possible that the UAC settings are set to Always Notify, which is the maximum strictness level where none of the applications are allowed to be installed or updated. You need to configure the settings, as QB installation won’t be possible until you do so. Here is the usable procedure to adjust the protection level on your system-
- Open the Control Panel window and click the System and Security option.
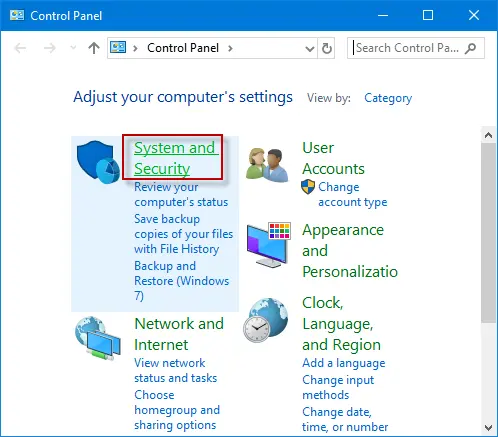
- Tap Change User Account Control settings under Security and Maintenance.
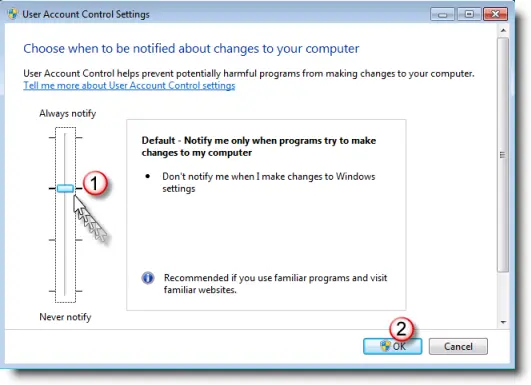
- The slider given in the next window acts as the controller for UAC settings. Adjust it accordingly-
- Select Never Notify if you want the applications to make changes (suitable for QB installation).
- Select Always Notify for maximum strictness level where none of the applications are allowed.
- Turn off the UAC settings by dragging the slider beside Never Notify and install QuickBooks on your system.
- Wait until QB is completely installed, and you can thereafter arrange the UAC settings however required.
If QuickBooks installation fails after arranging the UAC settings, move to the next solution.
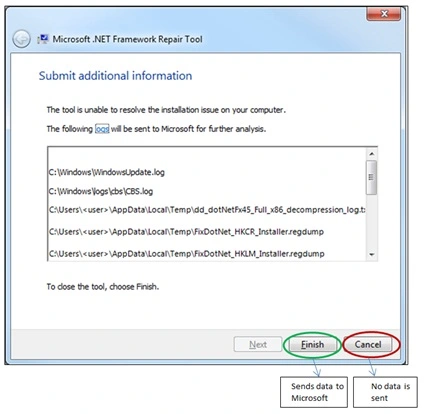
Solution 3- Repair Windows Components (.NET Framework and MSXML)
MSXML and .NET Framework are Windows components essentially required to run and install applications in Windows OS. .NET Framework is a Microsoft program used by QuickBooks Desktop to connect and sync data with the web services or applications, whereas MSXML (Microsoft XML) is required to build and run Windows XML-based programs. In case either of the two components gets damaged or isn’t configured properly, you won’t be able to install QuickBooks Desktop on your computer. Here are the steps to configure .NET framework settings-
- Launch Control Panel on your computer and click the Programs and Features option.
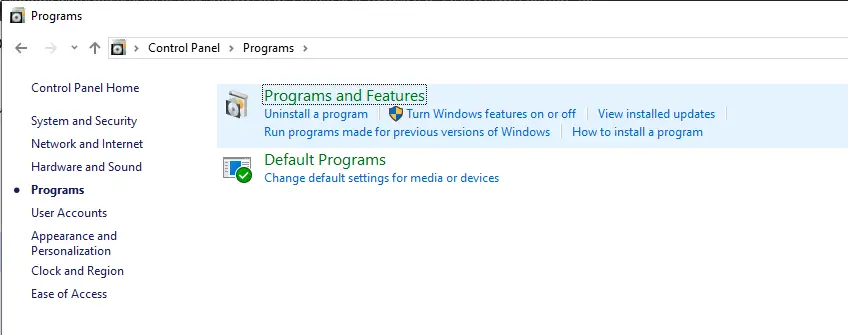
- Click Uninstall a program in the next window and select Turn Windows Features on or off.
- Search for the .NET framework in the feature list.
- Check both .NET Framework 4.5 and .NET Framework 3.5 SP1 settings-
- If .NET Framework 4.5 and .NET Framework 3.5 SP1 checkboxes aren’t selected-
- Single-click the checkboxes to mark them and tap Ok to save the settings.
- Restart your computer.

- If .NET Framework 4.5 and .NET Framework 3.5 SP1 checkboxes are selected-
- Tap the checkboxes to select them and save the settings using Ok.
- Reboot your computer.
- If .NET Framework 4.5 and .NET Framework 3.5 SP1 checkboxes aren’t selected-
Note: Use the same steps to configure all the .NET Framework (4.6, 4.7, 4.8).
After configuring the .NET Framework settings, proceed to register the MSXML DLL files-
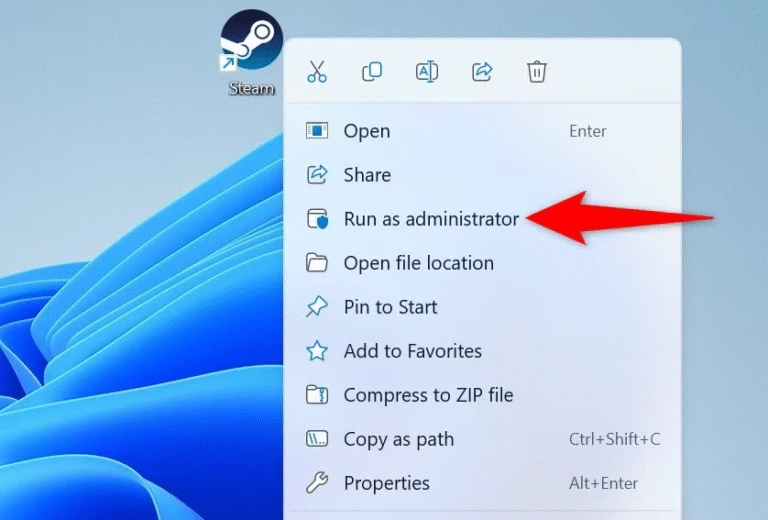
- Type ‘cmd’ on the search panel and right-click Command Prompt in the search results.
- Select Run as Administrator and wait for a black screen window to come up.
- Type cd\Windows\syswow64 after the C: prompt.
- Enter regsvr32 MSXML6.dll and press Enter.
- Retry installing QuickBooks Desktop after the .NET Framework and MSXML are repaired.
If QB installation fails after fixing the damaged components manually, check out the next solution.
Solution 4- Fix Network Connectivity Issues
QuickBooks might develop issues during installation if the file or package used for installing the application gets damaged. This can happen due to an unstable or lousy Internet connection on your system, which causes the installation package to incur damage during the download. You must also disable the antivirus and Windows Defender Firewall during QB installation to prevent them from blocking Internet access. One more thing you can do is configure the TLS and SSL settings in your Windows, which might also stop the applications from using the Internet.
Transport Layer Security and Secure Sockets Layer are security protocols ensuring the system doesn’t access harmful websites or download data containing malware. Arrange these settings in favour of QuickBooks Desktop to prevent network connectivity issues. Apply these steps-
- Press Windows+R on the keyboard to launch the Run command on your computer.
- Remove the auto-filled text and type ‘inetcpl.cpl’ as a command before pressing Enter.
- Navigate to the Advanced tab in the Internet Properties window and move down the settings list to locate TLS & SSL.
- Single-click the Use TLS 1.2 and Use SSL 3.0 checkboxes and leave the remaining checkboxes unmarked.
- Click the Content tab in the Internet Properties window and click Clear SSL State.
- Download the QB Installation package again and try extracting its files on your PC.
If the QuickBooks Installation isn’t successful after resolving the network connectivity issues, move to the next technique, which also helps you utilize the QuickBooks Tool Hub to make your system TLS 1.2 compliant.
Solution 5- Install and Run QuickBooks Tool Hub
QuickBooks Tool Hub is a platform crafted by Intuit that offers automated tools to users that help them tackle common issues in accounting software. It helps you rectify the issues you face during the software installation using a dedicated tool designed for it. Here’s how to fix QuickBooks error code 1327 using the QB Tool Hub-
- You must begin by downloading the latest QuickBooks Tool Hub (1.6.0.3) installation file on your computer.
- Save the file to an easily accessible location and double-click QuickBooksToolHub.exe when it is completely downloaded.
- Install the QB Tool Hub using the on-screen instructions and accept the ‘Terms and Conditions.’
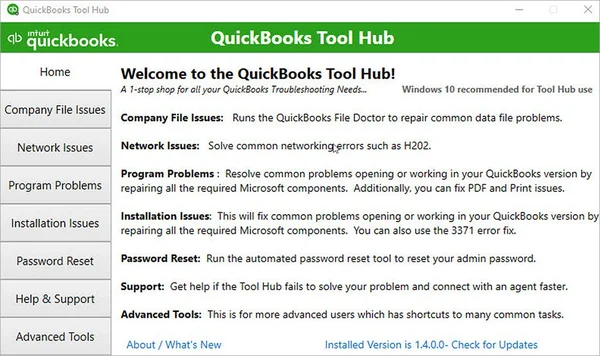
- Open the QuickBooks Tool Hub application using its launch icon on the desktop after it is installed and click the Installation Issues menu.
- Click the QuickBooks Install Diagnostic Tool option in the drop-down and follow the given instructions to run the tool.
- Reboot your computer after the tool finishes the repair.
Now, you must run the TLS 1.2 Readiness Tool from the Tool Hub to update your Windows to be TLS compliant. Here’s how you must do it-
- Relaunch the QuickBooks Tool Hub and click the Installation Issues menu.
- Tap the QuickBooks TLS 1.2 Tool mentioned on the bottom right and tap Ok to run the tool.
- Click Yes to the EULA Agreement and tap Run.
- Click Exit after the tool stops running.
Note: Both tools might take up to 20 minutes individually to run. Wait patiently until they diagnose and sort out the issues automatically.
Move to the next solution if the QB installation error persists.
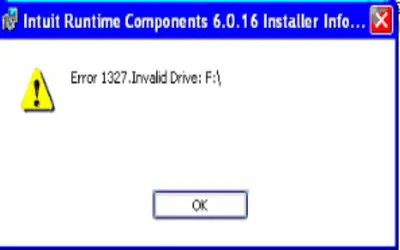
Solution 6- Adjust the Storage Drive Permissions
QuickBooks installation issue might occur if the system location you selected to store the software files doesn’t exist, the path is broken/inaccessible, or the drive isn’t connected to your system. A QuickBooks invalid drive letter error 1327 message appears when the Windows Installer cannot trace a path to the assigned storage location. You can fix the QuickBooks Error 1327 by signing in with your Windows Admin account and changing the folder permissions of the storage folder. Also, check that the network drive is mapped correctly if selected as the storage location. Use these steps-
- Type ‘cmd’ in the search panel and right-click on its launch icon (Command Prompt).
- Select the Run as Administrator option and enter ‘net user administrator/active:yes’ as a command.
- Click the Start button on the Taskbar and tap your username.
- Click Sign Out and log in again with your Windows Administrator Account.
Once you sign in with your admin account in Windows, use the following steps-
- Open the File Explorer and go to C:\ProgramFiles\CommonFiles.
- Right-click the Common Files folder and click Properties.
- Move to the Security tab and click Edit.
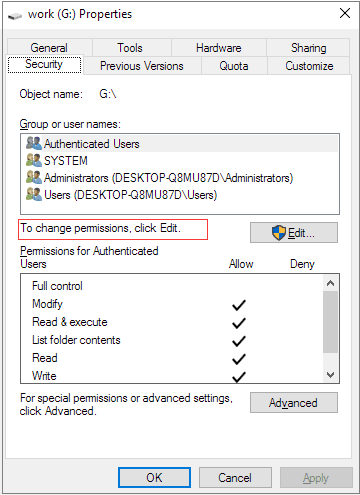
- Select Users in the ‘Group or user names’ section and click Full Control in the ‘Permissions for users’ option.
- Click Apply and tap Ok before closing the window.
Note: If the error message contains another location, go to the folder and apply the above steps to configure its folder permissions.
Install your QuickBooks Desktop and follow these steps after it is completely installed-
- Run the Command Prompt in Administrator mode again.
- Type ‘net user administrator/active:no’ in the CMD window and press Enter to hide your Windows Admin account from the login screen.
If changing the folder permissions isn’t beneficial in removing the QB installation error, jump to the next solution.
Solution 7- Create a New Windows Account with Admin Permissions
QuickBooks won’t be able to install if you are signed in with a non-admin Windows, which does not have the appropriate permissions to access the system drives or utilize the system resources (RAM, Processor, Disk Space, etc.). You might also encounter problems during QB Installation if the Windows Installer fails to access the Installation file due to restricted folder access or security software restrictions. You can fix QuickBooks error code 1327 by creating a new Windows account and providing it administrator rights as mentioned below-
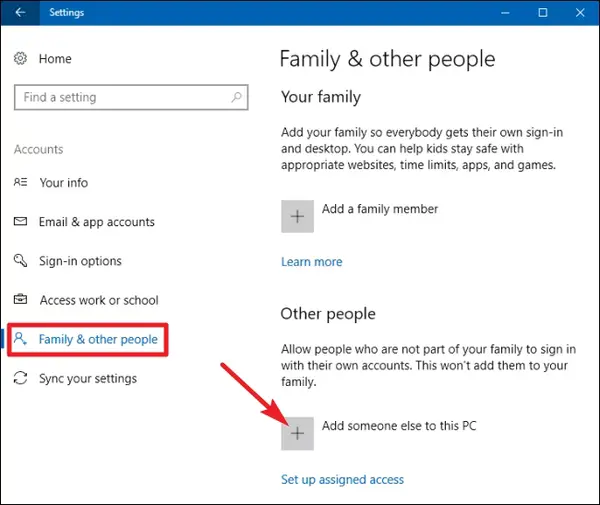
- Press Windows+X on the keyboard and single-click the Settings option in the pop-up menu.
- Click the Accounts option in the Control Panel and click Family & Other Users or Other Users if the former isn’t available.
- Select the Add other user option and click Add Account.
- Choose I don’t have this person’s sign-in information and click Add a user without a Microsoft Account in the next window.
- Type any preferred username, password, and select security questions before clicking Next.
- Go back to Family & Other Users after creating the account and click the Change account type option.
- Select Administrator below the Account Type option and tap Ok.
- Sign in with the Windows admin account you just created and install QuickBooks Desktop.
If QuickBooks Installation is stopped by the error after creating a Windows admin account, move to the next method.
Solution 8- Register Microsoft Windows Installer and Assign it Admin Access
Windows Installer must have all the required permissions to access the system drives while installing or updating a PC program. A damaged Windows Installer can also be a reason for issues while installing QuickBooks Desktop on your computer. You can fix the issue by registering the latest Windows Installer version on your computer and installing QuickBooks Desktop again on your computer. Here’s how-

- Download the latest Windows Installer on your system and install it using the built-in instructions.
- Reboot your computer after the Windows Installer is completely installed.
After installing the Windows Installer on your system, perform these steps to re-register it-
- Single-click the search panel on the Taskbar and type msiexec /unreg.
- Press Enter.
- Go to the search panel again and type msiexec /regserver.
- Press Enter.
Now, you must assign admin access to the Windows installer to prevent problems while accessing restricted locations on your system drive. Use these steps-
- Launch the Command Prompt with admin rights on your computer (Right-click the CMD icon> Run as Administrator).
- When the black screen in the command window appears, type icacls “C:\Config.msi” /T /C /grant administrators:F.
- Press Enter and close the CMD window before installing QuickBooks.
If assigning admin rights to the Windows Installer doesn’t fix the QB installation error, move to the next solution.
Solution 9- Consider Installing QuickBooks in Selective Startup
This method can be useful to prevent QB Installation issues as we have observed in some cases that QB installation failed due to interruption of Microsoft Services running in the background. You can troubleshoot QuickBooks error code 1327 by opening your system in selective startup mode and installing the software with limited services and applications running in the background. This minimizes the chances of QB installation getting hindered by background processes or occupancy of the system resources. We have simplified the procedure by breaking it down into two steps-
Step 1: Launch your system in Selective Startup
Follow these steps to limit the applications and services running while installing QuickBooks Desktop-
- Press Windows+R simultaneously on your computer to launch the Run command.
- Type ‘msconfig’ in the Run window and tap Ok.
- Move under the General tab and click the Selective Startup option.
- Select Load System Services and click the Services tab.
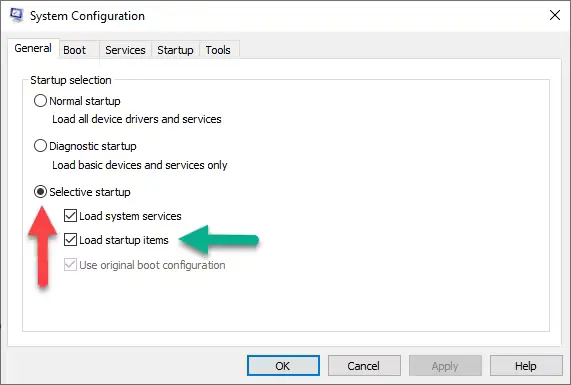
- Single-tap the Hide all Microsoft Services and click Disable All.
- Unmark the Hide all Microsoft Services option and choose Windows Installer in the services list.
- Tap Ok and click Restart in the System Configuration window.
Step 2: Install QuickBooks Desktop
Once your system opens in Selective Startup, begin QB installation using the following steps-
- Download the latest QuickBooks Desktop version for your system and click the QuickBooks.exe file after it is completely downloaded.
- Accept the software license agreement to highlight the Next option and fill in your product and license numbers when prompted.
- Click Next.
- Select Express if you are a new user and want to run QuickBooks on a single computer, whereas Custom if you want to host the QuickBooks company file in multi-user mode.
- Tap the Custom and Network Options and hit Next.
- Select the option in the next window accordingly and click Change the install location.
- Tap Browse to enter a location where you want to store the QB folder and click Install.
- Wait for the installation to complete.
All the techniques discussed above are effective in resolving QuickBooks error code 1327 as soon as it emerges.
What Causes QuickBooks Error 1327 and its Repercussions (Updated)
We all know that no software is perfect as they are always liable to foster runtime issues that appear randomly when they run on your system. Likewise, QuickBooks can also become inconvenient at times for its users due to problems like QuickBooks error 1327, which appears when you begin installing the software. Your system might lag and fail to respond to other commands after this QB installation error develops. We consulted with industry experts about QuickBooks Error 1327 to compile a list of all the possible PC conditions and reasons that can interrupt QB installation. Here are the most influential ones-
- QuickBooks cannot install or update if the User Account Control settings do not allow the program to extract its files on your computer.
- .NET Framework and MSXML play a significant role in installing PC applications and can become a reason for the QB installation error if damaged or settings are not configured correctly.
- Microsoft Services running in the background interrupt the Windows Installer when it extracts the QB installation package on your PC.
- Windows Installer can’t access the QB installation files due to a lack of appropriate folder permissions.
- The QuickBooks Installation package is damaged due to data loss during download, which might result from network connectivity issues on your computer.
- Your Windows account is damaged or doesn’t have the admin permissions to acquire the required system resources for QB installation.
- An obsolete Windows version can also cause technical glitches during QuickBooks installation on your system.
We hope you now understand the causes of QB installation failure and can relate to one or more of the reasons you might have experienced on your system while installing QB. Let’s move forward to the countermeasures for all the conditions above to prevent QuickBooks Error 1327 during QB installation.
Wrapping Up!
We have reached the farthest limit of this blog, which focuses on sharing the intricate details of QuickBooks error 1327 that appears while installing QuickBooks Desktop on your computer. All the favourable PC conditions for this error to emerge and some other reasons are mentioned in the blog accompanying the practical solutions for the installation error.
Frequently Asked Questions
What causes QuickBooks error 1327 to emerge while installing QuickBooks Desktop?
An incorrect or inaccessible system location selected to install QuickBooks is primarily what causes QuickBooks error 1327 to block the software installation on your computer. However, there can be several other reasons for QB installation issues like damaged Windows Installer, damaged .NET Framework or MSXML, irregularities in your Windows account, etc. We recommend that you ensure the storage location is correct before installing QuickBooks Desktop on your computer.
How can I quickly troubleshoot QuickBooks error code 1327?
You’ll have to take immediate action to troubleshoot QuickBooks error code 1327, as installing the accounting software won’t be possible until you resolve the issues triggering it. You must begin by updating your Windows and then proceed to configure your damaged Windows Components (.NET Framework & MSXML). After fixing the system settings, the best approach is to choose an accessible location on your system and reinstall QuickBooks Desktop in Selective Startup.
You May Also Like To Read-
How Do I Fix QuickBooks Error 1334?
QuickBooks Error Code 1311: Causes and Step-by-Step Fixes
QuickBooks Error 40001- The Right Way to Fix it
Get Rid of QuickBooks Error: The File You Specified Cannot Be Opened
How to Set Up Firewall and Antivirus Settings for QuickBooks: A Complete Guide

James Richard is a skilled technical writer with 16 years of experience at QuickBooks Data Migration. His expertise covers data migration, conversion, and desktop errors for QuickBooks. He excels at explaining complex technical topics clearly and simply for readers. Through engaging, informative blog posts, James makes even the most challenging QuickBooks issues feel manageable. With his passion for writing and deep knowledge, he is a trusted resource for anyone seeking clarity on accounting software problems.