
QuickBooks Data Migration Services facilitate the transfer of essential QuickBooks files from one place to another. As a technical process, users need to consider the case of data loss due to the varying factors affecting migration. In such situations, users must rely on professional service providers to ensure a seamless and risk-free data migration.
Users may need to migrate their data for several purposes. Regardless of the reason, the procedure can become complex, especially if they are naive in technical knowledge. Further, conversion from one computer to another or movement between different QB versions may bring differences and unmatched balances. The user must know all the limitations and challenges for a smooth migration ride. That is why we have brought forward this detailed guide on QuickBooks data migration Services. Here, you’ll learn everything about the operation and how to carry it out seamlessly.
What are QuickBooks Data Migration Services?
Online QuickBooks data migration services involve transferring files from one system to another. For example, you may decide to get a new computer for your accounting operations and now need to copy everything there. Similarly, you may need to shift between various QB editions for better access and suitability with your requirements. Regardless of the reason, when users undertake migration services, they essentially transfer their files from the old destination to the new one.
The migration process is challenging and comes with the risk of data loss. Therefore, users must be aware of all the crucial points involved in migration to ensure a streamlined procedure.
The Need for QuickBooks Migration Services
A general question you may have is why we require data migration desktop QuickBooks. The migration services may support you in the following cases and instances:
Changing QB Versions
If you are a QuickBooks Desktop user but require more storage and anywhere accessibility, you may benefit from the QuickBooks Online version offering cloud storage. Similarly, QB offers numerous editions like Pro, Premier, Accountant, Enterprise, etc., with different capabilities and offerings. Depending on the user’s requirements, they can switch between them. So, after weighing the pros and cons of each and selecting an appropriate one, users would need the migration services to move from the current to the new version.
File Size Expansion
When the user’s company file size expands significantly, they may need to upgrade or switch to other accommodating spaces. It may prompt them to look for a new computer with improved functionalities and higher RAM. Further, if the old computer doesn’t function properly or is becoming unsupportive of the recent QB versions, a switch may be necessary for seamless running and usability.
Switching the Accounting Programs
Users may wish to switch from another accounting application to QuickBooks or vice-versa. For instance, Mr. A’s team used Sage for their accounting needs. Now, they find QuickBooks to be a better partner for their enhanced and complex accounting and bookkeeping. In such cases, they’d need to migrate QuickBooks data. Thus, QuickBooks data migration services become a necessity.
Read more:- Secure cloud migration services
QuickBooks Desktop to Online Migration: Is it Worth it?
Users should consider the varying factors affecting the migration process when undertaking QuickBooks Desktop Migration services from Desktop to Online. Everything doesn’t remain the same in both versions. The accessibility, terms, features, lists, balances, and several other things change. Therefore, everything should be considered before QuickBooks migrate data.
The migration will alter your setup entirely and will be time-consuming. So please pay close attention to the comparison table and ensure it’s the right choice.
| Basis for Comparison | QuickBooks Desktop | QuickBooks Online |
| Limited add-on options are available. | Cloud-based apps keep developing, improving, and integrating with new add-ons. |
| 2. Security of the storage | The local files and drives are where most of the QuickBooks storage remains. The security threat of files and drives going corrupt, missing, or damaged looms large. | The QB Online data stays in a highly secure environment with robust-protection servers. Thus, data security is better here. |
| 3. Users | Only one user can be added. | Multiple users can be added. |
| 4. Hosting and backing up files | Hosting and backing files up remains a costly and time-consuming process. | Backing up files and hosting is not necessary in QB Online due to its cloud and secure storage. |
| 5. Accessibility | The QB Desktop version is available for use only in specific locations, like an office. | With internet connectivity and a smart device, you can use QuickBooks Online anywhere, anytime. Cloud apps offer anywhere, anytime accessibility.
|
Depending on the complexity of your company file, the speed, time, and other factors for migration may vary. So, consider everything before you decide to migrate your data.
Functionality Comparisons and Issues in QB Desktop and Online
When you migrate from QuickBooks Desktop to Online, you may experience differences in how the company file remains accessible. The QB company file contains everything regarding your business, including inventory, employee details, banking history, customer lists, account balances, etc. When the data in these files increases, its complexity in migration also rises. Thus, additional setup and QuickBooks data migration services help become necessary to undertake this operation.
Here are the variations between the two versions you may face after migration:
| QuickBooks Desktop is useful for me to | Tasks possible in QuickBooks Online | Tasks possible in QuickBooks Desktop |
| Data management and company file accessibility | ||
| Turning on data backups | All editions | All editions* |
| Returning to my company file version | Advanced | All editions, with backups |
| Working with the accountant | All editions | All editions |
| Remote access to the company file | All editions | All editions** |
| Enabling multiple users to access the company file | Essentials, Plus, Advanced | All editions |
| Maintaining multiple company files | Requires additional subscriptions | All editions |
| Working together with various open QuickBooks windows | All editions | All editions |
| Working with the customers | ||
| Sales restriction to customers with overdue invoices | Unavailable | Not available |
| Estimates creation and management, sending them to customers, converting them to invoices, and utilizing progress invoicing | All editions; progress invoicing in Plus and Advanced only | All editions |
| Sales and expenses tracking in various currencies | Essentials, Plus, Advanced | All editions |
| Sales tracking, payments acceptance, and sales tax calculation | All editions, with QuickBooks Payments | Unavailable |
| Project tracking with time expenses, pending payments, unbilled work | Plus, Advanced | All editions |
| Invoices with batch invoicing | Unavailable | All editions |
| Invoice creation and management and billing customers | All editions | All editions |
| Working with the suppliers | ||
| Billable expenses | Plus, Advanced | All editions |
| Bills management and supplier payments | Essentials, Plus, Advanced | All editions |
| Contractors’ tracking and management | All editions | All editions |
| Employee Data Management | ||
| Employee time tracking, including billable hours | Essentials, Plus, Advanced | All editions |
| Paying employees, e-filing payroll taxes, printing, and filing reports | All editions, with Enhanced Payroll | All editions, with Payroll subscription |
| Using online banking | ||
| Connecting to the bank, transactions downloading, and reconciling | All editions | All editions |
| Undoing previous bank reconciliations | By an accountant in QuickBooks Online Accountant | All editions |
| Inventory management | ||
| The FIFO method used to track inventory quantities, sales revenue, and COGS | Plus, Advanced | Unavailable |
| Setting and managing inventory reorder points | All editions | All editions |
| The Average Costing method used to track inventory | Unavailable | All editions |
| Reports creation and running them | ||
| Income and expense tracking and organizing according to tax categories | All editions | All editions |
| Sales and expense forecasts | Plus, Advanced | Premier |
| Advanced Reporting | Unavailable | Unavailable |
| Custom reports creation with Intuit Statement Writer | Unavailable | Unavailable |
| Running custom, profit, and loss, expense, and balance sheet reports | All editions | All editions |
* Intuit Data Protection is a must for Online backups.
**Remote Desktop app, hosting provider, and a terminal setup server are required.
Files that will and won’t move from QB Desktop to Online:
Usually, everything can be transferred from QuickBooks Desktop to Online. However, you may need to put extra effort into shifting some files. Manual entries, reconciliation, and comparison would be necessary in such cases. Mismatched data would need to be balanced through adjustments and alterations.
Here’s a glimpse into how different files behave when you undertake QuickBooks online migrate data:
- Audit Trail: QuickBooks Desktop’s audit trail won’t convert into QB Online. QuickBooks Online has its unique way of managing audit trails, known as Audit Logs, maintained automatically.
- Chart of Accounts: You’ll see an additional column in QuickBooks Online named ‘Detail Type’ in the Chart of Accounts. When you convert, a generic detail type gets assigned to different entries. You’ll have to edit them later. However, you can’t convert notes and bank account numbers through this process.
- Credit Card Charges: Migrating QB Desktop Online will categorize credit card charges as expenses.
- Estimates: The QB Online version converts, marks the active estimates, and closes them. The inactive ones get rejected by QBO.
- Inventory: Only the FIFO method is used to track inventory in QuickBooks Online and is only available in QuickBooks Online Plus.
- Journal Entries: Except for their billable status, everything gets converted.
- Vendors or Suppliers: While migrating QuickBooks Desktop to Online, information regarding the vendor’s contact, alternate contact, credit limit, type of supplier, etc., does not get converted.
How to Migrate QuickBooks Desktop to Online?
Here’s a comprehensive checklist on how to migrate QuickBooks data- the migration preparation and complete process. After you’re prepared to migrate to QB Online, you can begin the migration process. So, consider the following aspects beforehand:
Undertake the backup of your company file:
You should always back up your company files regularly before migrating from QuickBooks Desktop to Online. You don’t need to back up your files manually when using QuickBooks Online because the files are stored on the cloud server. The following steps can help you execute data backup:
- Begin by ensuring you are not operating in multi-user mode. You can verify these settings by heading to the File menu and tapping the Switch to Single-user mode option.
- Now, return to the File menu in QuickBooks Desktop.
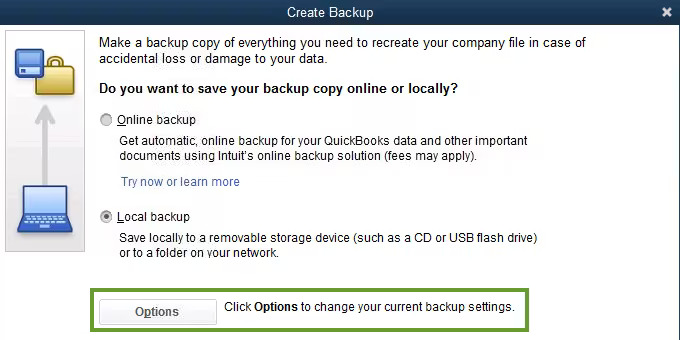
- Tap the Create Backup option. Next, choose the Local Backup option.
- Select Local Backup in the next window and follow it up with Next.
- Visit the Local Backup only section and choose the Browse option. Here, look for the location to save your company file. You can save as many backups as you wish.
- For a smooth backup process, a test will run. If errors emerge while backing up files during QuickBooks enterprise data migration, you need to see the troubleshooting issues section.
- Proceed by tapping OK. Then, opt for the Save it Now option, followed by Next in the wizard.
- A confirmation message will pop up on the screen, ensuring the backup validation.
While this is a manual backup procedure, you can undertake automatic backups also to proceed further.
Ensure to Update QuickBooks Desktop
Your QuickBooks Desktop application should be the latest version before you migrate. Therefore, download and install the latest updates through the following process:
- Before updating QB, switch to the Single-user mode by tapping the File menu and choosing the Switch to Single User Mode option.
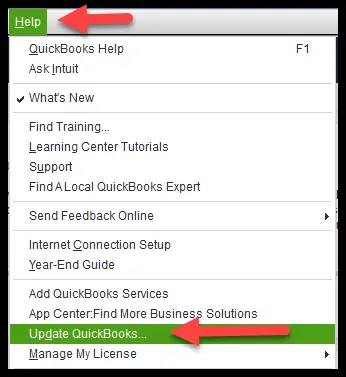
Further, navigate to the Help menu in QuickBooks Desktop. - Tap the Update QuickBooks Desktop option.
- Click Update Now.
- Then, click the Get Updates icon and tap Next.
- Select File, followed by Exit.
- Rerun to your QuickBooks Desktop and payroll.
Check the Total Targets
The next step involves verifying the credibility of the information related to total targets in QuickBooks.
- Launch the Product Information window by pressing Ctrl + 1 or F2 key on the keyboard in QuickBooks Desktop. Here, you’ll find information about the number of total targets in the File Information section.
- Eligibility for a list and balances conversion happens when the target numbers are as follows:
- 700,000 for Canada
- 500,000 for the UK
- 500,000 for South Africa
Let’s look at the next step performed by QuickBooks data migration services.
Save the Sales Tax Liability Report
Before migrating to QuickBooks, you should save the sales tax liability reports and others securely. You can also print them and keep them handy for comparisons post-migration. It will help heal the unmatched balances. Take the following steps for the process:
- Navigate to the Reports menu in QuickBooks Desktop.
- Tap the Suppliers and Payables option, followed by the Sales tax liability icon.
- Click All in the dates drop-down.
- Further, select the Save as PDF icon from the print drop-down at the top.
- Select the folder to save the file, name it, and click Save.
- Print it for a hard copy after saving the file.
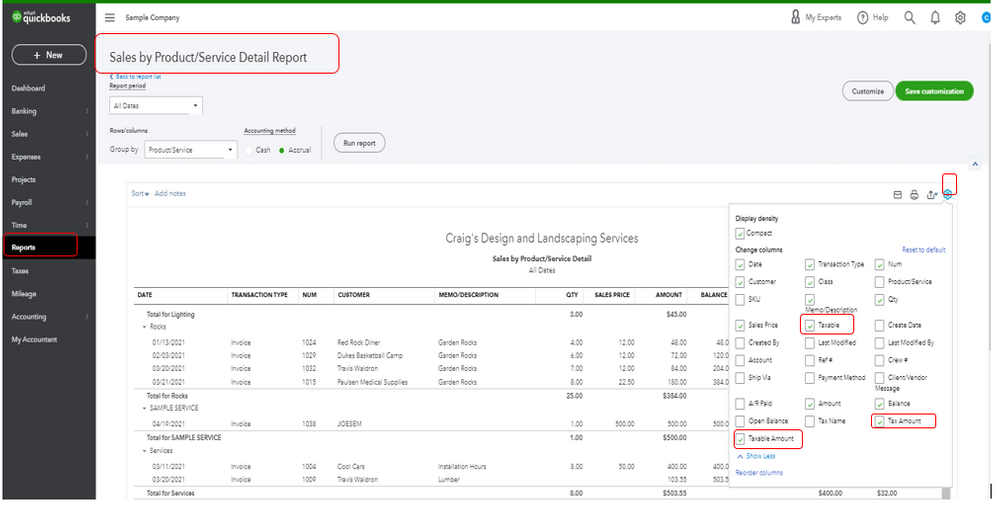
Undertake the export of reports and lists
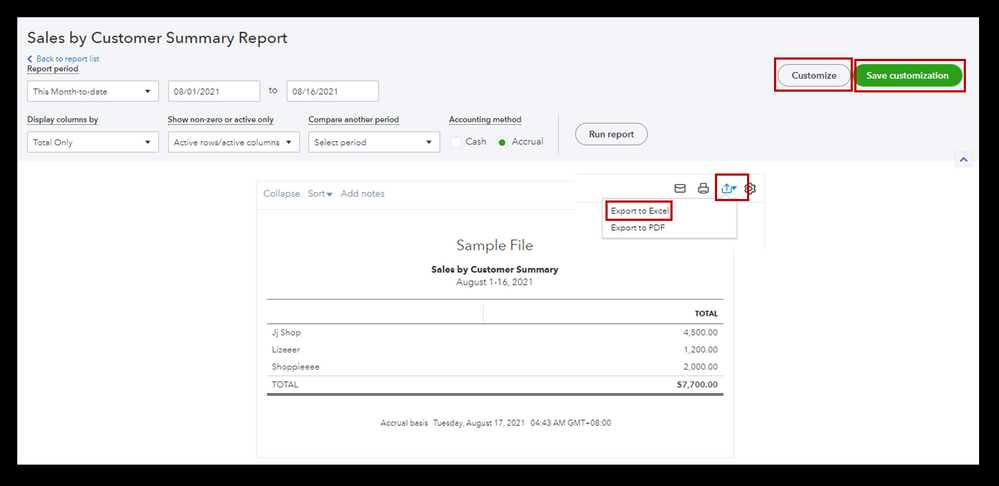
Exporting lists saves a significant chunk of your time when you begin in QB Online. Set the item lists individually. Exporting the reports and lists have the following steps:
- Click the Reports menu in QB Desktop.
- Head to the Report Center.
- Look for any report to open and click it.
- Opt for the desired date range from the dates drop-down menu.
- Navigate to Excel on the toolbar. You may also click the Print or Email option to save the report as a PDF file.
- Tap the Create a new worksheet option from the Excel drop-down for a new excel workbook. Or, click the Update Existing Worksheet option to update an existing workbook with the data in the open report.
- Next, click Export and search for the workbook on the computer.
- Tap the advanced option if you wish to format the data in a specific way (optional step).
- Click Advanced if you get a message saying the report exceeds the number of columns. Then, choose and unmark the space between the columns checkbox and tap OK.
- Click OK when the export process is ready.
Repeat these steps for all the lists and reports you wish to export.
Create a QuickBooks Online Account
Create your QuickBooks Online subscription to be ready for the migration process. Select an appropriate plan from the options list. Further, you should maintain compatibility with the system before ensuring you have the things needed for a hassle-free QuickBooks experience.
Note that you can only transfer the company file within 60 days of signing up for QuickBooks Online. So it would help to have an active subscription, ensuring you’re ready to move within 60 days.
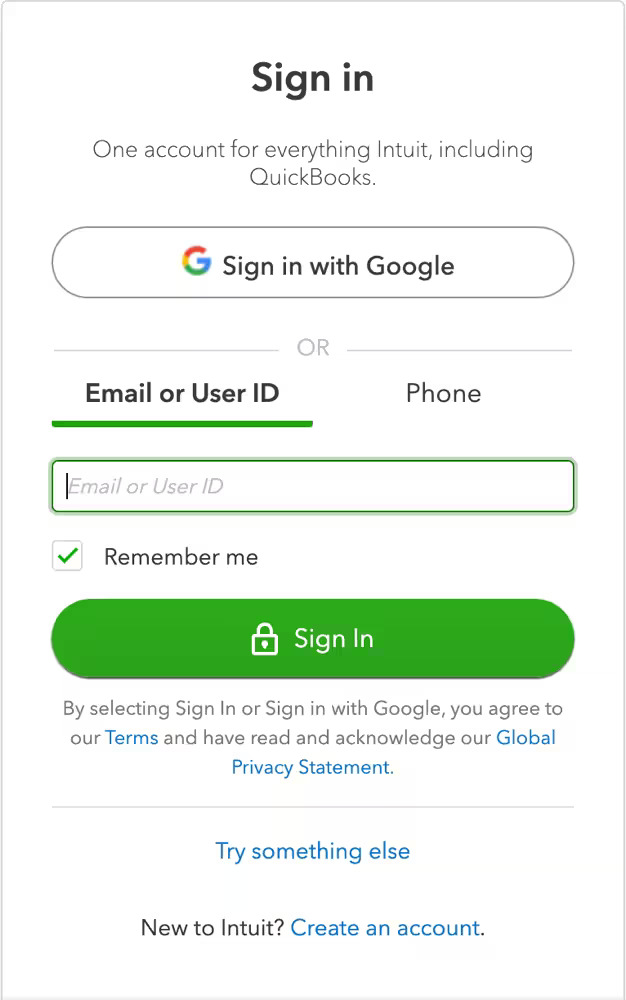
Now, when you’re asked to log in, use the same credentials as the QuickBooks Desktop account. However, you should wait to set up your QB Online company.
Recommended article:- QuickBooks Data Recovery Services
The Migration Process
Now, let’s look into how the data migration support QuickBooks works to accomplish the process.
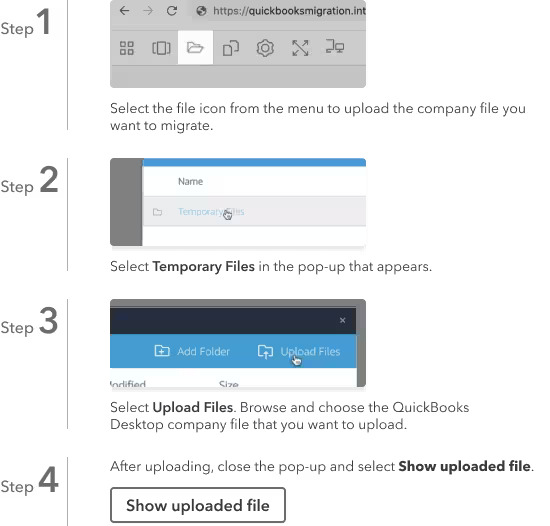
One way to shift your files from QB Desktop to Online or from one computer to another is the QuickBooks Migration Tool. It is a pretty valuable tool available for use online through browsers. It simplifies and streamlines the migration process.
You can also use the QuickBooks Data Switcher Tool to move your data from one place to another. It is Intuit’s migration supplier, which takes 24-72 hours for the switch, depending on the amount of data.
You should undertake the following steps before migration in different versions:
In QuickBooks Desktop Pro or Premier
- Enter as an admin of the company file you wish to import into QB Desktop.
- Navigate to the Company menu.
- Select the Export company file to QuickBooks Online option.
- Tap the Get Started button.
- Opt for the Select Destination option. Finally, sign in to the QB Online account.
In QuickBooks Desktop Enterprise

- Check the file you wish to import by logging in as an admin.
- Hold the F2 key on the keyboard to access the Product Information window.
- When the product information window emerges, press the Ctrl, B, and Q keys simultaneously. Then, tap OK at the bottom of the product page to start.
If your QBD tracks inventory, undertake the following actions:
- Choose the specific dates and tap Yes to bring it over.
- Click No if you wish to set items later in QBO.
- You’ll get an email when the conversion process finishes. Click the button that says ‘Complete your setup’ in the email.
- Log in to the QB Online account.
- Choose the company file you wish to open. You’ll get the QuickBooks Online dashboard on the screen.
Manage the Lists
The lists exported from QuickBooks Desktop will now be imported to QuickBooks Online. Each list follows varying steps in QuickBooks for importing and data migration.
Inventory Setup
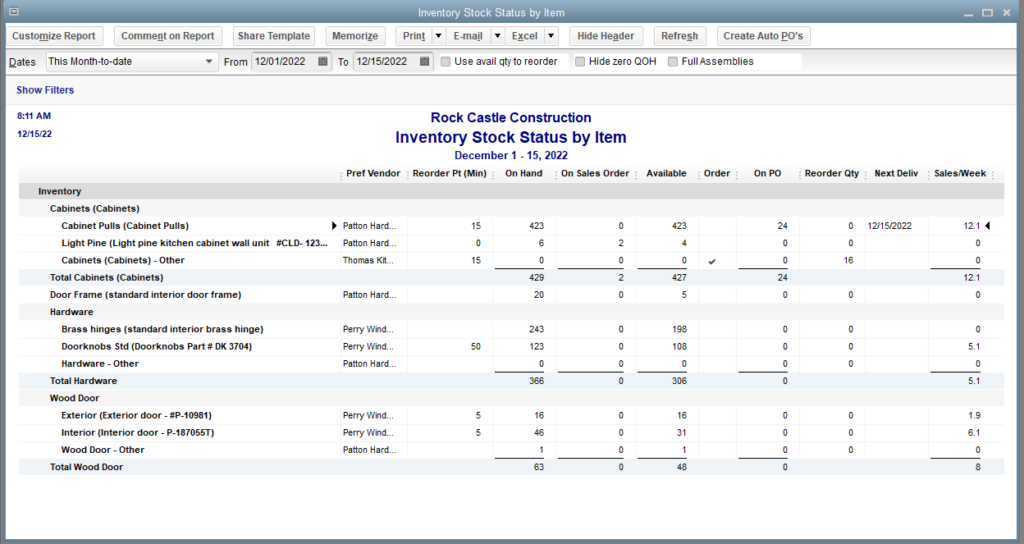
Enable inventory tracking in QuickBooks Online during QuickBooks Data Migration Services through the following actions:
- Opt for the Account and Settings option in the Settings tab.
- Click Sales > Edit in the products and services section.
- Enable the Show Product/ Service Column on the sales forms.
- Further, enable both options:
- Track quantity and price/ rate
- Track inventory quantity on hand
- Save the settings once you’re done.
The FIFO method is the inventory calculation method of choice in QB Online. So, it will recalculate the existing and future inventory through this method. Thus, it would help if you choose the first day following the last tax filing period to prevent changing the tax forms later.
The After Scene of Migration
Reviewing and reconciling your accounts is necessary before you set up and start using QuickBooks Online after migration. Do not enter any new transactions or change anything before checking.
Ensure the QuickBooks data migration services work per expectations through the following checklist. Moreover, remember to import the information that doesn’t transfer automatically.
Compare reports to review data
Ensure the accuracy of QuickBooks Data Migration Services by comparing the following reports in QB Desktop and Online:
- Balance Sheet report
- Customer Balance Summary (all dates)
- Supplier balance summary (all dates)
- Trial balances (all dates)
- Sales tax summary report (the most recent period)
- Any other reports to review
Review the reports by running them by all dates. Further, set the accounting method to accrual in QB Online and Desktop. Proceed with the post-migration data conversion services as follows.
Validate the company settings
The details like company name, address, and email don’t transfer with QuickBooks Data Migration Services. So, enter this information manually about the company through the following steps:
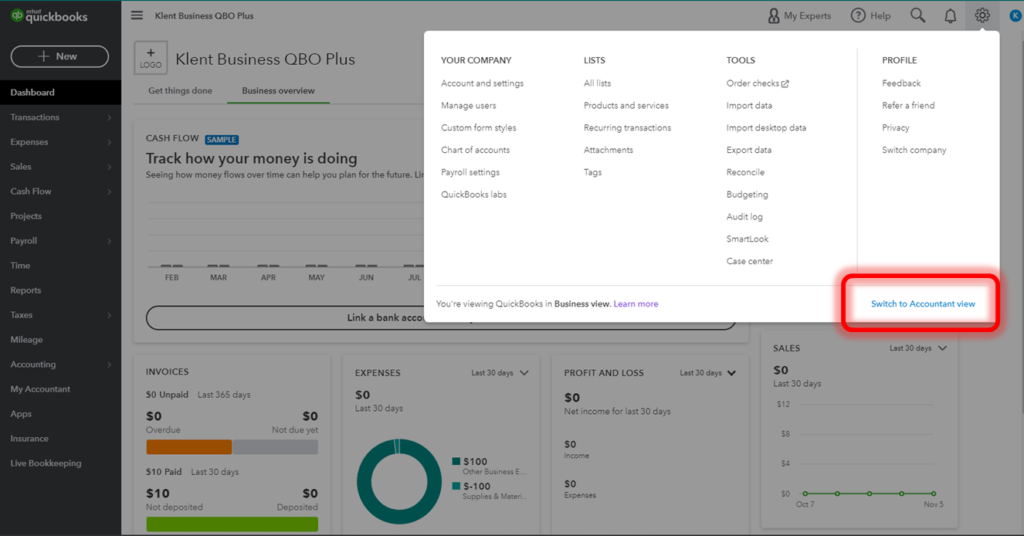
- Tap the gear icon, aka settings, in the menu and opt for the Account and Settings option.
- Type the company and contact details on the company tab.
- Enter the email address where this information is requested. You’ll receive monthly invoices from Intuit concerning your QB Online subscription.
- Further, enter the email address in the customer-facing email box if you don’t wish customers to reach you on the company email address.
- Migrate seamlessly after tapping the Save button for these details.
Link bank and credit card accounts
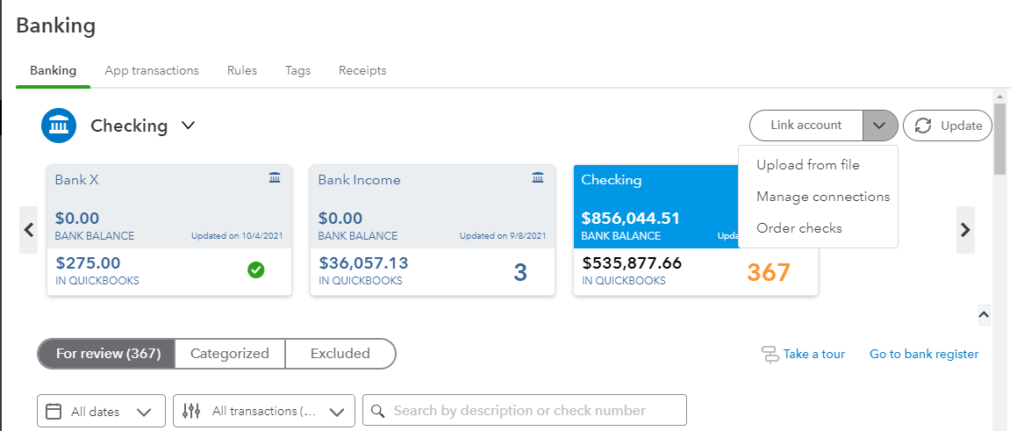
Due to security issues, QuickBooks never migrates your bank and credit card details and connections. Therefore, reconnect them in QuickBooks Online through the following steps:
- Head to the Bookkeeping section and select transactions. Further, opt for Bank transactions.
- Now, tap the Connect account on the landing page. You can also choose to Add an account if you have already created an account.
- Locate your bank and click Continue. Then, enter your bank account and password used on the bank’s website in the wizard on the screen.
- Choose the accounts you wish to connect.
- Select the account type from the drop-down menu for every account. These accounts will be on your chart of accounts.
- Choose the date range to download transactions and select Connect.
Hopefully, you can enjoy hassle-free QuickBooks Data Migration Services.
Check your bank reconciliations
Initially, you wouldn’t have performed any reconciliation in QB Online. So, mark all the transactions up to the conversion date to ensure only the future transactions get reconciled after migration. The following steps can help undertake this method:
- From the Settings menu, select the Reconcile option.
- Choose the relevant bank account from the drop-down menu.
- Enter the ending balance and date and opt to reconcile now.
- A list of transactions will emerge on the screen. Select all the transactions in the list by marking their boxes. Ensure the data in both columns is marked if it is in two columns.
- Bring the difference to zero, and it will show a successful migration.
- Tap Finish Now and repeat the steps for all other bank accounts.
Bottom Line
Hopefully, this in-depth guide offers complete insights into QuickBooks Data Migration Services.
FAQs
What is an essential consideration while availing of QuickBooks Data Migration Services?
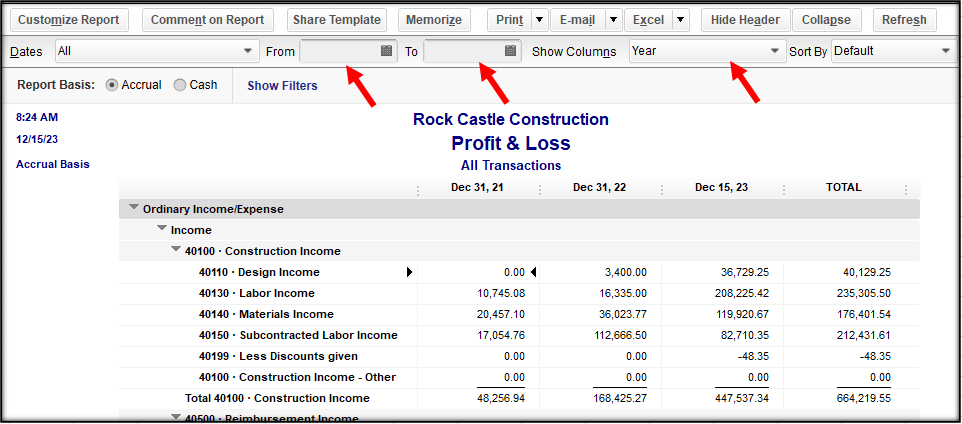
While migrating details from QuickBooks Desktop to Online, you must import the summary reports. The QuickBooks Desktop program and QB Online do not run simultaneously because one is on the local server while the other is on the cloud. Ensure to compare balances in the Profit and Loss report and balance sheet after conversion. You should use tools like the QuickBooks Migration tool and QB Data Switcher to transfer your files from one place to another.
What are the remaining steps in QuickBooks, Post Migration?
The post-migration checklist also contains the following items:
1. Manage the sales tax settings.
2. Complete the payroll setup.
3. Review the account detail types.
4. Connect payments and credits to open invoices.
You May Also Read-
Fix QuickBooks Error 6177 0 Using Proven Solutions
Why QuickBooks is Not Printing Correctly (Updated fixing Guide)
QuickBooks Payment Issues Fixed in No Time – Know How?
QuickBooks Error 1601: Installer is not accessible [Fixed]
Fix QuickBooks PDF Component Missing in Windows 10/11

James Richard is a skilled technical writer with 16 years of experience at QuickBooks Data Migration. His expertise covers data migration, conversion, and desktop errors for QuickBooks. He excels at explaining complex technical topics clearly and simply for readers. Through engaging, informative blog posts, James makes even the most challenging QuickBooks issues feel manageable. With his passion for writing and deep knowledge, he is a trusted resource for anyone seeking clarity on accounting software problems.