
Do you get the file you specified cannot be opened error in QuickBooks Desktop while you attempt to download payroll, pay scheduled liabilities, or open a federal or state form? This is a technical glitch in QB Desktop that can hinder your payroll tasks, leading to a delay in work. This error can be really annoying while you try to work, and fixing it might become a pain since the QuickBooks file won’t open.
There can be many reasons and causes as to why you see the QB message the file you specified cannot be opened. Let’s learn about why this problem occurs and what the resolutions are that you can take to get rid of it.
Delve into Troubleshooting Methods for the File You Specified Cannot Be Opened
Listed in this segment are some working solutions that you can follow to troubleshoot the QuickBooks error, the file you specified cannot be opened. Follow the procedures outlined below to resolve this problem without resorting to extreme countermeasures.
Update the QuickBooks Desktop
QuickBooks 2015 the file you specified cannot be opened might arise because of an outdated version. Therefore, take these steps to update QB Desktop to the latest version.
- Open Intuit’s website using your selected browser.
- Find the Downloads & Updates section.
- Select QuickBooks Product from the dropdown on the Product menu.
- In the Version menu, select your preferred model year and version of QuickBooks.
- Click on “Get the latest updates” and then select “Save/Save File“.
- The download of the update files will start.
- Install the update now by following the instructions.
- After finishing, restart your computer.
- Now, run the payroll update.
The file you specified cannot be opened QuickBooks 2012 may be resolved after updating it to the latest version. If your QuickBooks application is not updating, then follow this article to resolve the issue. If your QBDT software is up to date with the latest version, then skip to the next method.
Update the Windows Operating System
An outdated Windows or damaged Microsoft components can cause errors and lead to QuickBooks 2012 the file you specified cannot be opened. Therefore, take these steps to update your Windows operating system as outlined below.
Update Windows 11
The following steps are to be taken to update the Windows OS in Windows 11:
- Start your system and go to Settings
- Select Windows Update and hit Check for updates
- Available updates will show up on your screen
- Click on Download & Install
Update Windows 10
Through the steps given below, you can update the Windows OS to resolve the file you specified cannot be opened quickbooks Windows 10:
- Launch your system and head to Settings
- Choose Update & Security and go to Windows Update
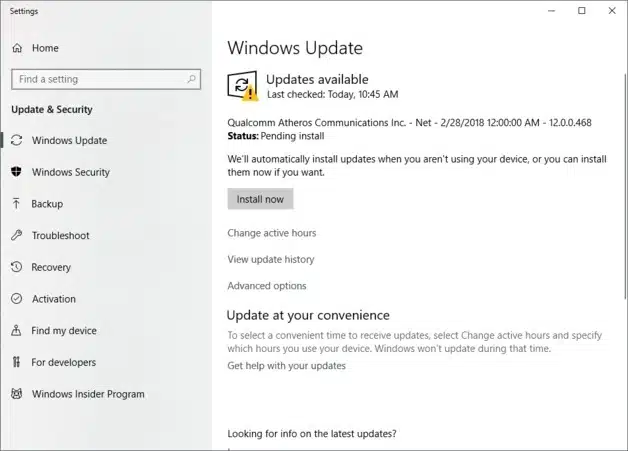
- Click on Check for updates.
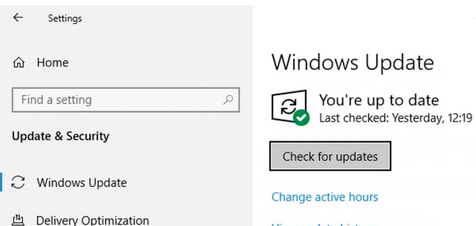
- If there are available updates, then hit Download & install
Any future updates will also be downloaded automatically. Now, confirm whether the QuickBooks 2013 the file you specified cannot be opened error has been fixed. If not, then you should create an exclusion for the QB program in the Firewall through the next step.
Windows Firewall exception for QuickBooks
An internet blockage on the QBDT application may occur due to incorrect or wrong Windows Firewall settings and cause the file you specified cannot be opened or the file exists error. You must configure the Windows Firewall and antivirus settings to prevent them from blocking QB. Follow this guide to exclude the application and ensure a stable internet connection.
Once done, relaunch the QB Desktop and verify whether the error has been resolved. If the issue persists, follow the next process to run the application as an administrator.
Run as Windows Administrator
You should launch QuickBooks as an administrator to ensure that it has all the necessary permissions to prevent the file you specified cannot be opened error.
- Open your Windows system.
- Locate and select the QB Desktop icon.
- Click on ‘Run as Administrator’.
Additionally, ensure that you are logged in as an administrator user on Windows. You can also modify a user to give them admin rights in Windows to prevent the file you specified cannot be opened in QuickBooks Desktop. If the issue persists, configure the UAC settings using the following solution.
Change UAC Settings
Your User Account Control (UAC) settings might cause various issues with the QuickBooks Desktop and lead to the file you specified cannot be opened. Follow the procedure outlined below to disable UAC settings on your system.
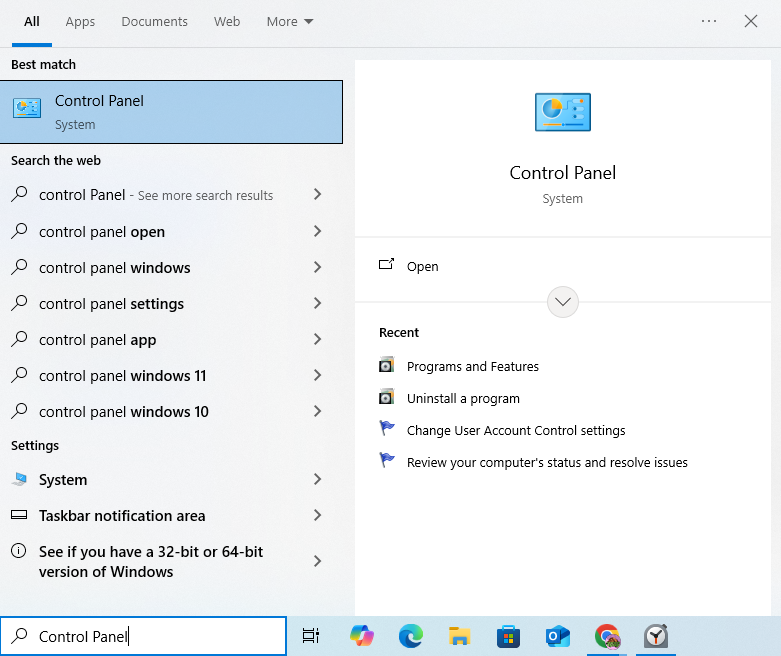
- Type “Control Panel” in the search box in the taskbar and open it.
- Open the System and Security section, and then locate Security and Maintenance.
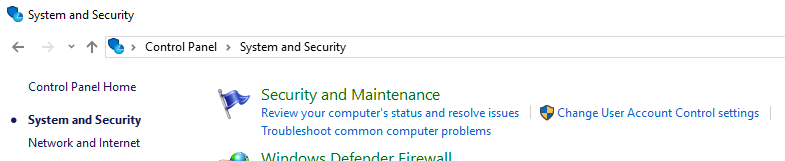
- Now, click “Change User Account Control settings.”
- You will be asked to type in the administrator password.
- Enter the password and hit OK.
- The program will make changes to your computer.
- Now, drag the slider to the bottom and select Never Notify.
- Finally, tap OK and restart your device.

Be sure to enable UAC settings afterwards, since it is a crucial security feature in Windows. Now, confirm whether the error is gone or still occurring. You can resolve the file you specified cannot be opened errors in QuickBooks by following the method below to run Quick Fix My Program.
Run Quick Fix My Program
Follow the process below to run the Quick Fix My Program for the file you specified cannot be opened error in QB Desktop. To download the QuickBooks Tool Hub you can go through this guide.
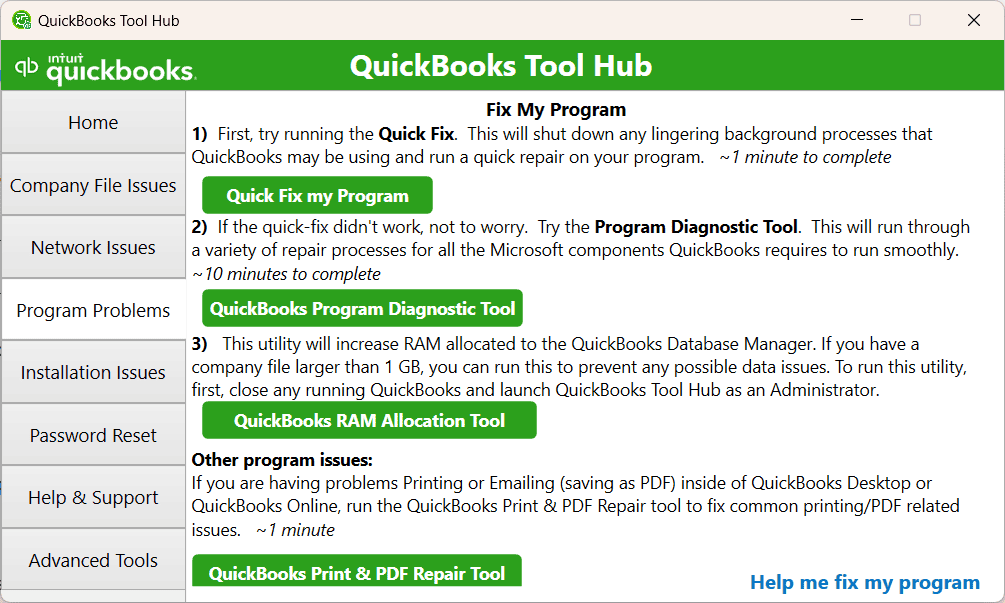
- Launch the QuickBooks Tool Hub.
- Navigate to the Program Problems tab.
- Click on Quick Fix My Program.
- Sign in to your company file on QBDT.
Alternatively, the QuickBooks File Doctor can be used to repair your company file. If the file exists QB error continues, then you should update the Windows permissions for users through the next method.
Update Windows Permissions
Follow this process to change the file permission on your computer system so that the file you specified cannot be opened error in QuickBooks Desktop can be prevented.
Note:-
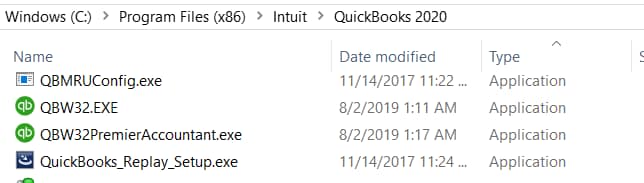
| Processor Type | File Path for QBW32.EXE |
| 32-bit | C:\Program Files\Intuit\QuickBooks (year) |
| 64-bit | C:\Program Files x86\Intuit\QuickBooks (year) |
- Head to the Windows Start menu.
- Search for “File Explorer” through the search bar.
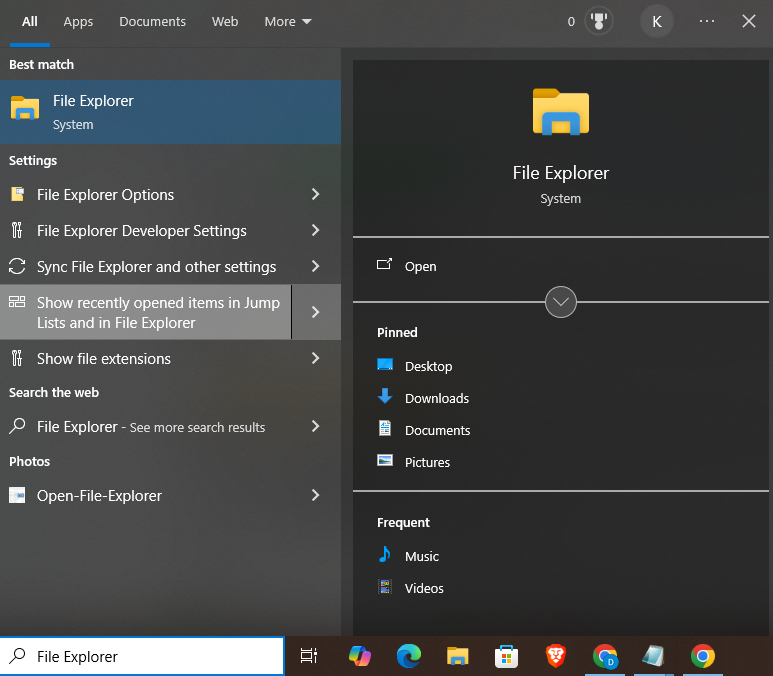
- Locate your QuickBooks program file in File Explorer.
- Now, select the QuickBooks program (QBW32.EXE) file and go to Properties.
- Head to the Security section and choose Edit.
- Select Add and enter “Everyone” in the window, then hit OK.
- Again, click on Add and enter “Users” in the window and tap OK.
- Tick the Full Control checkbox in the Security window and click OK.
- Once done, hit Apply and then hit OK to close the settings.
Once the Windows permissions have been updated, QuickBooks the file you specified cannot be opened error should not occur anymore. If the file exists error still occurs, then verify and rebuild the QB company file as outlined in the next method to resolve the issue.
Verify and Rebuild the Data File
Your damaged data file may be the leading factor in the file you specified cannot be opened in QuickBooks Desktop. To resolve this issue, follow the steps outlined below to verify and rebuild the data file.
Verify the Company File:
You can verify your data file with the steps below on QuickBooks Desktop:
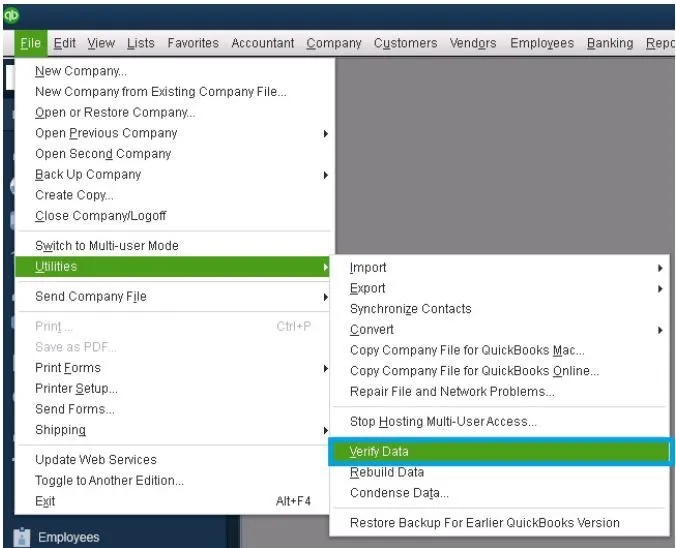
- Open QBDT and expand the Files menu.
- Locate and select the Utilities option.
- Now, click on Verify Data.
Rebuild the Company File:
You can take these steps in QBDT to rebuild your data file.
- Open the Files menu on the QuickBooks homescreen.
- Select and expand the Utilities menu.
- Finally, Hit Rebuild Data.
Then, verify your data file again to check for additional damage, and ensure that you create a backup of the company file before rebuilding the data file. Has your QuickBooks backup failed? Troubleshoot it through this guide. If the file you specified cannot be opened issue persists, then try reinstalling the QBDT entirely through the next step.
Reinstall the QuickBooks Desktop
QuickBooks error the file you specified cannot be opened might occur due to the incomplete or improper installation of the application. Therefore, follow the steps given below to reinstall the QBDT program:
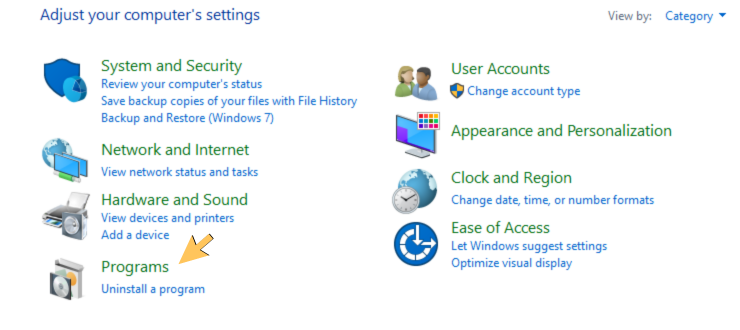
- Type “Control Panel” into the search box on the taskbar.
- Open the Control Panel, and navigate to the Programs section.
- Choose ‘Programs and Features’ or ‘Uninstall a Program’.
- Now, click on QuickBooks Desktop in the list of programs.
- Select “Uninstall” from the menu to remove the software.
- After that, download QBDT and install it.
- Finally, set up the QuickBooks Desktop.
Alternatively, you can refer to the clean install QuickBooks Desktop guide, as it will not affect your data files.
What is QuickBooks Desktop Error: The File You Specified Cannot Be Opened?
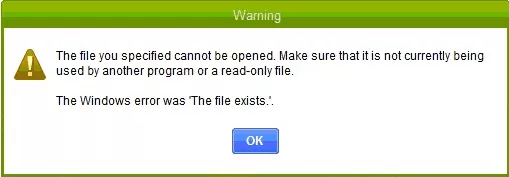
If you get this error on your QBDT application while performing basic payroll tasks, then dive into this blog to understand how this error occurs. It can hinder accounting tasks such as paying scheduled liabilities, opening a state/federal form, and payroll update download; therefore, it’s necessary to resolve this company file error in QuickBooks Desktop. You can identify this issue with the following warning message that will appear on your screen.
“The file you specified cannot be opened. Make sure that it is not currently being used by another program or a read-only file.
The Windows error was ‘The file exists’.”
The Windows error was ‘The file exists’.”
Now, to understand how the file you specified cannot be opened issue can occur, move on to the next section to see what the prime causes are for it.
Reasons Behind the File Exists or Cannot Be Opened Error in QB Payroll
There can be a variety of reasons that can contribute to this problem and hinder your productivity. Read the following list of reasons that primarily cause the QuickBooks payroll error: the file you specified cannot be opened.
- The company data file may have become damaged or corrupted.
- QB is unable to open the company file.
- You may have an outdated version of QuickBooks software, like QuickBooks 2009 the file you specified cannot be opened.
- Malware or other issues may prevent the QuickBooks server connection.
- Lack of administrator permissions as a Windows user.
- The company file might be open on a different server.
- Issues with the QB installation files.
- Windows Firewall settings may block QuickBooks’ internet access.
- Incorrect network connectivity settings may prevent you from accessing the internet.
- You might have a poor or weak internet connection.
- Improper installation of the QB application.
- The User Account Control (UAC) settings on Windows might lead to interruptions.
- QuickBooks update stuck or fails to update properly.
- An outdated version of Microsoft Windows.
These are the prime causes that may have caused the file you specified cannot be opened errors in QuickBooks. Now, let’s take a look at some working solutions that can resolve this issue on QB Desktop.
Quickview Table for QuickBooks Error: The File You Specified Cannot Be Opened
In this segment, we have provided you with a tabulated overview of the file you specified cannot be opened errors in QuickBooks.
| Error message | The File You Specified Cannot Be Opened |
| Error description | The file you specified cannot be opened. Make sure that it is not currently being used by another program or a read-only file. The Windows error was ‘The file exists’. |
| Its causes | Damaged company file, QB can’t open company file, outdated QuickBooks version, malware preventing server connection, lack of administrator permissions, company file open on another server, QB installation files issue, Firewall blocking internet access, incorrect network connectivity settings, poor or weak internet connection, improper QB installation, Windows UAC settings, QuickBooks update stuck, outdated Microsoft Windows. |
| Troubleshooting methods | Update QuickBooks Desktop, update the Windows operating system, create an exception for QuickBooks in the Firewall, run as a Windows administrator, update UAC settings, run Quick Fix My Program, update Windows permissions, verify and rebuild the data file, and reinstall QB Desktop or perform a QuickBooks Clean Install. |
| Tools required | QuickBooks Tool Hub, Quick Fix My Program, Quick File Doctor, QuickBooks Verify and Rebuild Utility, and QuickBooks Clean Install Tool. |
What You Should Remember
This detailed guide provides an understanding of the file you specified cannot be opened error in QuickBooks Desktop. In this blog, we have walked you through various reasons that may contribute to this problem and disrupt your workflow. Additionally, you have a list of proven and working solutions that can be followed to get rid of the QuickBooks error: the file you specified cannot be opened.
Frequently Asked Questions (FAQs)
How to fix payroll errors the file you specified cannot be opened?
You can take multiple troubleshooting methods to resolve the file you specified cannot be opened error in QuickBooks Desktop. You can begin by updating the QuickBooks Desktop to the latest version, create an exception for QBDT in the Microsoft Firewall, run as a Windows administrator to prevent lack of permissions, update UAC settings on your system, launch the Quick Fix My Program, use the verify and rebuild utility to repair the data file, or perform a QuickBooks Clean Install and many more.
Why am I getting a QuickBooks payroll error the file exists?
There are a number of reasons as for why you might be getting the QuickBooks payroll error the file exists. Some of the prime contributors to this error include a damaged company file, QB being unable to open the company file, an outdated version of QuickBooks, malware or antivirus on your system that might be preventing server connection, lack of administrator permissions, QB installation files issue, Firewall might be blocking internet access, incorrect network connectivity settings, poor or weak internet connection, Windows UAC settings, QuickBooks update stuck, or an outdated Microsoft Windows operating system and such other.
Can QB File Doctor help with the QB file exist error?
Yes, the QuickBooks File Doctor can be used to repair your company file, which might resolve the QuickBooks the file exists error. To do this, you will need to navigate to the QuickBooks tool hub on QB Desktop, where you will find the QB file doctor under the company file issues tab. Now select ‘run QuickBooks File Doctor’ to begin the diagnosis and let the tool fix any issues with the company file. Alternatively, you can download the QB tool hub from the Intuit website, install it using the file explorer, and then upload your company file to run the diagnosis and repair.
What does the error the file you specified cannot be opened mean in QuickBooks?
Sometimes, an error occurs when QuickBooks fails to open a file to perform tasks like paying scheduled liabilities, opening a state/federal form, and payroll update download. This error can hinder your work productivity and delay your accounting tasks that are to be run by QuickBooks Payroll.
You May Also Read-
A Beginner’s Guide to Reactivate QuickBooks Payroll Subscription
QuickBooks Migration Tool: Guide for Migration (Updated 2025)
Your Ultimate Guide to QuickBooks Data Recovery Services
QuickBooks Data Migration Services to Streamline Your Finances
QuickBooks Data Conversion Services: Pro Insights 2025

James Richard is a skilled technical writer with 16 years of experience at QuickBooks Data Migration. His expertise covers data migration, conversion, and desktop errors for QuickBooks. He excels at explaining complex technical topics clearly and simply for readers. Through engaging, informative blog posts, James makes even the most challenging QuickBooks issues feel manageable. With his passion for writing and deep knowledge, he is a trusted resource for anyone seeking clarity on accounting software problems.