
When the QuickBooks pdf component missing issue occurs, you may see error messages such as, “QuickBooks detected that a component required to create PDF files is missing.”
Or
Error: QuickBooks can’t complete the current action due to a missing component: Missing pdf file component.
on the screen. When it comes to resolving this issue with minimal difficulty, you should set a new template for your form or rename the Qbprint.qbp file. Otherwise, you can also run the Print and PDF repair tool for quick repair. Nonetheless, repairing QuickBooks may also help deal with the issues if the QuickBooks pdf component is missing. Read this blog till the end for all these effective fixes.
How to Fix Missing PDF Component Issue in QuickBooks Desktop (Updated)
After much discussion with the QuickBooks experts regarding the QuickBooks pdf component missing issue in Windows 10/11, we have discovered and mentioned the most effective solutions to get rid of this issue effortlessly. Implement the solutions in the given order for the best result.
Solution 1: Update QuickBooks Desktop to the Latest Release
If QuickBooks has detected that a component pdf is missing, you should look to update QuickBooks. Secondly, experts always recommend updating QuickBooks whenever a new release is made available by Intuit. Thus, make sure your QB Desktop version is up-to-date and contains all the latest software improvements. Here are the steps through which you can update QB easily.
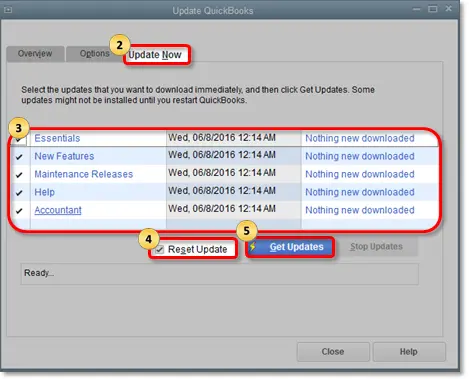
- Launch QuickBooks Desktop, then move to the Help section, click Update QuickBooks Desktop from the drop-down and then select Update Now.
- Further, mark the Reset Update checkbox, then click the Get Updates button, and wait for the download to complete.
- Once the download finishes, restart QuickBooks and click Install Now to install the latest updates.
After QBDT is updated, re-run the software and check if the pdf component is still missing in QuickBooks desktop. If yes, move to the next solution and run the PDF & Print Repair tool.
Solution 2: Run the QuickBooks Print & PDF Repair Tool
If you suspect that the component required for pdf print from QuickBooks is missing, running the QuickBooks Print & PDF Repair tool may significantly help. Here are the detailed steps outlined below to run the tool effortlessly.
Step 1 – Download and Install QuickBooks Tool Hub
The QB Tool Hub comprises various tools and features that help fix common errors and issues within QuickBooks. To download & install this program, follow the steps given below
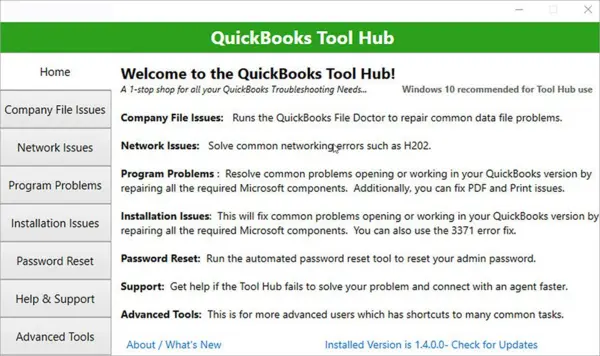
- Exit QuickBooks, then download the latest QB Tool Hub version and save the setup file on the PC in an easily accessible location like the downloads folder or the desktop so that you can easily access it later.
Note: If you already have QB Tool Hub installed on the PC, click the Home tab and look at the bottom to find out what version you have. Ensure that you have the most recent version (1.6.0.5) installed. If not, follow these steps to install the latest version of Tool Hub. - Next, open the QuickBooksToolHub.exe setup file, then go through the on-screen instructions to install and accept the given terms and conditions.
- Lastly, once the installation process ends, double-click the QB Tool Hub icon on the Windows desktop and open it.
Note: If you can’t spot the QB Tool Hub icon on the desktop, manually search for “QuickBooks Tool Hub” in the Windows search panel, then launch the program.
Once QB Tool Hub is successfully installed, move to step 2 and run the QuickBooks PDF & Print Repair tool.
Step 2 – Run the QB PDF & Print Repair Tool
Now, you can use the QuickBooks PDF & Print Repair tool by implementing the steps given below –
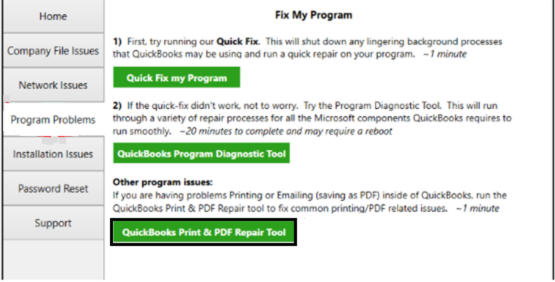
- Launch QB Tool Hub, select the Program Problems tab from the left pane, then click the PDF & Print Repair Tool. Wait for the tool to open, which may take up to a minute.
- Let the tool run and once it stops, try printing, emailing, or saving as a PDF from QuickBooks Desktop again to check if the QuickBooks component required for PDF print is still missing. If yes, move to solution 3 below.
Solution 3: Restart and Reset the Temp Folder Permissions
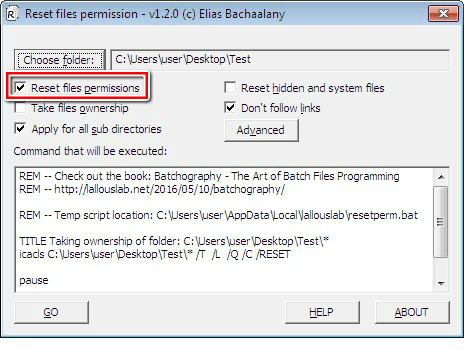
In this section, we’ll learn how to reset the temp folder permissions by following the steps outlined below:
Step 1. Restart the System

The first step is to restart the system and then try again. If the missing pdf component in QuickBooks still goes missing, move to the next step right below.
Step 2: Reset the Temp Folder Permissions
- Press the Windows + R keys on the keyboard and open the Run Command.
- Type in %TEMP% in the search panel of the Run command and hit Enter to continue.
- Right-click an empty area of the temp folder, and select the Properties option.
- Further, select Security and ensure that all user names and groups in Security have Full Control.
- Once the permissions have been set to Full Control, try to save as a PDF again in QuickBooks to check whether the QuickBooks missing PDF component is still missing in QuickBooks.
Remember QuickBooks uses parts of the XPS Document Writer to save as PDF. Therefore, the next step is to confirm whether you can print to your XPS by following the detailed steps below.
- Firstly, open Notepad and type something on it.
- Move to the File menu at the top, then select Print.
- Select XPS Document Writer and click Print again to continue.
- Further, select your Desktop in the save dialog box.
- Lastly, navigate to the desktop and check whether you can view the XPS document you have just printed from the Notepad.
If the QuickBooks missing pdf component issue still persists, move to the next solution.
Solution 4: Reinstall Microsoft XPS Document Writer
In this section, we’ll learn how to reinstall Microsoft XPS Document Writer in Windows 10 / 11 by following the detailed steps outlined below.
In Windows 10
- Press the Windows + R keys together to open the RUN window.
- Type in optional features into the Run command search panel and click OK.
- In the Windows Features window, ensure that Microsoft XPS Document writer is checked. If not, consider checking it.
- Now, hit the Windows Start button and then click the gear-shaped icon above to open Settings.
- Click Apps, then Apps & Features from the left menu, and then click on Manage Optional Features.
- Lastly, click Add a Feature, locate XPS Viewer from the list, and install it to conclude the procedure.
In Windows 11
- Press the Windows Start button, search Optional Features in the search bar of Windows 11 PC, and then click to open it.
- Click the View Features button.
- A “Add an optional feature” window will open; search XPS Viewer in the search bar and once it appears select the check box to its right.
- Lastly, hit Next and add the XPS Viewer to the Windows 11 PC.
Solution 5: Set a New Template for Your Form
QuickBooks allows you to create custom templates for forms. By customizing these templates, you can control how they look, what information to include, and what to exclude. Here is how you can customize the form templates:
- Firstly, choose the type of form you’d like to customize.
- In the form, select the Formatting tab and then Manage Templates.
- Select a template to preview; then select Copy. It’ll create a new template or select OK to edit the template.
- You can use the basic customization window to do the following things:
- Add your logo: If you want your company logo to appear in your form, check the Use logo checkbox. Another key point is that if you want to change your logo, select Select Logo and select the image you want to use.
- Change fonts and colors: You can personalize fonts and colors for certain details used in the form, including company names, labels, and data.
- Change company & transaction information: In this section, you can select the contact information that will appear on the invoice. By selecting Update Information, you can change any of this information.
- If you want to add or remove the items from the header, columns, or footer, select Additional Customization. Also, opt for Layout Designer to move or resize items on the form.
- Finally, hit OK when you’re done.
- Lastly, select Print Preview to view your form and if everything looks good, select Close and then hit OK to conclude.
The next step is to change the template on your transaction and then create your .pdf. Then check whether the QuickBooks pdf component missing issue still persists. Unfortunately, if yes, move to the next solution.
Solution 6: Configure the Antivirus Settings

It must be remembered that misconfigured antivirus settings may block the creation of .xps files. Therefore, checking the settings on your antivirus is of utmost importance to ensure that .xps files aren’t blocked.
How can you configure the antivirus setting? Since many antiviruses are being used, it’s significantly challenging for us to provide the configuration steps for each antivirus. However, you can still help you on how to configure the antivirus you are currently using. The very first thing you can do is visit the official website of your antivirus and look for the configuration steps. The second thing you can do is you can get in touch with the nearest vendor who can help you with this.
Solution 7: Download and Install Adobe Acrobat Reader on Windows
If you haven’t already, download and then Install Adobe Acrobat Reader on Windows. Here are the steps outlined below to do the same.
- Close all versions of Acrobat Reader, then close any browser that is displaying a PDF.
- Move to the Adobe Acrobat Reader download page by clicking here and then select Download Acrobat Reader.
- Hit Save to download the Acrobat Reader installer.
- Click the .exe file for Acrobat Reader when the downloaded file appears at the bottom of the browser window.
- Hit Finish when you see the confirmation message that the installation is complete.
Solution 8: Updating Adobe Reader and Adobe Acrobat Manually
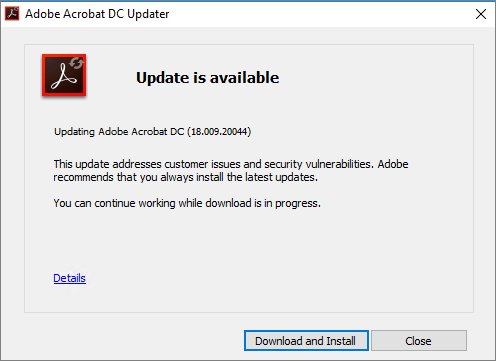
- Open the product and choose Help > About Acrobat or Adobe Reader.
- Then, note the version, and after that close the product.
- In case you do not have the latest version installed, download the needed installer from here.
- Click the installer to download it and once the download is complete, double-click the downloaded file to launch it and then follow on-screen instructions to complete the process.
If the component required for pdf print from QuickBooks is still missing, move to the next solution.
Solution 9: Repair Adobe Reader
If updating Adobe Reader manually doesn’t help fix the QuickBooks pdf component missing issue, repairing it is another alternative. Let’s follow the steps below and repair it effortlessly.
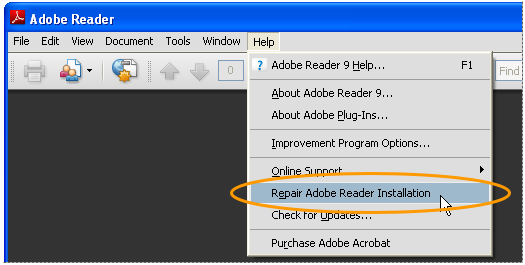
- Close Acrobat/Reader and all open web browser windows; then click the Windows Start button to continue.
- Type in ‘Control Panel’ into the search bar and then tap to open it.
- Select Acrobat or Adobe Reader, then select Uninstall/Change, and then select Next in the Setup dialog box.
- Select Repair, then hit Next, and then select Install.
- Lastly, when done, select Finish to conclude. Afterward, consider restarting the system.
If the QuickBooks pdf component is still missing after repairing the program, move to the next solution.
Solution 10: Rename Qbprint.qbp File Manually
The Qbprint.qbp file is used in QuickBooks to gain valuable insights about printer setup and customization of forms. Let’s rename it by following the steps outlined below and see whether the QuickBooks pdf component missing issue gets resolved or not.
- Open File Explorer by pressing the Windows + E keys simultaneously on the keyboard.
- Locate the QBPrint.qbp file in C:\ProgramData\Intuit\QuickBooks 20XX.
Note: In case you don’t find the file, you will need to display the hidden files and folders. Otherwise, you can also do a manual search in the Windows Search bar to find the file. - Once the QBprint.qbp file is found, right-click it and select Rename.
- Then, add the word ‘old’ to the file name (i.e. QBPrint.qbp.old) and then open QuickBooks Desktop.
- Move to the File menu at the top and choose Printer Setup.
- Select any transaction in the Form Name list and hit OK to continue. This creates a new QBprint.qbp file.
Note: It must be remembered that you need not do this for every transaction. - Finally, try to open and print any transaction.
If the QuickBooks missing pdf component issue still persists in your windows 10 or 11, move to the next solution.
Solution 11: Repair QuickBooks Through the Control Panel
Before you repair QuickBooks using the Control Panel, creating a backup of the company file is essential. Now, let’s follow the steps outlined below and repair QuickBooks.
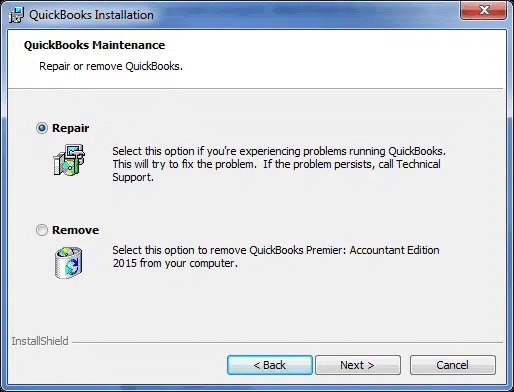
- Close QuickBooks, restart the system, then open the Windows Start menu.
- Type in ‘Control Panel’ into the search bar and then click to open it.
- Select Programs and Features and then select Uninstall a Program.
- Select QuickBooks from the list of programs, and then click Uninstall/Change. This opens the repair window on the screen.
- Select Continue and then hit Next.
- Click Repair, and then hit Next again.7. Lastly, once it’s done, hit Finish to conclude.
- Lastly, once it’s done, hit Finish to conclude.
Now, check whether the QuickBooks missing pdf component issue has been resolved after implementing this solution. If not, move to the next solution.
Solution 12: Enable the Microsoft XPS Document Writer in Windows Settings
- Move to the Windows Start button and press it; type in ‘Control Panel’ in the search bar and then click to open it.
- Click Programs or Uninstall a Program and click Turn Windows features on or off.
- Check the box next to “Microsoft XPS Document Writer” and then hit OK to conclude.
If QuickBooks can’t save as the PDF component is still missing, consider consulting our experts for instant assistance.
However, if you still continue to struggle with QuickBooks desktop missing PDF component issues, you have another alternative to opt for. You can get in touch with our QDM’s experts and seek immediate assistance. They are proficient enough to fix any issues or errors in QuickBooks in no time.
What Triggers Missing PDF Component Issue in QuickBooks Desktop (Updated)
In this section, we have outlined all the root causes that trigger missing PDF component issues in QuickBooks Desktop. Ensure to go through each one of them carefully.
- An outdated version of the Adobe Reader program may cause missing PDF component issues in QuickBooks
- QuickBooks missing PDF component issues may also occur due to a damaged or missing Adobe application
- In case the Microsoft XPS Document Writer is disabled in the Windows settings
- You are running an outdated version of QuickBooks Desktop
Conclusion
We are on the verge of concluding our blog. Hopefully, our efforts to provide the best and most effective troubleshooting solutions for QuickBooks PDF Component Missing issue have come in handy.
FAQ
Why won’t QuickBooks let me save as PDF?
It happens due to a number of reasons, including disabled Microsoft XPS Document Writer, outdated QuickBooks, missing or damaged Adobe Reader application, outdated Adobe Reader program, etc
How do I get the missing pdf file component?
You can try a number of quick fixes outlined below:
Make sure XPS services are enabled.
Make sure to test the XPS Document Writer and print it outside QuickBooks.
Consider adjusting Windows user permissions for the XPS Document Writer.
Install, update, or repair Adobe Reader
Update QuickBooks, etc
Check this blog above for all the fixes in detail.
What issues can you encounter if the QuickBooks PDF component is missing?
Missing PDF components in QuickBooks may prevent you from printing documents and reports. Moreover, you may not be able to save documents and reports as PDFs. Apart from these two issues, you are likely to encounter a number of other inevitable issues.
You May Also Like To Read-

James Richard is a skilled technical writer with 16 years of experience at QDM. His expertise covers data migration, conversion, and desktop errors for QuickBooks. He excels at explaining complex technical topics clearly and simply for readers. Through engaging, informative blog posts, James makes even the most challenging QuickBooks issues feel manageable. With his passion for writing and deep knowledge, he is a trusted resource for anyone seeking clarity on accounting software problems.