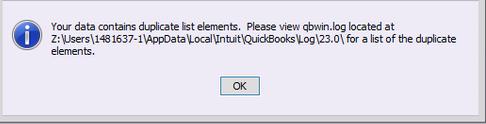
To ensure the safety of crucial financial data, the integrity of the company file must be regularly verified using the Verify Data tool. The Verify Data tool thoroughly analyzes the company file and checks for issues in every section, including list items such as Customer, Account, Class, Employees, Job Type, Name list, etc. QuickBooks error 213 is displayed in the Verify results when there are duplicate entries in the QBWin.log file. The error message you receive indicates where exactly the duplicate list item exists in the accounts list of the data and reads as:
Error 213
Error: Verify Item list. Duplicate name encountered. Name: labor Records 1211 (575) and 113 (576). To fix, edit this element in the list and change its name.
Details: List: ‘Item,’ record name: ‘Labor,’ List: ‘Item,’ record name: ‘Labor (Labor:20RoughIn – Labor).’
Error 213
Error: Verify Name list. Duplicate name encountered. Name: Mighty USA Records 892 (553) and 891 (554). To fix, edit this element in the list and change its name.
Details: List: ‘Name,’ record name: ‘Mighti USA,’ List: ‘Name,’ record name: ‘Mighti USA.’
In this guide, you will find more reasons for QuickBooks Error 213. Duplicate Name Error and the most effective solutions to resolve it quickly.
Practical Solutions to Resolve Error 213 in QuickBooks Desktop
Solution 1 – Run QuickBooks Desktop with Admin Rights
Firstly, ensure you are using QuickBooks Desktop as an admin user. If not, follow the steps below to run QBDT as an administrator –
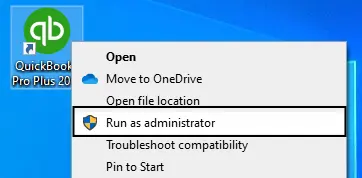
- Exit QuickBooks, right-click the QB Desktop icon, and choose Run as Administrator.
- Enter the admin account’s login credentials to run QuickBooks with admin rights.
If you still encounter QuickBooks error message 213 while verifying the company data, move to the next solution.
Solution 2 – Edit the Inactive Name
As error 213 is a result of an inactive duplicate name, we will review all the lists and edit the inactive names in the following manner –
- Open QuickBooks, move to the Lists menu, and click Item List.
- Further, click the drop-down arrow for the Item tab and choose Show Inactive Items.
- If you find a duplicate name for the item, edit or delete the name.
After editing the duplicate name, rerun the Verify Data tool and check if the error is resolved. If QuickBooks error 213 persists, follow the next troubleshooting solution.
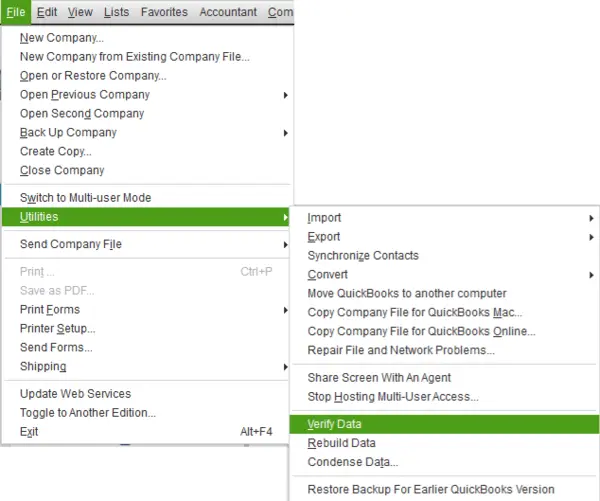
Solution 3 – Use the Verify/Rebuild Data Utility
Another approach to resolving error 213 is to repair the data damage using the Verify and Rebuild Data tool. This tool identifies data integrity issues and fixes them if they are found.
After running the tool, check the status of the QuickBooks rebuild error 213. If the error code persists, move to the next solution to eliminate it.
Solution 4 – Manually Remove Duplicate Entries in the QBWin.log File
If the Verify/Rebuild data tool doesn’t work, you must manually remove the duplicate entries. Use the QBWin.log file to locate and remove the duplicate entries in the following manner –
Step 1 – Find the Duplicate Names
Firstly, you need to locate the duplicate names –
Use the QBWin.Log File
This is how you can use the QBWin.log file to find the duplicate names –
- Launch QuickBooks and press the F2 or Ctrl + 1 keys to access the Product Information window.
- Further, press F3 or Ctrl + 2 to open the Tech Help window and select the Open File tab.
- Now, locate and select QBWin.log and click Open File.
Note: Alternatively, use File Explorer and go to this location: C:\Users\YOUR USER NAME\AppData\Local\Intuit\QuickBooks\log\XX.X\QBWin.log. - Press Ctrl + End to scroll to the bottom of the file, then press Ctrl + F to open the Find window.
- Now, find the word “duplicate” in the log and locate the name, account, customer message, etc.
Use the Primary Name List
To find the duplicate names using the primary name list, go through the following steps –
- Go to the Banking menu, click Write Checks, and select the Pay to the Order Of field.
- Press Ctrl + L to open the Primary Name List, then select the Include Inactive checkbox.
- The checkbox will show active and inactive names, then select the Name heading to alphabetize the names.
- Finally, look for names that have the same spelling to find the duplicates.
Use your Regular List
You can also use your regular list to find the duplicate names in the following manner –
- In QuickBooks, move to the Lists menu and choose the appropriate list.
- To get the Memorized Report List, go to the Reports menu, choose Memorized Reports, and click Memorized Report List.
- Now, click the Name heading to sort the names alphabetically and look for names with the exact spelling.
Once the duplicate names are found, move to the next step to edit the name.
Step 2 – Edit the Duplicate Names
Now, you need to modify the duplicate names by following the instructions below –
- Open the list containing the duplicate name (Customer List, Vendor List, etc.), then double-click the name to edit.
- Change at least a single character of the name, then hit OK to save the modifications.
- Repeat the above two steps to rename all the duplicate names mentioned in the QBWin.log file.
- Once done, re-run the Verify Data tool to check for more duplicate names.
Now, decide if you want to keep the modified names separated or if you want to delete them. You might want to delete the names if you don’t have any transactions associated with them. If not, you can merge these names.
Once the process ends, rerun QuickBooks and check if the error is resolved. However, if QuickBooks error code 213 persists, follow the next troubleshooting solution.
Solution 5 – Download and Apply the Patch File
You can download and apply the patch file if none of the above solutions work. Follow the steps below to apply the patch file and fix this QB error –
- Log in as an administrator to your PC, then download the Patch file from HERE.
- Save this file to an accessible location on your PC, extract it, and ensure all the details are correct.
- Double-click on the extracted file. An automated closing command will pop up if the file closes without issues.
Now, rerun the program and check the error status. If QuickBooks error 213 persists, follow the next solution to fix it.
Solution 6 – Repair QuickBooks Desktop
Sometimes, general issues with your QuickBooks Desktop program can also lead to this error. To fix it, you must repair QuickBooks by using the QB Tool Hub in the following manner –
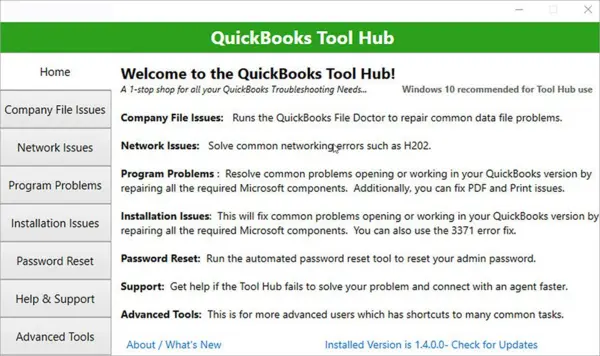
- First, download and install the most recent QuickBooks Tool Hub version (1.6.0.5) and launch it on your PC.
- Next, go to the Program Problems section and choose the Quick Fix My Program tool to repair program issues. Once the tool stops, check the status of QuickBooks Desktop error 213.
- If this error code persists, use the QuickBooks Install Diagnostic tool from the Installation Issues tab to run a QB installation repair.
After the tool stops running, rerun QuickBooks and check if the error is resolved. If you still encounter the 213 error, follow the next solution.
Solution 7 – Run the System File Checker Utility
Since Windows registry issues can be a trigger for the 213 error, you can use the System File Checker in the following manner to fix it –
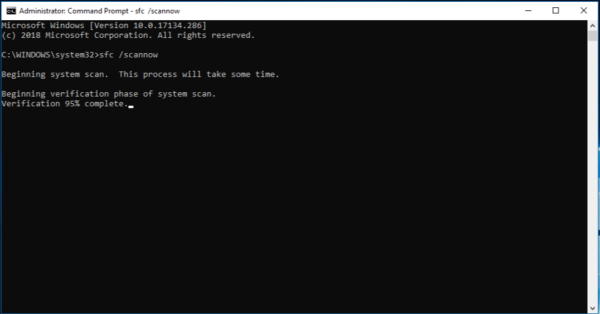
- First, install the latest Windows updates. Then, go to the search box in the taskbar and type “command prompt.”
- Right-click or press and hold Command Prompt (Desktop app) from the results list, then select Run as Administrator and click Yes.
- Further, type “DISM.exe /Online /Cleanup-image /Restorehealth” (keep space before each “/”), and click Enter.
- Once you see the “The operation completed successfully” message emerge on your screen, type “sfc/scannow” (note the space) and hit Enter.
- After the “Verification 100% complete” message pops up, type Exit and press Enter.
Once done, rerun QuickBooks and check if the error code is removed. If QuickBooks Pro error 213 keeps appearing, follow the next solution.
Solution 8 – Reinstall the Windows OS
If you are still experiencing the error, try reinstalling your Windows OS. A damaged operating system can cause issues while using QuickBooks; thus, installing a new Windows version might help. Before reinstalling, back up QuickBooks on an external storage device, then follow the steps below –
Note: Follow these steps only if you are confident in making the changes; otherwise, contact IT help for assistance.
- Firstly, download the Windows 10 installation media in a separate 8 GB-sized external storage device with ample space.
Download Windows 10 from Here
Download Windows 11 from Here - Open the tool and select Yes when asked if you’d like to allow the tool to make changes.
- When the Windows 10 Setup Guide appears, accept the terms and agreements, then select Create Installation Media (USB flash drive, DVD, or ISO file) from another PC.
- Select Next, choose a language, edition, and architecture (64-bit or 32-bit), and follow the steps to create installation media.
- Click Finish and use the installation media to perform a clean installation.
- Connect the installation media, select the Windows Start button, and click Settings.
- Select Update & Security, click Recovery, then open Recovery Settings.
- Under Advanced Startup, select Restart now, and click Use a Device.
- Now, choose the device that corresponds to your external storage device.
Note: If the Use a Device option is unavailable, visit your device manufacturer’s website to learn how to boot from a USB flash drive. - When the first Windows screen opens, choose the most suitable option and click Next.
- Select Install Now, check the I accept box, and select Next.
- Choose Custom: Install Windows only (advanced), and your device will display a list of drives and partitions.
- If multiple disks are shown, delete all partitions from the disk where you want to install Windows.
- Next, highlight each drive/partition in the list, click Delete, and when the Windows Setup notification pops up, select OK.
- Complete Steps 12, 13, and 14 for every drive except the one with Unallocated Space, and select Next.
- The Windows setup screen will now display “Installing Windows.” After the process ends, your system will restart.
- If the initial Windows setup screen asks you to choose your language/keyboard layout, remove the external storage drive and hit OK.
- Restart your system, and once the installation is complete, select the preferences and settings as preferred.
After reinstalling the Windows OS, rerun QuickBooks to check if the error code is eliminated.
Reasons for Intuit QB Error 213
Before you try troubleshooting error 213 in QuickBooks, check out the reasons behind it to avoid getting it in the future –
- You are not using QuickBooks Desktop as an admin user, which can limit verify and rebuild operations.
- There are duplicate names on the list that have been made inactive.
- Your PC may have Windows registry issues, which can be another reason for the QuickBooks error message code 213.
- There are duplicate entries in the QBWlog.in file in QuickBooks Desktop.
- Your company file might have data damage or corruption.
- Your QuickBooks Desktop program might be damaged or have installation problems.
- Your Windows OS might be damaged and needs to be reinstalled.
These are the leading causes of QB error code 213. Now, let’s learn how to eliminate it in the next section.
Conclusion
The solutions mentioned in this detailed guide will help you resolve QuickBooks error 213 with ease.
FAQs
What are the possible symptoms of QuickBooks error 213?
When you encounter QuickBooks error code 213, you might notice the following signs and symptoms –
-The Rebuild Data tool might be unsuccessful in fixing the data damage in the company file.
-You won’t be able to switch QuickBooks from single-user to multi-user mode.
-Your computer might crash or shut down abruptly.
-You might be unable to access your QB company file after running the Verify Data tool.
-QuickBooks might stop responding, or some tabs might grey out.
Is it necessary to back up your QB company file before fixing error 213 in QuickBooks?
Before troubleshooting QuickBooks error 213, it is recommended that you back up your company file. This prevents accidental data loss while fixing the error or resolving the company file damage.
How can I find the QBWin.log file in QuickBooks for Mac?
To find the QBWin.log file in QuickBooks Desktop for Mac, follow the steps below –
-Select the File menu, click Close Company, then hold the Command + 1 keys to get the Product Information tab.
-Select Logging, click Collect All Logs, and find the zip file on your desktop.
-Finally, double-click it to extract the files and find the QuickBooks log files inside the folder.
You May Also Read-
Resolve Common QuickBooks Issues Using QuickBooks Tool Hub
Fixing QuickBooks Error 1903: Updated Practical Solutions
Easy & Effective Solutions to Fix QuickBooks Error 15101
QuickBooks Hosting Mode is Off: Know How to Enable It Again
Resolve QuickBooks Error QBWC1085 Caused by the Log File

James Richard is a skilled technical writer with 16 years of experience at QDM. His expertise covers data migration, conversion, and desktop errors for QuickBooks. He excels at explaining complex technical topics clearly and simply for readers. Through engaging, informative blog posts, James makes even the most challenging QuickBooks issues feel manageable. With his passion for writing and deep knowledge, he is a trusted resource for anyone seeking clarity on accounting software problems.