
While using QuickBooks Online to perform your important accounting and business tasks, you might encounter QB website not loading, having missing pages, certain tasks not working, and other similar issues. This is generally caused by the QB cache and cookies stored in your web browser. This can be extremely frustrating, as it can halt your work progress and business tasks. Therefore, it becomes important to clear QuickBooks cache and Intuit specific cookies. In this blog, we’ll learn how to clear cache in QuickBooks Online in the browser of your choice with guided steps.
Clear QuickBooks Cache and Intuit Specific Cookies – An Overview
| Clear QuickBooks cache and cookies | Piled up cache and cookies in your browser can cause your QBO website to not work properly. This can hamper your accounting and bookkeeping processes. Therefore, it becomes important to clear QuickBooks cache and Intuit cookies. |
| Steps for the online website | Steps vary depending on the browser you use, but the base outline is going to the third-party cookies section, searching for Intuit, and clearing them. |
| Steps for the Android app | Steps for the Android app also depend on the skin, but the outline is to go to app settings, followed by Storage & Cache, and delete the cache. |
How to Clear QuickBooks Cache and Intuit Cookies? Detailed Steps
You can follow the steps given below to clear QuickBooks cache and Intuit specific cookies in the web browser you use.
Google Chrome
- Open the Google Chrome app
- Press the three dots in the top right corner
- Click on the Settings option
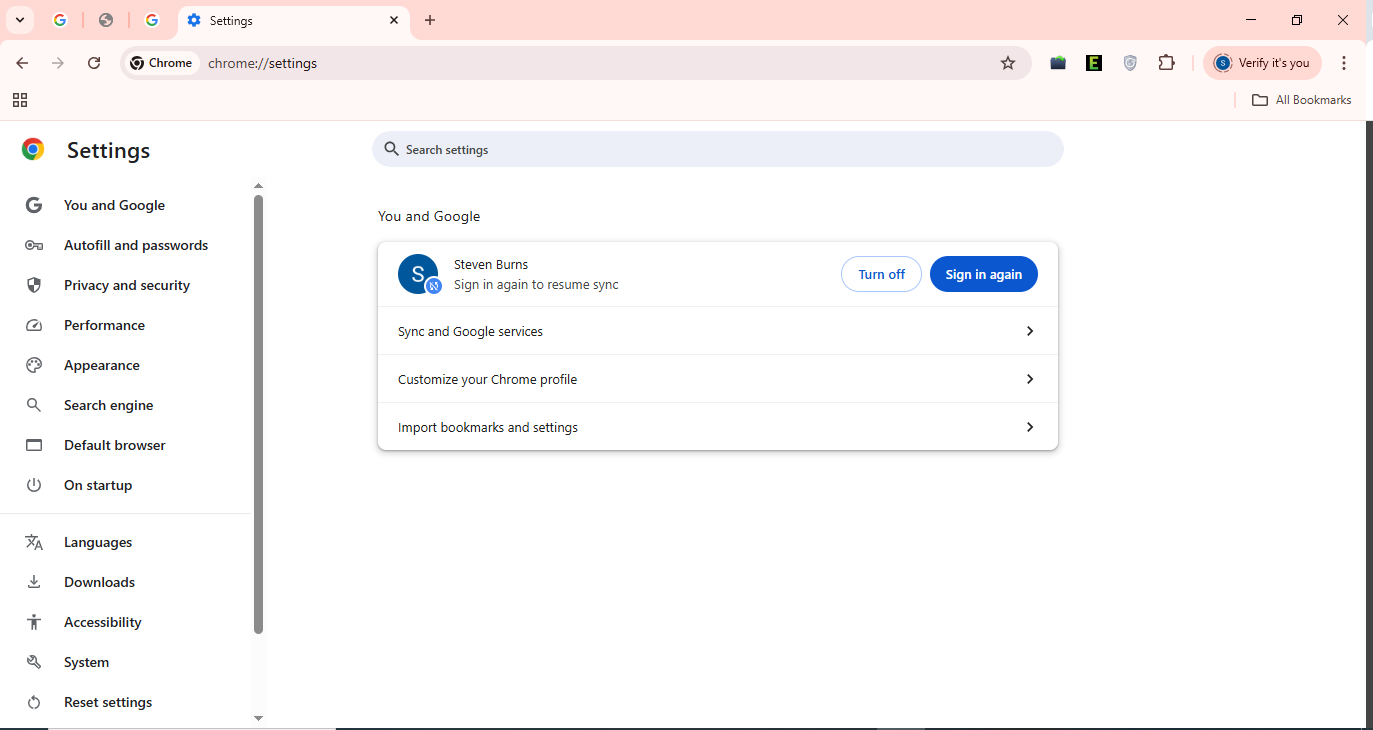
- Navigate to the Privacy and Security tab
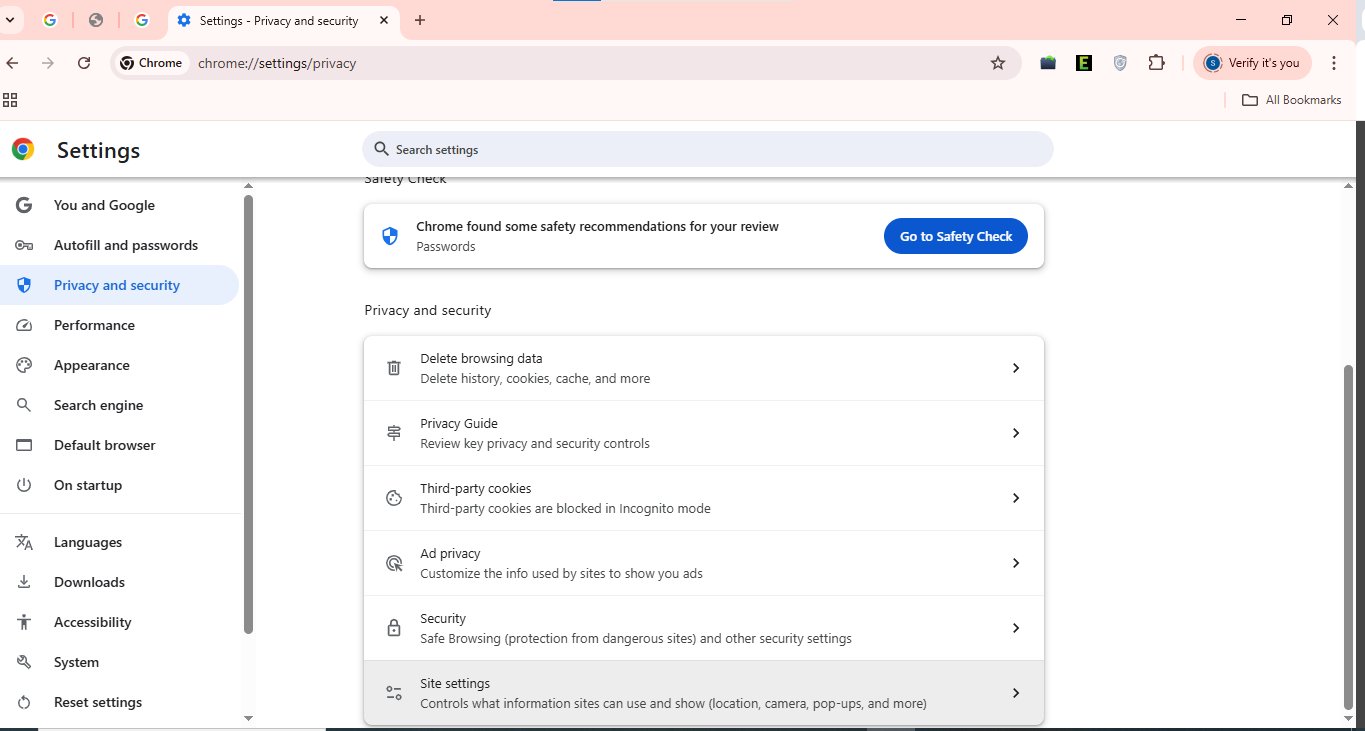
- Then, select the Third-party cookies option
- Press the See all site data and permissions option
- Then, browse to the search bar
- Located on the right of Third-party cookies
- Now, Type in Intuit and hit Enter
- Lastly, select the Remove All option
Microsoft Edge
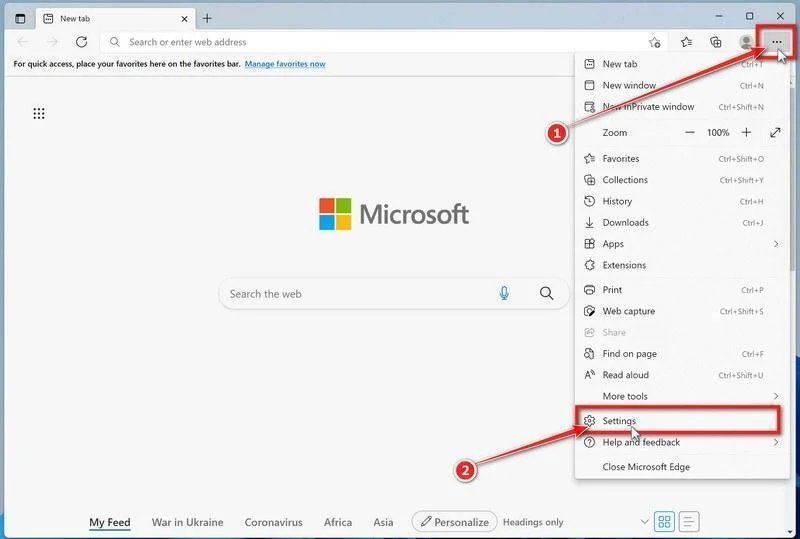
- Open the Microsoft Edge browser
- Then, click on the Settings and More option
- Or else, you can also press Alt + F on your keyboard
- Now, select the Settings option
- Next, you should navigate to the Privacy, search, and services tab

- Proceed by clicking on Cookies
- Then, just press the See all cookies and site data option
- Type in Intuit in the search bar
- Continue by pressing the Enter key
- Now hit Remove all shown
- Lastly, click on the Clear option
Safari Mac
- Open the Safari browser
- Browse to the Preferences option
- Then, proceed to navigate to the Privacy section
- Click on the Manage Website Data option
- Type Intuit in the search box
- Press Enter
- Finally, click on the Remove All option
Mozilla Firefox
- Double-click on the Mozilla Firefox application icon
- This would then open the Firefox application
- Now, proceed to press the three lines in the top right corner
- Below the Close (X) option
- Then, click on the Settings option
- Now, proceed to click on Privacy & Security
- Then, navigate to the Cookies and Site Data option
- Next, open the Manage Data window
- Go to the Search Websites bar and type Intuit
- Hit the Enter key
- Choose the Remove All Shown option
- Lastly, press Save Changes
Safari for iPhone and iPad
- Go to the Settings option on your iPhone/iPad
- Then, tap on Apps
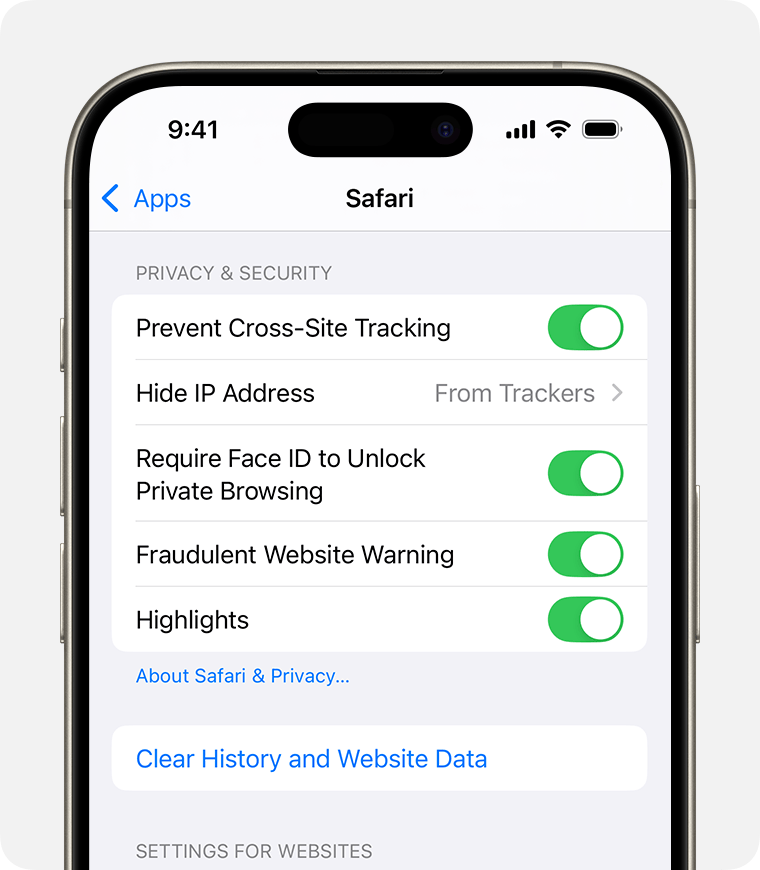
- Now, select Safari from the list of apps
- Choose the Advanced option
- Tap on Website Data
- Now, in the search bar, type Intuit
- Press Edit on the bottom right corner
- Press the Red button beside the Intuit results you see to clear them
Opera
- Open the Opera browser
- Now, click on the three bars below the minimize option
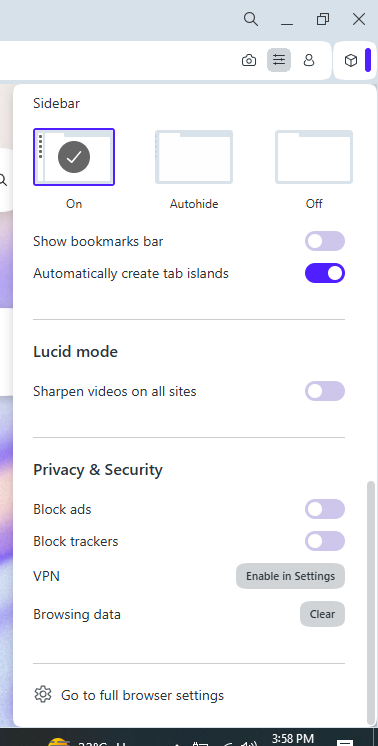
- Then, click on the Privacy and Security tab
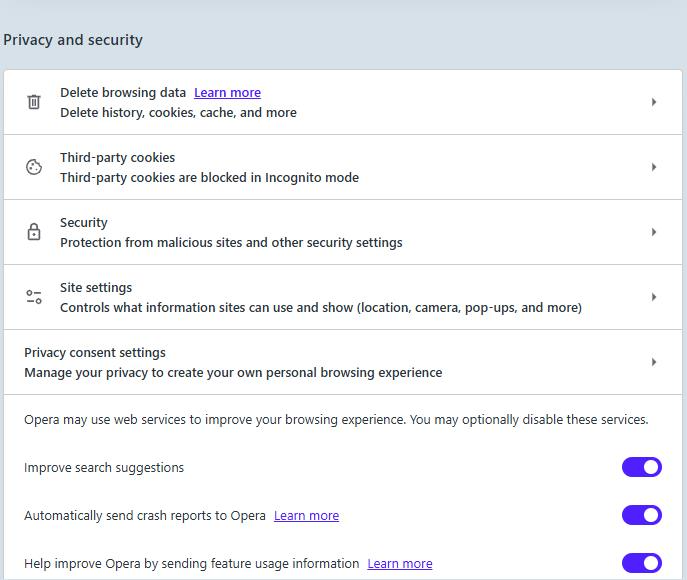
- Now, press the Third-party cookies option
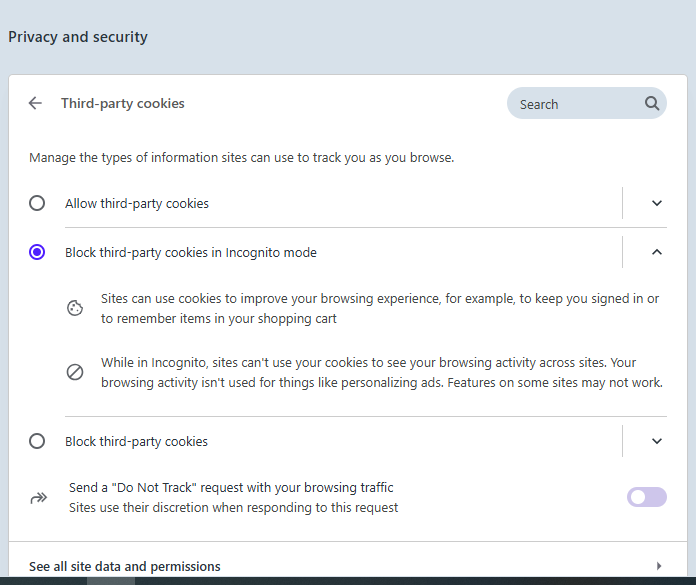
- Click on See all site data and permissions
- In the search bar, type Intuit
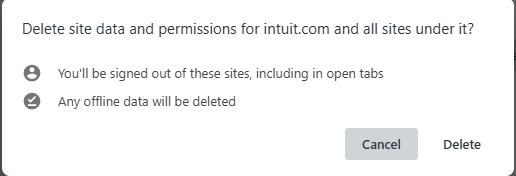
- Click on the bin icon beside intuit.com
- Press Delete to remove the cookies
Brave Browser
- Open the Brave browser
- Click on the menu in the top right corner
- Press the Settings option
- Now, go to Additional settings
- Select Privacy and Security
- Click Site and shields settings
- Press Cookies and site data
- Now, hit View permissions and data stored across sites
- Now, go to the search bar in the top right corner
- Type Intuit
- Finally, press the Remove all shown button
How to Clear Cache from the QuickBooks Online Application
To clear the QuickBooks Online app cache on your Android, you can follow these steps:
- Open Settings on your phone
- Move to Apps (The steps from now on would vary depending on the Android skin you use)
- Now, choose the QuickBooks Online application
- Tap Storage & Cache
- Lastly, select Clear cache
This would eliminate most of the problems you were facing with the QB Online mobile app.
Cache and Cookies in Your Browser – A Quick Explanation
Cache and cookies exist to make your browsing experience much smoother and hassle-free. Cookies are the files created by the website you visit to make your online experience easier, as they save browsing data. On the other hand, the cache is used to remember parts of specific web pages, like images and videos, which then helps the website load faster the next time you visit it. But these caches and cookies can pile up, ultimately causing the website to not load. So let’s discuss about that in the next section.
QuickBooks Cookies and Cache in Your Web Browser
Intuit cookies and cache function in the same way as mentioned above. But sometimes the QB cookies can pile up and make the website hard to work with. Hence why it is necessary to clear QuickBooks cache and Intuit-specific cookies from the web browser you use to perform your accounting and bookkeeping tasks. Remember to note down your password and user ID before you clear the cookies and cache, as it can erase the auto-fill information. So now, let’s proceed with the steps to clear cache QuickBooks Online in different web browsers.
Conclusion
In this blog, we discussed how the Intuit cookies and cache can affect the performance of your QB Online website in a negative way. Additionally, we provided you with the steps you can perform to clear QuickBooks cache and Intuit specific cookies according to the web browser you might be using.
FAQs
Why won’t QuickBooks load in Chrome?
There can be several factors leading to your QuickBooks Online website to not load in Chrome. Stored browser cache and cookies, compatibility issues, unstable network connection, or using an outdated Google Chrome version can all result in QBO not loading. Hence, it’s important to rectify all these triggers as soon as possible. The steps to clear cookies and cache are given above.
What is the quick key to clear all cache and cookies?
The quick key to delete all cache and cookies from Google Chrome, MS Edge, and Safari is Ctrl (Command for Apple) + Shift + Delete.
Will clearing the cache and cookies delete my QuickBooks data?
No, clearing cache and cookies won’t delete your QuickBooks data; it will only delete the site data stored on your browser.
What problems can clearing the cache and cookies fix in QuickBooks?
Clearing the QuickBooks cache and cookies from your web browser can fix various issues, like the QB Online website not opening, having missing pages, loading slowly, having empty or blank spaces, your payroll not running, etc.
Why should I clear my QuickBooks cache?
You should clear your QuickBooks cache and cookies from time to time to ensure that they are not piling up in your browser, which can cause your QB Online website to function properly and hamper your workflow and important business processes.
What are Intuit-specific cookies?
Intuit-specific cookies are just like any other cookies, meaning they are designed to store website data and reuse it when you revisit the website again. This saves both data and time. However, sometimes, cookies can pile up and cause QB Online to not function properly.
How to clear Intuit-specific cookies?
The steps to clear Intuit-specific cookies can vary depending on the web browser you use. As Intuit recommends Google Chrome as the default browser for running QBO, we’ll list the steps to clear cookies in Chrome. First, open the Chrome browser, and click on the three dots. Then, proceed to click on Settings, followed by Privacy and security. Next, select Third-party cookies and press See all site data and permissions. Lastly, type Intuit in the search bar and click on Remove All.
You May Read Also-
Resolve QuickBooks Unable to Export to Excel in Easy Steps
Resolve Common QuickBooks Issues Using QuickBooks Tool Hub
QuickBooks Migration Tool: Guide for Migration (Updated 2025)
An Expert Guide to Fix QuickBooks Migration Error 1009
Migrate from QuickBooks Online to Desktop: QB Migration

James Richard is a skilled technical writer with 16 years of experience at QDM. His expertise covers data migration, conversion, and desktop errors for QuickBooks. He excels at explaining complex technical topics clearly and simply for readers. Through engaging, informative blog posts, James makes even the most challenging QuickBooks issues feel manageable. With his passion for writing and deep knowledge, he is a trusted resource for anyone seeking clarity on accounting software problems.