
Out of many reasons, one that makes QuickBooks a dynamic and cutting-edge software is its ability to host the company files in a network. Multi-user mode allows users to access the company file remotely while it is stored somewhere else on a different computer, usually the server. However, you may sometimes encounter challenges while working on the company file in multi-user mode.
In this blog, we have discussed how to enable hosting if QuickBooks Hosting Mode is off. Apart from that, you’ll also get additional troubleshooting solutions to counter multi-user network issues in QuickBooks. Let’s delve into the blog and resume your financial operations effortlessly.
Understanding How Multi-user Mode Works
Before understanding how the multi-user network works in QuickBooks, we must become familiar with terms such as ‘Server’ and ‘Workstation.’ A server is a computer that hosts the company file using the QuickBooks Database Server Manager. On the other hand, a workstation(s) is a computer that is connected to the server to access the company file remotely.
When it comes to the server, a few points must be kept in mind to avoid issues or errors. Firstly, hosting must be turned on since the server hosts the company file. If hosting is disabled, you will likely encounter errors or technical issues, preventing you from working in multi-user mode. Secondly, QuickBooks Database Server Manager must be installed on the server to host the company file. Lastly, there must be only one server hosting the company file.
On the other hand, hosting must be turned off on the workstations. As discussed above, only one server must host the company file. Irrespective of how many workstations are connected to the server, hosting must be disabled on all workstations. If any workstation has hosting enabled, you may encounter multi-user mode errors such as QuickBooks errors H101, H202, H303, H505, etc.
How to Turn On Hosting Mode in QuickBooks?
The steps to turn on hosting mode in QuickBooks are pretty straightforward. If QuickBooks Hosting Mode is off, follow these steps to enable it.
- Begin by opening QuickBooks Desktop and then go to the File menu in the top menu bar.
- Further, hover over Utilities and select Host Multi-User Access from the drop-down.
- Lastly, click Yes to confirm.
This enables multi-user mode on the server computer. However, despite having hosting mode enabled on the server computer, you may encounter errors or issues in QBDT. Below, we have outlined a series of solutions to counter multi-user mode issues.
Proven Solution to Try if QuickBooks Hosting Mode is off
Let’s look at the solutions outlined below to counter multi-user network issues in QuickBooks desktop.
Solution 1. Ping Your Server from a Workstation
If QuickBooks Hosting Mode is off, ping your server from each workstation that is facing issues. To begin, turn on Network Discovery on your server computer and any workstations with issues:
- Click the Windows Start menu on your server and workstations.
- Enter “Network” into the search bar and open Network and Sharing Center.
- Select Change advanced sharing settings and ensure Turn on Network Discovery is selected in the Network Discovery and File and Printer Sharing sections.
The next step is to get your server name from your server:
- Open the Windows Start menu on your server computer again.
- Enter “Run” into the search panel and open Run Window.
- Enter “CMD” into the Run window, then hit Enter.
- Enter “ipconfig/all” into the CMD window, then hit Enter.
- Further, find the Host Name in the Windows IP Configuration section. Your server name should be on the right.
- Note down the hostname, or copy it to a Word Document so you can access it later when required.
The next step is to return to your workstation to test the server. If these steps become complex, you may seek further assistance from an IT professional.
- Begin by clicking the Windows Start menu on a workstation.
- Further, enter “Run” into the search bar and open the Run window.
- Furthermore, enter “CMD” into the Run window, and then hit Enter.
- Next, enter “ping [your server name],” and then hit Enter. Remember not to include the brackets around your server name.
- Repeat these steps for each workstation that is facing the issue.
If you get a reply for each packet with no loss, it simply means your server is working fine. However, if there’s packet loss or a prolonged reply, reach out to an IT professional for further assistance with your network.
If this doesn’t help while hosting QuickBooks on a server, move to the next solution.
Solution 2. Check the Services on the Server
If QuickBooks hosting mode is off, ensure QuickBooks services are running on your server computer. Follow the steps below to check QuickBooksDBXX. Then, repeat the same steps for QBCFMonitorService.
- Begin by opening the Windows Start Menu on your server computer.
- Type in “Run” into the search panel and open the Run window.
- Type in “services.msc” into the Run window, then hit Enter to continue.
- Find and double-click QuickBooksDBXX on the list, with XX denoting your version of QuickBooks plus 10. For instance, QuickBooks 2023 is QuickBooksDB33.
- Select Automatic for the Startup Type and ensure the Service status is either Running or Started. If it’s neither, choose Start to continue further.
- Further, select the Recovery tab and then Restart the Service from each dropdown menu: First, Second, and Subsequent failures.
- Lastly, select Apply and then hit OK to save the changes. Also, repeat the above steps for QBCFMonitorService.
When finished, open QuickBooks on each workstation, move to the File menu, and select Switch to Multi-user Mode. If everything opens correctly, the issue is fixed. However, if you still encounter the same issue, move on to the next solution.
Solution 3. Repair QuickBooks Using Tool Hub’s Utilities
Sometimes, partial/incomplete installation of QuickBooks or internal issues in QuickBooks may cause severe issues, highly impacting user experience. In such a scenario, you must look to repair QuickBooks using Tool Hub’s utilities. So, if QuickBooks hosting mode is off, consider trying this solution by implementing the steps below.
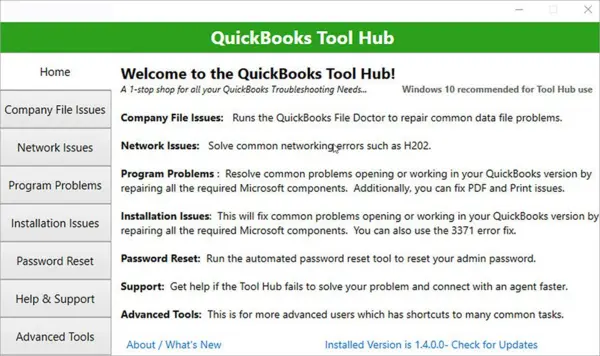
- Begin by downloading and installing QuickBooks Tool Hub on the system to access the repair tools.
- The next step is to run the Quick Fix My Program tool from QuickBooks Tool Hub.
- If the Quick Fix My Program tool fails to fix QuickBooks hosting issues, run the QuickBooks Program Diagnostic tool.
- Unfortunately, if both tools are ineffective, run the QuickBooks Install Diagnostic tool to fix common install issues.
If you find QuickBooks Hosting Mode is off despite repairing QuickBooks, move on to the next solution.
Solution 4. Run the QuickBooks Database Server Manager on Your Server
Network errors are commonly encountered while working in a multi-user environment. However, you can use QuickBooks Tool Hub as a countermeasure to resolve network issues effortlessly. Tool Hub contains a number of tools to resolve common QB issues. First, Let’s download and install Tool Hub and then run the QuickBooks Database Server Manager to get past the multi-user issues.
- Firstly, open QuickBooks Tools Hub and select Network Issues.
- Further, select QuickBooks Database Server Manager to proceed. Remember, if QuickBooks isn’t on your server, you will be prompted to install it.
- Furthermore, in the QuickBooks Database Server Manager, select Start Scan if you see your company file folder(s). However, if you don’t, Browse to the location of your company file and then choose Start Scan.
- QuickBooks Database Server Manager automatically repairs your firewall permissions. When the scan finishes, hit the Close option.
- Now, open QuickBooks on each workstation where you encounter issues. Select File, then select Switch to Multi-user Mode. If you use your server computer as a workstation, consider checking it as well to avoid any further issues.
If QuickBooks Database Server Manager fails to resolve the issue, try running the QuickBooks File Doctor tool and check if the hosting mode is still off in QuickBooks. If yes, proceed to the solution below.
Solution 5. Configure Firewall and Internet Security Settings for QuickBooks Desktop
If both the QuickBooks Database Server Manager and QuickBooks File Doctor tool fail to resolve the issues while QuickBooks is hosting multi-user access. In that scenario, consider configuring firewall and internet security settings for QuickBooks Desktop and checking again whether or not QuickBooks hosting mode is off.
Solution 6. Set up Folder and Windows Access Permissions to Share Company Files
In this section, we’ll verify whether or not the permissions are set correctly. Let’s follow the comprehensive steps below to do so.
- Begin by opening the Windows Start menu and then opening File Explorer.
- Further, right-click the folder with the company file and then select Properties.
- On the Security tab, select Advanced, then select QBDataServiceUserXX, and then select Edit.
- Set the following settings to Allowed to proceed.
- Traverse Folder/Execute File
- List Folder/Read Data
- Read Attributes
- Read Extended Attributes
- Create Files/Write Data
- Create Folders/Append Data
- Write Attributes
- Write Extended Attributes
- Read Permissions
Let’s say your permissions aren’t set correctly. Follow the steps outlined below to change the permissions.
- Firstly, right-click the folder with the company file and then select Properties.
- Select Security, then choose Edit.
- Further, select QBDataServiceUserXX, select Full Control, and then Allow.
- Lastly, select Apply, then hit OK.
Change Folder Permissions
In case you need to adjust folder permissions, follow the detailed steps outlined below.
- First, open the Windows Start menu and then File Explorer.
- Find and right-click the folders outlined below:
- C:\Program Data\Intuit\Entitlement Client\v8
- C:\Program Data\Intuit\Entitlement Client\v6.0
- C:\Program Data\Intuit\Entitlement Client\v5
- C:\Program Data\Intuit\Entitlement Client\v3
- C:\Program Data\Intuit\Entitlement Client
- C:\Program Data\Intuit\QuickBooks Enterprise Solutions X.0 (X = version) or C:\Program Data\Intuit\QuickBooks 20XX (XX = year)
- C:\Program Data\COMMON FILES\INTUIT
- C:\Program Data\COMMON FILES\INTUIT\QUICKBOOKS
- C:\Users\Public\Public Documents\Intuit\QuickBooks\FAMXX (XX = year)
- C:\Users\Public\Public Documents\Intuit\QuickBooks\Company Files
- C:\Users\Public\Public Documents\Intuit\QuickBooks\Sample Company Files\QuickBooks Enterprise Solutions X.0 (X = version) or C:\Users\Public\Public Documents\Intuit\QuickBooks\Sample Company Files\QuickBooks 20XX (XX = year)
Consider performing these steps for any folder listed above. However, you may not have all these folders, as some are specific to certain versions of QuickBooks Desktop.
- Firstly, right-click the folder and select Properties.
- Further, on the Security tab, select Everyone.
Note: In case Everyone is not listed in the Group or User Name checkbox, select Add, type in Everyone, and then hit OK. - Lastly, select Full Control, then select Apply, and hit OK.
Set Windows Access Permissions to Share Company Files
First and foremost, ensure that QuickBooks has the right level of access to prevent future issues while working with your company files over the multi-user network.
- Open the Windows Start menu and then access File Explorer.
- Further, locate and right-click the folder with the company files.
- Furthermore, select Properties, then Sharing, and then Share Add.
- Next, select the corresponding QBDataServiceUserXX for your version.
- Lastly, set the permission level of both users to Full Control and select Share to conclude.
Frequently Asked Questions
Does QuickBooks Database Server Manager support Network Attached Storage?
No! QuickBooks Database Server Manager doesn’t support devices like Network Attached Storage (NAS).
Can I host my own network?
Yes, you can host your own network using the following servers:
-Windows Server 2019, Standard and Essentials
-Windows Server 2016, Standard and Essentials
-Windows Server 2012 R2, Standard and Essentials
-Windows Server 2012, Standard and Essentials
What are the ways to set up QuickBooks Database Server Manager?
You can easily set up QuickBooks Database Server Manager in two ways.
-The Full Program option
-The Server Only option
Why is QuickBooks so slow in multi-user mode?
Multiple issues, such as network issues, update issues, internal issues, etc, negatively impact the performance of QuickBooks, making it work slowly in any network.
You May Also Read-
An Easy Guide to Fix QuickBooks Time Error Code 10000
Migrate from QuickBooks Online to Desktop: QB Migration
Fix QuickBooks Compile Error in Hidden Module Instantly
QuickBooks Error 557 Eliminated Using Best Techniques
How to Resolve Delivery Server Down in QuickBooks Issue Easily

James Richard is a skilled technical writer with 16 years of experience at QuickBooks Data Migration. His expertise covers data migration, conversion, and desktop errors for QuickBooks. He excels at explaining complex technical topics clearly and simply for readers. Through engaging, informative blog posts, James makes even the most challenging QuickBooks issues feel manageable. With his passion for writing and deep knowledge, he is a trusted resource for anyone seeking clarity on accounting software problems.