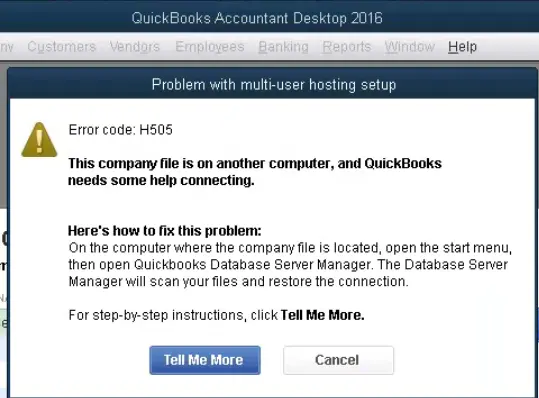
QuickBooks Error H505 shows up when having any issues accessing company files that are stored on a different computer in a multi-user environment. A communication breakdown between the workstation and the server hosting the company file can be the reason. QuickBooks error H505 is a network issue and belongs to the H series error. It shows up on the screen with a warning message stating:
| Error Code: H505 Error Description: This company file is on another computer, and QuickBooks needs some help connecting. |
What are the solutions to fix QuickBooks Error Code H505?
If you wanna fix QuickBooks error code H505, follow the given below solutions and their steps:
Solution 1: Configure the Windows host file
Apply the given steps to remove the error H505 in QuickBooks Desktop:
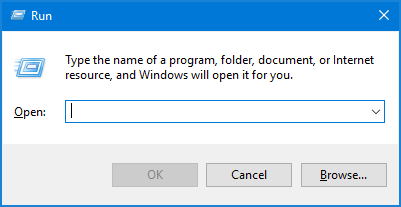
- Open the Run window by pressing the Windows + R.
- Then, type cmd and tap Enter to reach the command prompt window.
- Now, type the command ipconfig/all and Enter.
- The hostname and IP address should be noted somewhere accessible, and these steps should be repeated for the system with the multi-user setup.
Then, configure the Windows host file as given below:
- Shut QuickBooks and click on the Start menu.
- Navigate to This PC or My Computer and follow the paths: “C:\Windows \ System32 \ Drivers\ Etc OR C:\Windows \ Syswow64\ Drivers\Etc.”
- If the Windows folder isn’t available on the PC, try finding it by unhiding the hidden folders.
- Click on the View tab and navigate to the hidden items option to check the folders.
- Select the host file and open it via Notepad.
- Then, enter the IP address and computer name and use the Tab key at the place of the space bar while entering these details and putting a space between the information.
- Save all these changes to use QB in multi-user mode.
Solution 2: Check the Services on the Server
Check if the QBCFMonitorService and QBDBXX services are working correctly as follows:
- Open the Run window from either the Start menu or through the shortcut ‘Windows + R’ keys.
- Then, type and enter the command services.msc here.
- Double-click QuickBooksDBXX from the list and choose Automatic for the Startup type.
- See if the status is Running or Started.
- Tap on Start and then the Recovery tab.
- Choose to restart the services from the drop-down menu for First, Second, and Subsequent failure.
- Select Apply and then OK to get the changes.
- Then, repeat it for QBCFMonitor services.
Solution 3: Set up the Security and Firewall Settings
Configure restrictive firewall settings to remove the error H505 in QuickBooks. Below are the steps to add a firewall port exception to QB:
- Click the Windows icon to open the Start menu and search for Windows Firewall.
- Launch Windows Firewall and select Advanced Settings.
- Now, Right-click on Inbound Rules and follow the same steps except change Inbound to Outbound Rules. Once done, then click on New Rule.
- Click on port and then Next.
- Choose TCP while correcting the H505 QuickBooks desktop error.
- Mention the specific ports required for your QB year version in the Specific Local Ports field:
- QuickBooks Desktop 2020 and later have 8019 XXXXX ports.
- QuickBooks Desktop 2019 contains 8019 XXXXX ports.
- QuickBooks Desktop 2018 follows 8019, 56728, 55378-55382 ports.
- QuickBooks Desktop 2017 has 8019, 56727, 55373-55377 ports.
- Then, click on Next after entering the Port number.
- Select Allow the Connection option and move Next.
- Checkmark all the profiles if the prompt appears and click on Next.
- Make a rule and give a name like “QBPorts(year).”
Repeat these steps for Outbound Rules, then switch to multi-user mode and check if you still get the H505 error in QuickBooks:
Then, create Windows firewall exceptions for QuickBooks Desktop:
- Click on the Start menu icon, type Windows Firewall, and open the Firewall window.
- Choose Advanced Settings by right-clicking Inbound Rules.
- Select New Rule.
- Mark Program, then Next.
- Choose the This Program Path option and Browse.
- Find the executable field necessary to resolve error code H505 QuickBooks 2024 from the table below and click Next.
- Click on Allow the Connection > Next.
- Check all the profiles are marked when prompted, then tap Next.
- Make a rule and name it as given: “QBFirewallException(name.exe).”
- Do repeat all the steps for Outbound Rules.
| Executable files (.exe) | Location |
| OnlineBackup.exe | C:\Program Files\QuickBooks Online Backup |
| QBCFMonitorService.exe | C:\Program Files\Common Files\Intuit\QuickBooks |
| DBManagerExe.exe | C:\Program Files\Intuit\QUICKBOOKS YEAR |
| FileManagement.exe | C:\Program Files\Common Files\Intuit\QuickBooks\QBUpdate |
| QBUpdate.exe | C:\Program Files\Intuit\QUICKBOOKS YEAR |
| QuickBooksMessaging.exe | C:\Program Files\Intuit\QUICKBOOKS YEAR |
| AutoBackupExe.exe | C:\Program Files\Intuit\QUICKBOOKS YEAR |
| QBDBMgrN.exe | C:\Program Files\Intuit\QUICKBOOKS YEAR |
| QBServerUtilityMgr.exe | C:\Program Files\Common Files\Intuit\QuickBooks |
| Dbmlsync.exe | C:\Program Files\Intuit\QUICKBOOKS YEAR |
| FileMovementExe.exe | C:\Program Files\Intuit\QUICKBOOKS YEAR |
| IntuitSyncManager.exe | C:\Program Files\Common Files\Intuit\Sync |
| QBW32.exe | C:\Program Files\Intuit\QUICKBOOKS YEAR |
Solution 4: Make sure the Accurate Permission for Folders
Make sure all folders have sufficient permissions to restrict unauthorized access to the important QuickBooks data. Users should give permissions only to the needed groups and limit it as required. Regularly reviewing and updating folder permissions ensures seamless functioning and helps to prevent error code H505 QuickBooks.
Below are the steps taken to configure folder permissions:
- Open the folder containing your company file from the File menu.
- When the company file folder shows, right-click it and select Properties.
- Click on the Security tab, then Advanced.
- Choose QBDataServiceUserXX and set the following settings to Allowed:
- Traverse Folder/Execute File
- Read Extended Attributes
- Create Files/Write Data
- Write Attributes
- Create Folders/Append Data
- List Folder/Read Data
- Read Permissions
- Write Extended Attributes
- Read Attributes
- Select Properties and navigate to the Security tab, then choose edit QBDataServiceUserXX for H505.
- Click on the Add option, type the user or group name to add, and offer access to the folder.
- Check all the names and make sure everything’s correct.
- Choose the user or group from the list after adding them.
- Select the permissions to permit the user or group in the Permissions for Users or Groups section. For example, tap on Full Control to give complete control and access.
- Select Apply and OK to get the changes.
See if the error code H505 QuickBooks continues and then check the folder permissions as given:
- Click on the Start icon to open this menu, and select File Explorer.
- Search for the folder to change the permissions for and right-click it:
- C:\Program Data\Intuit\Entitlement Client\v8
- C:\Program Data\COMMON FILES\INTUIT\QUICKBOOKS
- C:\Users\Public\Public Documents\Intuit\QuickBooks\Sample Company Files\QuickBooks Enterprise Solutions X.0 (X = version) or C:\Users\Public\Public Documents\Intuit\QuickBooks\Sample Company Files\QuickBooks 20XX (XX = year)
- C:\Program Data\Intuit\Entitlement Client\v6.0
- C:\Users\Public\Public Documents\Intuit\QuickBooks\Company Files
- C:\Program Data\Intuit\Entitlement Client\v3
- C:\Program Data\Intuit\QuickBooks Enterprise Solutions X.0 (X = version) or C:\Program Data\Intuit\QuickBooks 20XX (XX = year)
- C:\Program Data\COMMON FILES\INTUIT
- C:\Program Data\Intuit\Entitlement Client\v5
- C:\Users\Public\Public Documents\Intuit\QuickBooks\FAMXX (XX = year)
- C:\Program Data\Intuit\Entitlement Client
The QuickBooks version tells whether you have all these folders or not. Now, take the following actions and correct the QuickBooks H505 error message:
- Select Properties after right-clicking these folders.
- Mark Everyone in the Security section. (Tap Add, type Everyone, and click OK if Everyone is not an option.)
- Choose Full Control> Apply and OK, then check the presence of QuickBooks error H505 on the server.
Solution 5: Fix the QuickBooks Application
Fix issues with the QB app that are causing the H505 QuickBooks error by using these steps to resolve it:
- Choose Control Panel from the Start menu or Run window.
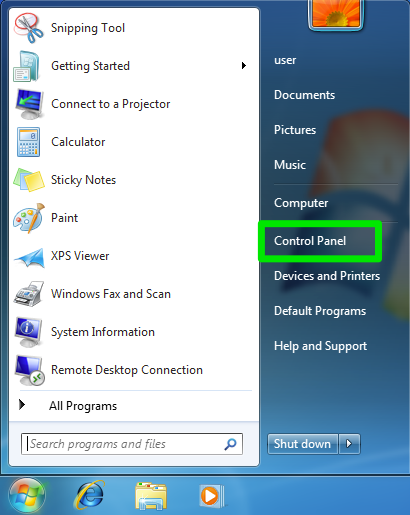
- Launch it and select the Programs and Features tab.
- Pick Uninstall a program and reach the list of apps currently installed on the device.
- Find QuickBooks from the list.
- Click on the Repair option and execute the prompts.
- Restart the device and check if the QuickBooks H505 error is fixed.
Solution 6: Ping the Server from the Workstation
Check the server and workstation connection by pinging your server from the workstation and do it from every workstation that is getting QuickBooks H505 error.
Turn ON the Network Discovery on your server computer and workstations, which is getting QB error code H505:
- Open the Windows Start menu on both server and workstations.
- Type network in the search field and open the Network and Sharing Center.
- Choose the Change Advanced Sharing Settings option.
- Then, make sure to turn on network discovery by choosing it in the Network Discovery and File and Printer sharing sections.
Remember the server name from the server to remove the symptoms of QuickBooks error H505:
- Click on the Windows icon to open the Start menu.
- Then, type Run in the search field to open the Run window.
- Type cmd in the run box and Enter.
- Now, type ipconfig /all and tap Enter.
- Search for the Hostname in the Windows IP configuration tab, and the server name will be available on the right side.
- Make a note of the hostname and copy it to Notepad or Word doc for prompt access.
Then, go back to the workstation to test the server, and if you are still getting it, then try to get professional help from experts:
- Select the Windows Start menu from the workstation.
- Write Run in the search field and enter to open the Run window.
- Then, type CMD in the run window and click Enter.
- Type “ping [your server name],” without any brackets, and Enter.
- Go on with these steps for every workstation requiring QuickBooks error H505 fix.
If you get a response for each packet without losses, the server is fine. However, stop and contact a professional if you get packet loss.
Solution 7: Make a New Company File Folder
This method is beneficial when your QuickBooks company file folder is corrupted and causing a QuickBooks H505 error. Change your company file location by creating a new folder:
- In the company file folder on your server, copy your company file.
- Make a new folder on your desktop by right-clicking and clicking New > Folder.
- Then, paste the company file into the new folder.
- Right-click this folder and choose the Properties option.
- Select the Advanced Sharing option under the Share section.
- Mark the Share this Folder checkbox and the Permissions option.
- Be sure to click the Full Control box for everyone in the group. Then, select Apply and OK.
- Then, try accessing your company file from the workstations and see if the QuickBooks Enterprise error H505 continues.
Solution 8: Upgrade the QuickBooks Desktop to its latest version
Below are the steps to upgrade the QuickBooks Desktop application and troubleshoot error H505 in QuickBooks:
- In QuickBooks Desktop, go to the Help menu and click About QuickBooks to check your current version.
- Pick the Update QuickBooks Desktop option.
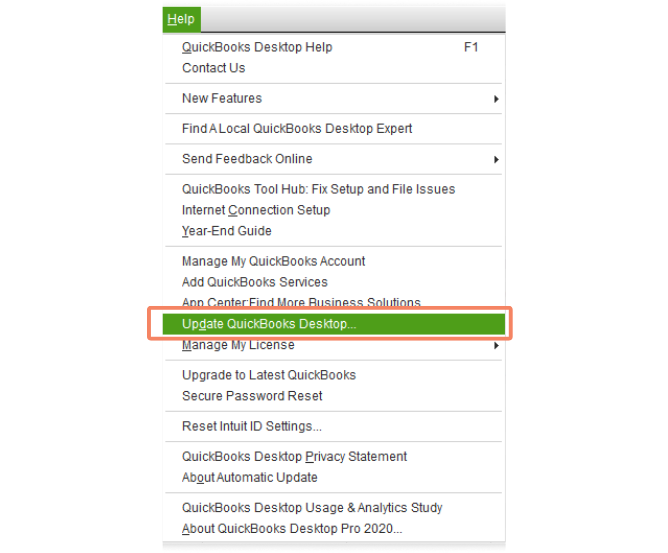
- Click on the Update Now option.
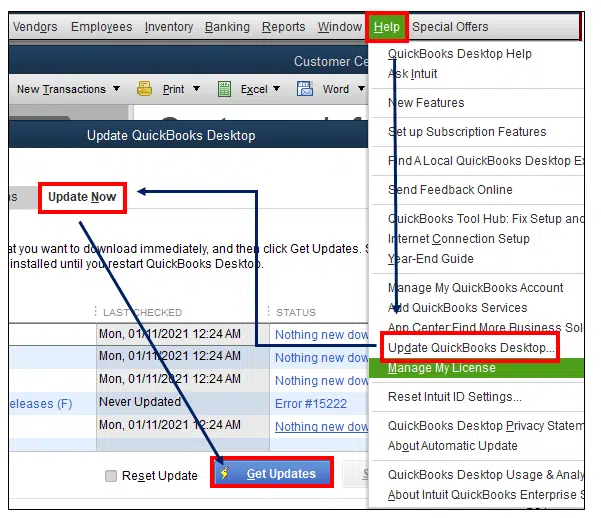
- Select the New Features, Maintenance Releases, and Reset Updates.
- Then, click on the Get Update option.
- Restart QuickBooks and install updates. Click on the Install Now option.
- Restart your computer after the installation and retry accessing the company file.
Check if it continues the QB error H505. If yes, then go with the other solutions given in this blog.
Solution 9: Use the QuickBooks File Doctor Tool
QuickBooks File Doctor is a utility available in the QB tool hub that fixes network and company file issues. It can be implemented as follows:
- Start the download and installation of the QuickBooks Tool Hub on your system.
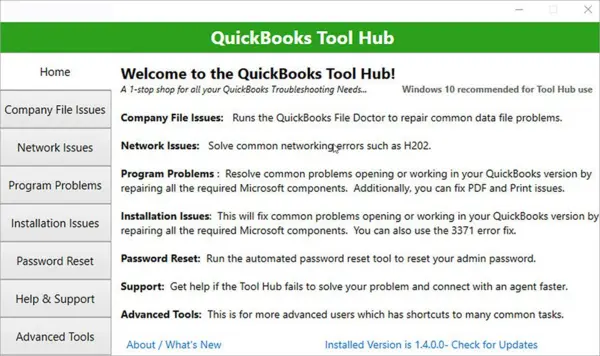
- Configure the tool hub and visit the Company file issues section.
- Choose the QuickBooks File Doctor option.
- If the first option doesn’t work, find the company file automatically or manually and browse the designated company file in a second way.
- Then, let the tool detect and fix errors. It might take some time.
- Now, close and restart the system to check the error.
Solution 10: Resolve the firewall using QuickBooks Database Server Manager
QuickBooks Database Server Manager helps QuickBooks communicate with the network server. When the service is disabled, you may receive error H505 in QuickBooks Desktop when opening the company file. Below are the steps to resolve the error:
- Download QuickBooks Tool Hub from a legitimate source.
- Save the downloaded file to a suitable location.
- Next, click on the downloaded QuickBooksToolHub.exe file.
- Follow the on-screen instructions to install the tool.
- Once the installation is done, open QuickBooks Tool Hub.
- Now, from within the tool, select Network Issues and select QuickBooks Database Server Manager.
- Use the Browse option to select the company file folder and click Start Scan.
- It will help QuickBooks Database Server Manager repair your firewall and provide efficient permissions to access all workstations.
- Hit Close once you are done.
If the Intuit error message H505 appears again on your screen, move to the next procedure.
Solution 11: Try Installing a Trial Version
Install a trial version of the latest or previous QuickBooks version and run a sample file in this version to check if the error h505 QuickBooks Desktop pops up. If it pops up, then the issue is with the app.
Solution 12: Consider hosting your Own Network
Start by hosting your network, and if you are using an alternative solution or one of the affiliated Intuit Hosting Providers, contact them directly to restart the hosting environment. Collaborate with them during the troubleshooting process for QuickBooks error H505.
Solution 13: Update the OS Build to its latest version
The chances of the error H505 in a multi-user environment are higher than when running old Windows operating systems. Therefore, update it to the latest version to avoid the ‘lost connection’ error or error code H505 when running the multi-user mode.
Below are the steps to update Windows,
- In the Start menu, after pressing the Windows icon, type Check for updates.
- Tap Enter and download updates if available.
What is QuickBooks Error code H505?
Several types of H-series errors in QuickBooks are related to the network issues that develop when you try to access the company file stored on the server. It throws an H-series error on the screen whenever QuickBooks has issues connecting with the server. QuickBooks Error Code H505 is shown when QuickBooks on the user’s computer is not able to connect with the other computer in the network that is hosting the company file, due to which some technical glitches in the network setup are interfering with the connection between different workstations in the network, with an error message stating:
| Error | Description |
| Warning | QuickBooks has faced a problem and needs to close. Sorry for any inconvenience caused. |
| Problem with multi-user hosting setup | Error code H505: This company file is on another computer, and QuickBooks needs help connecting. |
It comes from the family of HXXX series error codes that H101, H202, H303, etc, often accompany.
What are the Causes of QuickBooks Error Code H505?
Given below are the causes behind QuickBooks error H505 that should be undertaken before resolving it:
- An incorrect hosting setup can cause the error H505, such as multiple workstations hosting your company file instead of the server.
- Interrupting the QuickBooks connection or blocking or restricting it.
- The firewall can restrict incoming or outgoing communication to the company file.
- Incorrect or damaged.ND (Network Descriptor) file.
- Having issues in obtaining the IP address of the system or server housing the company file in QuickBooks.
- Set up the workstations to access the file via the host’s Full Qualified Domain Name (e.g., computername.domain.com).
- QuickBooksDBXX service has not begun.
- The file must be on a non-native installed server, such as a virtual machine (VMware, VirtualBox, Microsoft Virtual Server, etc.).
- The Permissions for QBDataServiceuserXX need READ/WRITE access and have not been set to “Include Inheritable permissions from the object’s parent.”
- The QuickBooks files folder on the server has not been scanned with the QuickBooks Database Server.
- Damaged QuickBooks company files can also trigger the error H505 in QB Desktop.
- The file is stored on a network drive (NAS).
What are the Symptoms of QuickBooks Error H505?
Given below are the symptoms of the QuickBooks multi-user error H505:
- It displays the error and crashes an active program window.
- The system crashes repeatedly when running the same program.
- When QuickBooks is not able to switch to multi-user mode.
- Windows functions slowly.
- Unable to access the QuickBooks company file from a different computer or server.
- QuickBooks freezes or crashes frequently for many seconds.
- QuickBooks displays a slow response time while accessing the company file.
What are the points to Remember Before Resolution?
Below are the important points to remember before proceeding with the resolution of the QuickBooks error H505:
- Make sure the installation of the QB application on the system is correct.
- The full QB Desktop version must have only database or license manager hosting.
- Install the QB application on the server so that the multi-user mode can work.
- To prevent damage, virus, or corruption in the server system, install QB from the official website.
- Enter your QuickBooks application admin details.
- Take a backup of your files to prevent data loss.
- Update the tax tables and payroll app.
- Use the tools by QB Tool Hub, such as Quick Fix My Program, to resolve performance issues.
- Make sure the QuickBooks Database Server Manager is active.
- Check the firewall restrictions and lift them before fixing error code H505 in QuickBooks.
Only then can you proceed with the QuickBooks H505 Error fix.
Conclusion
The troubleshooting solutions shared above will help fix QuickBooks error code H505.
FAQ’s
What is QuickBooks error H505?
QuickBooks error H505 is an error that occurs when the user tries to access the company files or data on another computer, and that computer isn’t configured properly & needs additional installation or setup.
Is there a way to prevent QuickBooks Error H505 from occurring?
Yes, to prevent QuickBooks error H505 from occurring, regularly update QuickBooks to its most recent version available and check hosting settings. Make sure to configure the network setup correctly and update firewall and antivirus settings to accommodate QuickBooks operations.
What is the role of the.ND file in QuickBooks, and why can it cause Error H505?
The.ND file in QuickBooks is a “network descriptor” file that contains important information about the network location of the QuickBooks company file, which allows multiple users to access it in a multi-user environment. It can cause an error H505 because QuickBooks can’t connect properly to the server hosting the company file due to inappropriate details being stored in the.ND file.
How do I fix the H505 error in QuickBooks?
To fix the H505 error in QuickBooks, check whether the server is properly configured to host the company files and network connectivity by pinging the server from workstations. Make sure the required Windows services are running on the server, and use QuickBooks File Doctor to resolve any file or network issues.
How do DNS Settings cause QB Error H505?
Incorrect DNS settings can cause QB error H505 because if the DNS isn’t configured properly, QuickBooks cannot repair the server’s IP address.
What are the reasons for the Error H505 in QuickBooks?
The reasons for the error H505 in QuickBooks can be many, but it often occurs due to incorrect server hosting setup, network connectivity issues, firewall restrictions, damaged network data files, and any issue with QuickBooks services while running on the server computer.
You May Also Read-
Essential Ways to Counter and Remove QuickBooks Error 15240
QuickBooks Error code 6189: A Troubleshooting guide for Amateurs
We can’t update your account. Please wait a few hours and try (Fixed)
Easy Troubleshooting methods to get rid of QuickBooks Error 80070057
Unique solutions to easily eliminate QuickBooks error 1317

James Richard is a skilled technical writer with 16 years of experience at QuickBooks Data Migration. His expertise covers data migration, conversion, and desktop errors for QuickBooks. He excels at explaining complex technical topics clearly and simply for readers. Through engaging, informative blog posts, James makes even the most challenging QuickBooks issues feel manageable. With his passion for writing and deep knowledge, he is a trusted resource for anyone seeking clarity on accounting software problems.