
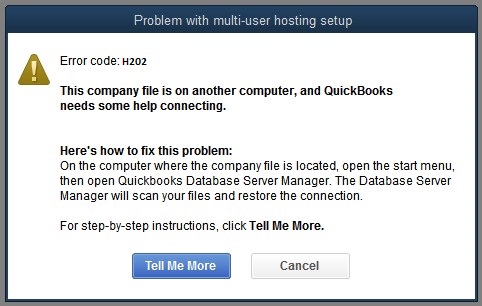
QuickBooks error H202 is a common H-series error that arises while running QBDT in multi-user mode. This error can prevent users from hosting their company files over the network and can occur due to misconfigured hosting settings or an inactive QB Database Server Manager. The following error message appears with this error code: “This company file is on another computer, and QuickBooks needs help connecting.” To learn how to fix this error, perform the practical solutions given in this comprehensive guide.
Quickview Table for QuickBooks Error H202
Below is a concise overview of the entire blog, serving as a reminder of our discussion on error code H202 in QuickBooks Desktop, which is part of the H series of errors.
| Error code | H202 |
| Error message | This company file is on another computer, and QuickBooks needs help connecting. |
| Common causes | Incorrect QB hosting configuration on server and workstations, inactive QuickBooks Database Server Manager, Windows firewall or anti-virus restricting QB from hosting the company file, network connectivity issues, damaged .ND file, essential services not running on PC, lack of admin permissions, incorrect server IP address, outdated QuickBooks Desktop version, incorrect QBDT installation, or damaged company files. |
| Troubleshooting methods | Check the Hosting Setup, run QB Database Server Manager, review active Services, update QBDataServiceUserXX permissions, modify Windows permissions, configure Firewall and security settings, ping the server from workstation, add the server to Windows Host Files, run Quick Fix My Program tool, utilize QuickBooks Install Diagnostic tool, reinstall QBDT in selective startup mode, rename .ND and .TLG files, and change the company file’s location. |
| Tools used | QuickBooks Database Server Manager, Quick Fix My Program, QuickBooks Install Diagnostic tool, QuickBooks Tool Hub. |
Practical Solutions to Fix Error H202 in QuickBooks Desktop (Updated)
You need to resolve error code H202 in QuickBooks on time; otherwise, you won’t be able to run QuickBooks in multi-user mode. Thus, follow the troubleshooting solutions given below to fix this hosting issue-
Solution 1 – Check the Hosting Setup on the Server and Workstations
Firstly, ensure that QuickBooks multi-user settings on the server PC and workstations are correct. This is because incorrect or misconfigured hosting setup can be a significant reason behind QuickBooks multi-user hosting error H202. Thus, review the QB hosting setup in the following manner-
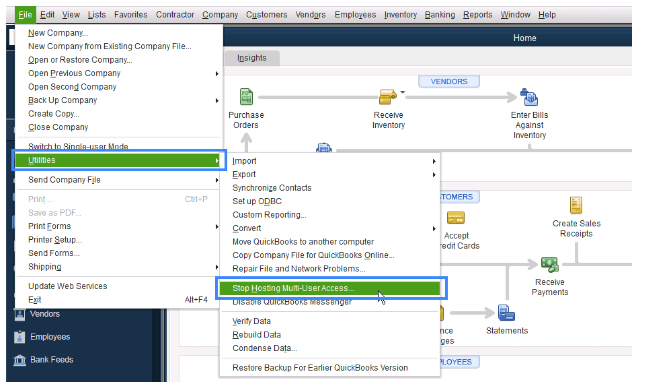
- Run QuickBooks on one of the workstations facing the H202 error, then go to the File menu and select Utilities.
- Now, perform the following actions based on the hosting option you see –
- If you see the Host Multi-User Access option, don’t select it and move to the next workstation, as the hosting settings are correct on this workstation.
- On the other hand, if you see the Stop Hosting Multi-User Access option, select it, then repeat these steps on all the workstations getting the error.
Once the hosting settings are configured on the workstations, open QuickBooks on the computer that hosts the company file and review the settings using the instructions below-
- Move to the File tab, select Utilities, then if you see the Host Multi-User Access option, select it and enable the hosting.
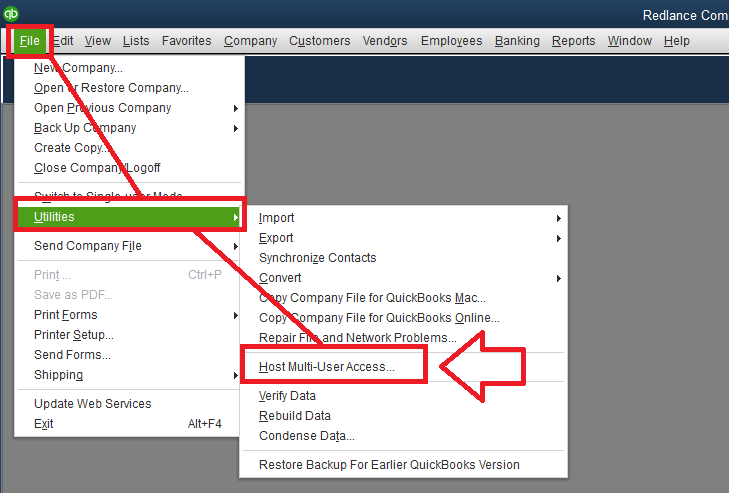
- However, if you see the Stop Hosting Multi-User Access option, don’t select it, as the settings are correctly set.
After the hosting settings are configured on the server and workstations, rerun QuickBooks in multi-user mode and check if the hosting problems are fixed. If you still encounter QuickBooks error H202, move to the next troubleshooting solution.
Solution 2 – Use QuickBooks Database Server Manager
The QB Database Server Manager is an essential utility that can resolve network issues in QuickBooks. You can run this tool to fix the network problems while running QuickBooks in a multi-user environment in the following manner-
Step 1 – Install the QB Tool Hub
The QB Tool Hub contains various tools and features to help fix common QB issues. Thus, to run the QB Database Server Manager, first download and install the latest QuickBooks Tool Hub version (1.6.0.5) on your PC.
Step 2 – Run QB Database Server Manager
You can fix the network issues while hosting the company file in multi-user mode with QuickBooks Database Server Manager. The tool will run a scan to find and resolve the network issues leading to error code H202 in QuickBooks.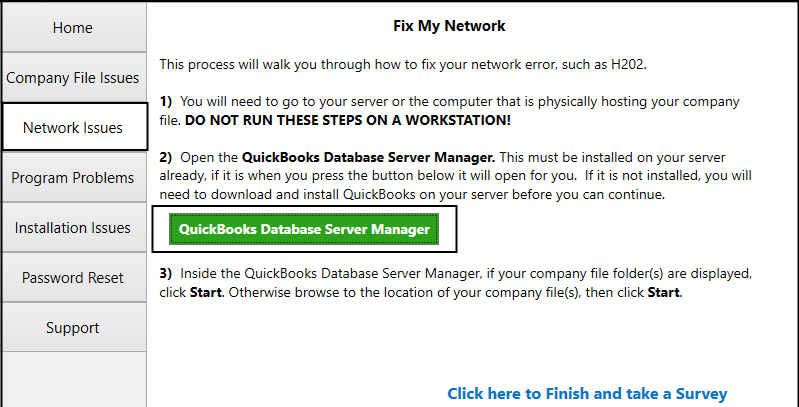
After running the tool, rerun QuickBooks in multi-user mode and check if the hosting error is fixed. If you still encounter the error, follow the next solution and check the QB services on the server.
Solution 3 – Review the Services on the Server PC
You must ensure the QB services are running correctly on the server. If the services are not running, it can lead to hosting problems in QB. Thus, review these services by implementing the steps given below-
Note: If you use the full version of QBDT on the server, enable the multi-hosting mode before following these steps.
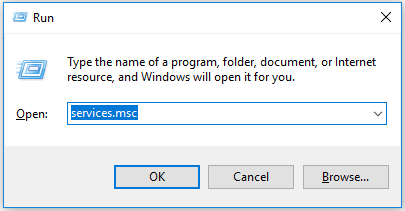
- Firstly, open the Windows Start menu on the server PC, then type “Run” into the search bar to get the Run window.
- Enter “services.msc” into the Run command box, then press Enter. Find and double-click QuickBooksDBXX on the list (wherein XX notes your QB version).
- Select Automatic as the Startup Type option, then check the Service Status and ensure it is either Running or Started.
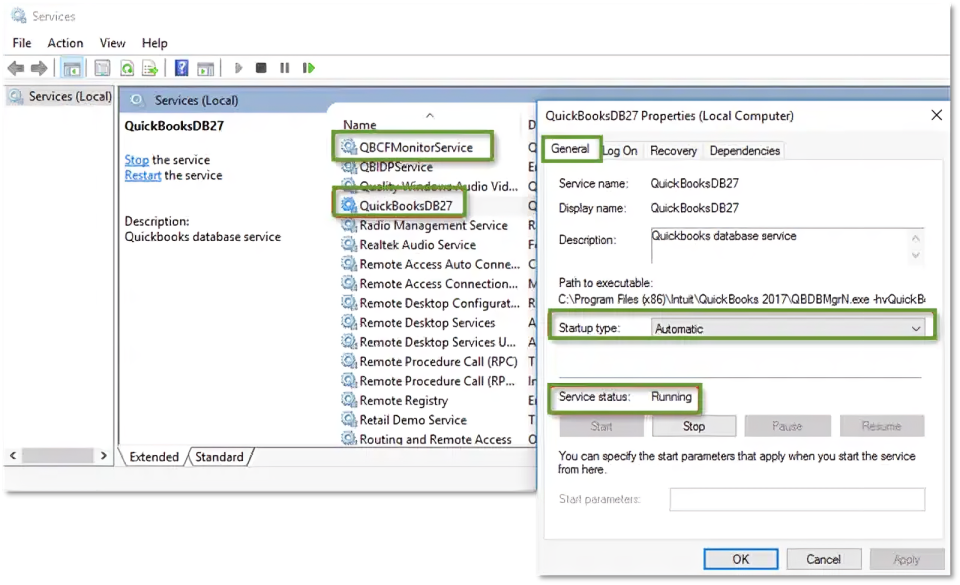
- If the service is not running, click Start and start the QuickBooksDBXX service.
- Go to the Recovery menu and click Restart the Service from the First, Second, and Subsequent Failures dropdown menus.
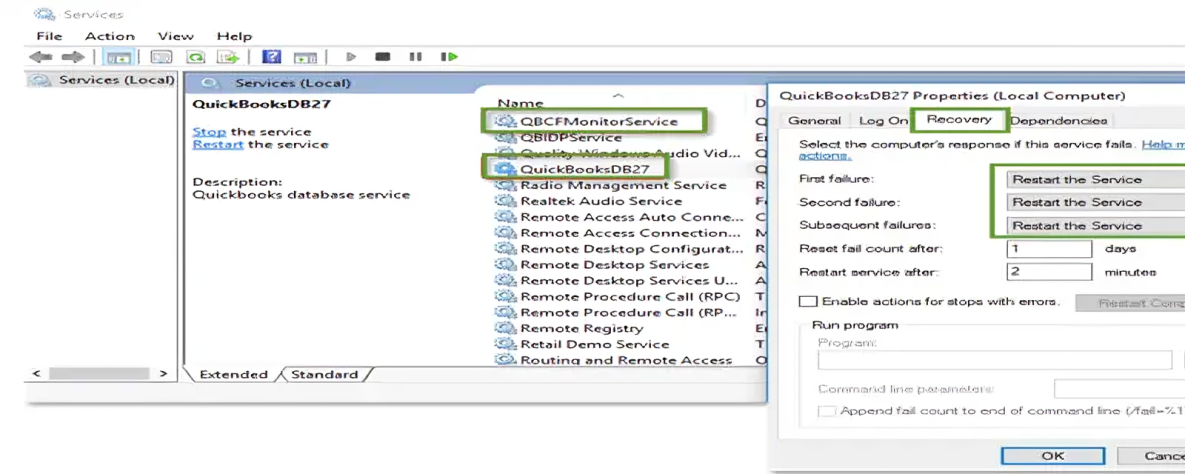
- Select Apply and OK to save the changes, then repeat these steps to modify the QBCFMonitorService.
- Once done, open QuickBooks on each workstation, then move to the File section and select the Switch to Multi-user Mode option.
Now, check if the hosting issues are resolved. If you still encounter QuickBooks error code H202, move to the next troubleshooting solution.
Solution 4 – Provide Full Control to QBDataServiceUserXX
If essential services, like QuickBooksDBXX and QBCFMonitorService, don’t have proper admin permissions on the server PC, it can lead to hosting issues. Thus, you need to provide full access to these QB services in the following manner-
Firstly, review the settings to check if the permissions are correctly set by following the steps below –
- Open the Windows Start menu, then type ‘Windows File Explorer’ in the search bar, and open it.
- Next, right-click the company file folder, select Properties, and move to the Security tab.
- Select Advanced, click QBDataServiceUserXX, hit Edit, and set the following settings to Allowed:
- Traverse Folder/Execute File
- List Folder/Read Data
- Read Attributes
- Read Extended Attributes
- Create Files/Write Data
- Create Folders/Append Data
- Write Attributes
- Write Extended Attributes
- Read Permissions
However, if the permissions aren’t correctly set, provide full control access to QBDataServiceUser in the following manner –
- Right-click the company file folder, select Properties, then click Edit in the Security tab.
- Choose QBDataServiceUserXX, select Full Control, then hit Allow, and click Apply and OK to save the changes.
Once the permissions are set, check if you can switch to multi-user mode without issues. If the hosting error persists, move to the next solution to set the permissions to share the company files.
Solution 5 – Set Proper Windows Permissions to Share Company Files
You need to ensure that proper permissions are set to share the company files over the network; otherwise, you won’t be able to access the files on workstations in a multi-user environment. To set the file access and sharing permissions, go through the following steps –
Windows 10
Set Windows access permissions to share the company files in Windows 10 by following the steps below-
- Open the Windows File Explorer from the Windows Start menu. Then, locate and right-click the company file folder.
- Further, click Properties, select Sharing, and click Share Add.
- Now, choose the corresponding QBDataServiceUserXX for your QuickBooks Desktop version.
- Lastly, set the permission level for both users to Full Control and click Share.
Windows Server 12
To set file-sharing permissions on Windows Server 2012, follow the steps mentioned below –
- Firstly, ensure that the File and Storage Services are installed, then go to the Windows Start menu.
- Type “Run” into the search box, open the Run box, and type “Server Manager.”
- Select OK, click File and Storage Services, then Share, and open the Task drop-down menu.
- Next, choose New Share, and a list of File Share Profiles will appear on the screen. Choose each profile and read the description to learn about the differences between the profiles.
- Select SMB Share—Quick, the default profile; then, click Type a custom path from the Share location section.
- Hit Browse to locate the folder you want to share, then select the appropriate folder, click Select a folder, and hit Next.
Note: In the Configure Share settings window, you can leave the default selections and click Next again. Once the permissions are set for the QBDataServiceUserXX and to share the company files over the network, rerun QB in a multi-user mode. If you still face the QuickBooks multi-user hosting error H202, move to the next troubleshooting solution.
Solution 6 – Configure the Windows Firewall and Security Settings
Issues while switching to the multi-user mode can arise due to Windows firewall restrictions. You must ensure your server PC lets QuickBooks through the firewall by adequately configuring the Windows firewall and anti-virus settings.
After setting up proper firewall and anti-virus permissions, rerun QuickBooks and switch to multi-user mode. If everything works, the hosting issues are resolved. But if the hosting issues persist, follow the next troubleshooting solution.
Solution 7 – Ping the Server from your Workstation
Connectivity issues between the server PC and the workstations can be another reason for hosting problems in QB. To ensure no such issues exist, you need to ping the server from the workstation in the following manner –
Step 1 – Turn the Network Discovery On
Firstly, turn on the Network Discovery on the server PC in the following manner-
- Open the Windows Start menu on your server and workstations facing the H202 error, then search for and open Control Panel.
- Then click Network and Internet Options.
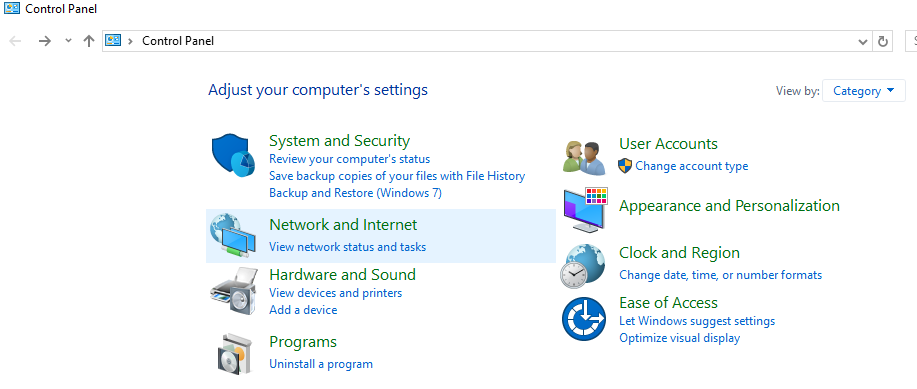
- Further, select Network and Sharing Center and click Change advanced sharing settings.
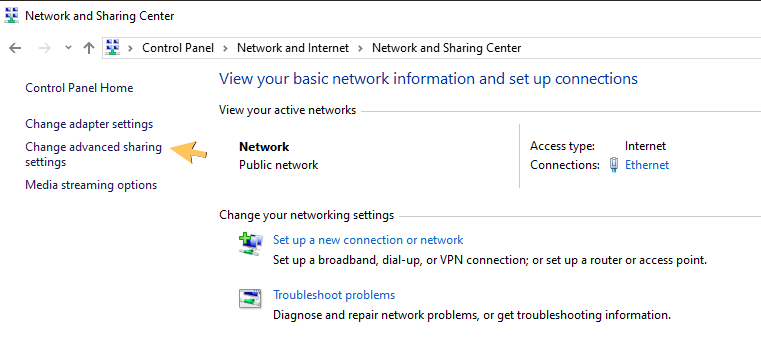
- Lastly, ensure the Turn on Network Discovery option is marked in the Network Discovery and File and Printer Sharing sections.

Once done, get your server name by going through step 2 below.
Step 2 – Note Down your Server Name
Implement the steps given below to get your server name from the server PC –
- Open the Windows Start menu on the server PC, then type Run” into the search bar to open the Run window.
- Next, enter “CMD” in the command prompt window, press Enter, type “ipconfig/all” into the CMD window, and hit Enter again.
- Find the Host Name in the Windows IP Configuration section, then find your server name on the right.
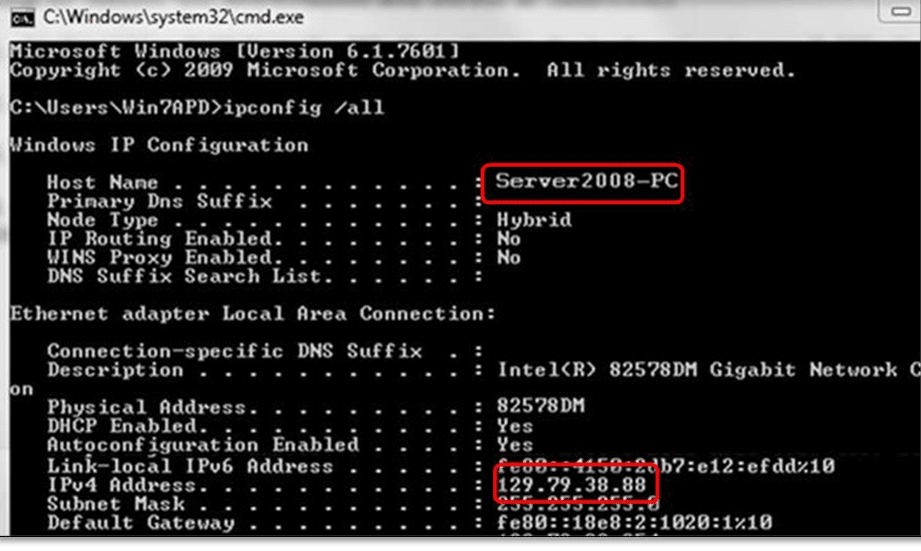
- Lastly, please write down the hostname or copy it to a Word document to access it easily.
After noting the server name, test the server from the workstation in the next step.
Step 3 – Ping the Server to Test the Connectivity
Lastly, go back to your workstation and test the connection by pinging the server in the following manner –
- Open the Windows Start menu on the workstation, and enter “Run” into the search bar to open the Run window.
- Now, enter “CMD” into the command prompt window, press Enter, and type “ping [your server name].”
- Hit Enter, ensure the brackets are not included around your server name while pinging the server, and repeat the same steps on all workstations facing the QuickBooks Error H202.
Once done, check for packet loss to review how your server is working. Getting a reply for each packet with no loss indicates that the server is working fine and that QuickBooks Desktop error H202 did not arise due to server connection issues. In this case, move to the next solution to fix QB Error H202.
On the other hand, if the packets are lost or the reply is slow, you need assistance from an IT professional to fix the network problems.
Solution 8 – Add your Server to the Windows Host Files
The Windows host files contain crucial network configuration information required to connect the server and workstations. Thus, you need to ensure the server is added to the Windows host files so that the server has the info of the workstation and vice-versa. Follow the steps given below to make changes to the Windows host files –
- On one of your workstations, type ‘CMD’ in the Run command box, hit Enter, then type ‘ipconfig’ in the command box.
- Next, note down the IP Address and Host Name in the Notepad and get the same info from all the other workstations connected to the network.
- Find the Windows Host Files on your server PC by the following paths given below –
- C:\Windows\System32\Drivers\Etc
- C:\Windows\Syswow64\Drivers\Etc
- Open the Host File and select Notepad (if prompted). Then, add the IP address and system name to the file (use the Tab key to enter any spaces in the text).
- Further, ensure that the server system has the information (IP Address & Host Name) of the workstation, and every workstation must have the required information of the server PC.
- Press Ctrl + S to save the changes, then copy this file by pressing Ctrl + C and rename the original Windows Host File.
- Right-click the file, select Rename, then add.OLD to the file name, and save this new file as “hosts” in the folder.
Once done, rerun QuickBooks in multi-user mode and check if you can access the company file. If you still face QuickBooks error H202 while switching to multi-user mode, move to the next solution.
Solution 9 – Repair QBDT by Using the QB Tool Hub
Sometimes, if the program is damaged or incorrectly installed, it can create issues while switching to the multi-user mode. You can use the utilities available in QuickBooks Tool Hub to fix such program issues. Firstly, ensure to have the latest QB Tool Hub installed, then follow the steps given below –
- Firstly, run the Quick Fix My Program tool to fix the QB program issues and check if the QuickBooks error message H202 is eliminated.
- If the error persists, you can use the QB Install Diagnostic tool to run a QBDT installation repair.
Once done, check if you can switch to multi-user mode and access the company files without issues. If the hosting error keeps appearing, follow the next troubleshooting solution.
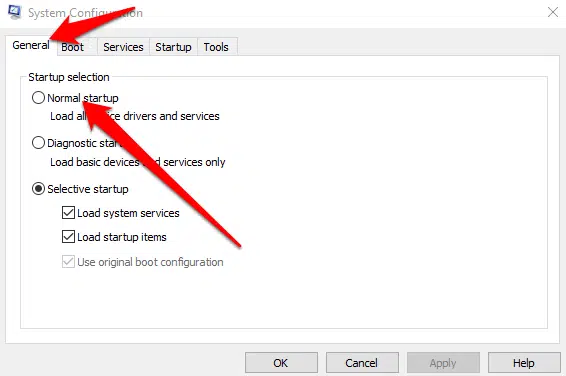
Solution 10 – Reinstall QB in a Selective Startup Mode
If repairing QuickBooks doesn’t help, reinstall the software to fix the installation problems. You can reinstall QuickBooks in Selective Startup Mode to ensure no background interruptions from other apps.
After reinstalling the software, rerun QuickBooks Desktop in multi-user mode and check if the hosting issues are addressed. However, if you still face the QuickBooks Error H202, move to the next solution.
Solution 11 – Modify the Network Data and Transaction Log File Names
The Network Data (.ND) and Transaction Log (.TLG) files are configuration files that allow QuickBooks to access the company file over the network or in multi-user mode. If either of the files is damaged or corrupted, it can cause issues when opening the company file in hosting mode. To fix the file damage, rename the files in the following manner-
- Open the QuickBooks company file folder and find the files with .ND and .TLG extensions with the same name as your company file. If you can’t locate these files, ensure that hidden files and folders are displayed on your system.
- Next, right-click each file, select Rename, then add .OLD at the end of the file name, and hit Enter to save the changes.
Once both the file names are renamed, rerun QuickBooks in multi-user hosting mode. Check if everything works fine and you can access the company files over the network. If QB error H202 remains unresolved, move to the next solution.
Solution 12 – Change the QB Company File Location
If none of the above solutions work, try changing the company file location. A damaged folder can cause issues accessing the company file over the network. Thus, change the company file location and access it from the new folder as follows –
- Create a new folder in the C Drive on the host PC containing your company file, then copy (Ctrl + C) the company file and .TLG file from the company file folder.
- Paste the copied files into the new folder (Ctrl + V) and try to access the company file from this location.
Now, check if you can open the company file in multi-user mode to ensure the issues are resolved.
Other H Series Error Codes in QuickBooks Desktop
Tabulated below is a list of H-series errors that can lead to issues in multi-user mode. Similar to the QuickBooks error H202, these can also prevent the company file from being hosted over a network.
| Error Code | Category | Primary Cause |
| H101 | Multi-user Hosting | Misconfigured network settings, restrictions from Windows Firewall or antivirus software, and incorrect IP/DNS settings. |
| H303 | Multi-user Hosting | Connection blocked due to incorrect network settings, IP address conflicts, or DNS issues. |
| H505 | Multi-user Hosting | The company file cannot be hosted because QuickBooks fails to connect to the Intuit server. |
Leading Causes for Error Code H202 in QuickBooks (Updated)
This H-series error in QuickBooks can arise due to various reasons. Before troubleshooting, you need to understand the reasons behind the error for better clarity. Below, we have provided the leading reasons why you are facing QuickBooks error H202-
- The QB hosting configuration on the server and workstations might be incorrect.
- The QuickBooks Database Server Manager is inactive or not working correctly.
- A Windows firewall or anti-virus app might restrict QB while hosting the company file over the network.
- Other network connectivity issues between the server PC and the workstations can also lead to company file hosting errors.
- Crucial QB configuration files, like the.ND file might be damaged or corrupted.
- Essential QuickBooks Desktop services are not running correctly on the server PC.
- The QB services don’t have admin permissions, and the file access and sharing permissions are not correctly set.
- QuickBooks cannot obtain the IP address of the server PC, or the address might be incorrect.
- Your current QuickBooks Desktop version is outdated, leading to the possibility of having bugs triggering QuickBooks Desktop error code H202.
- QuickBooks Desktop is not correctly installed, or the program might be damaged/corrupted.
- Your QB company files might be damaged or corrupted, causing file access issues when running QB in multi-user mode.
Now that we have understood the triggers behind this error code, let’s learn about the practical solutions to eliminate it in the next section.
Conclusion
The QuickBooks error H202 can be a hindrance to your work as the multi-user mode fails to operate normally. This needs to be addressed immediately so that users can access the company file over a shared network. We have listed out the leading factors for this issue, so that you can take preventive measures and avoid it in the future.
FAQs
What are the signs and symptoms of QuickBooks Desktop error code H202?
QuickBooks error H202 can have the following common signs and symptoms –
1. You won’t be able to switch QuickBooks Desktop to the multi-user mode.
2. You won’t be able to access the company file on the host PC or other workstations in the network.
3. You might get an error message stating that the file is on another computer and QuickBooks cannot connect.
4. QuickBooks Desktop might slow down or freeze while accessing the file or switching to the multi-user mode.
5. Other applications on the system might slow down or start lagging.
How can I fix QuickBooks error H202 while hosting the company files on a non-Windows server?
If you are hosting the QB company files over a non-Windows server, follow the steps given below to fix QB error code H202 –
1. Add the server’s fully qualified domain name to the host files of each workstation connected to the same network.
2. Edit the QBGlobalAppConfig.ini file on the Fedora Linux Server to check the default port range.
3. Lastly, create a mapped drive to the Linux server’s IP address.
Note: These troubleshooting steps are related to the Linux server only. If you use another non-Windows server, like Citrus, follow its specific steps to fix the hosting issues in QuickBooks.
What are the prerequisites for troubleshooting QuickBooks error H202?
Below are some of the crucial prerequisites that you must fulfill to ensure error H202 is fixed effectively –
1. Ensure QBDT is updated to the latest version to avoid compatibility issues.
2. Take a backup of the company files to avoid accidental data loss during troubleshooting.
Can disabling the anti-virus program help fix hosting issues in QuickBooks?
Restrictions from the anti-virus program can prevent users from running QuickBooks in a multi-user mode. To fix this issue, you must reconfigure the anti-virus settings. As an alternative, you can temporarily disable the anti-virus program on the host PC and check if it fixes the QB hosting issues.
you May Read Also-
Fix QuickBooks Error 1603- Problem Installing Microsoft .NET
QuickBooks Multi-User Not Connecting: Causes and Proven Solutions
QuickBooks Payroll Not Working – Troubleshoot Common Errors and Their Solutions
Fix QuickBooks Error 15106 by Repairing the Damaged Program
How to Resolve QuickBooks balance sheet out of balance Error?

James Richard is a skilled technical writer with 16 years of experience at QuickBooks Data Migration. His expertise covers data migration, conversion, and desktop errors for QuickBooks. He excels at explaining complex technical topics clearly and simply for readers. Through engaging, informative blog posts, James makes even the most challenging QuickBooks issues feel manageable. With his passion for writing and deep knowledge, he is a trusted resource for anyone seeking clarity on accounting software problems.