QuickBooks is designed so impressively that it instantly informs you whenever Intuit releases a new update. Let’s assume you launched QuickBooks with admin-level access to install the updates. You tried installing the updates, but QuickBooks asked you to reboot the system instead to install the updates. Even though you rebooted the system not once but multiple times, the same error message QuickBooks requires that you reboot loop kept repeating itself, resulting in unfinished installation and plenty of frustration. Read this comprehensive troubleshooting guide that will help you promptly fix the quickbooks update reboot loop using proven solutions.
Quick Solutions to Try When QuickBooks Requires That You Reboot Loop
When your QuickBooks still requires that you reboot loop, you must try the unique solutions we have mentioned below.
Solution 1: Update QuickBooks Desktop to the Latest Release
In Order to fix the Common Issue, you have to update QuickBooks Desktop to the latest release. This helps get enhancements to existing features and security patches from time to time and, therefore, keeps QuickBooks away from bugs, errors, technical glitches, etc. Let’s perform the intricate steps below and update QuickBooks with minimal effort.
- Firstly, open QuickBooks and move to the Help menu at the top menu bar.
- Then, select Update QuickBooks Desktop and click the Update Now tab.
- Further, check the Reset Update checkbox and click the Get Updates button next to it.
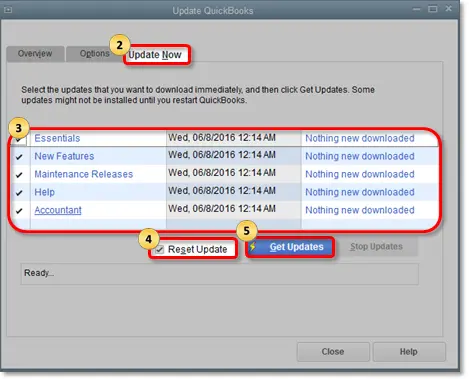
- Wait for the update to finish; once it does, close and reopen QuickBooks. Then, hit Yes to install the QB updates.
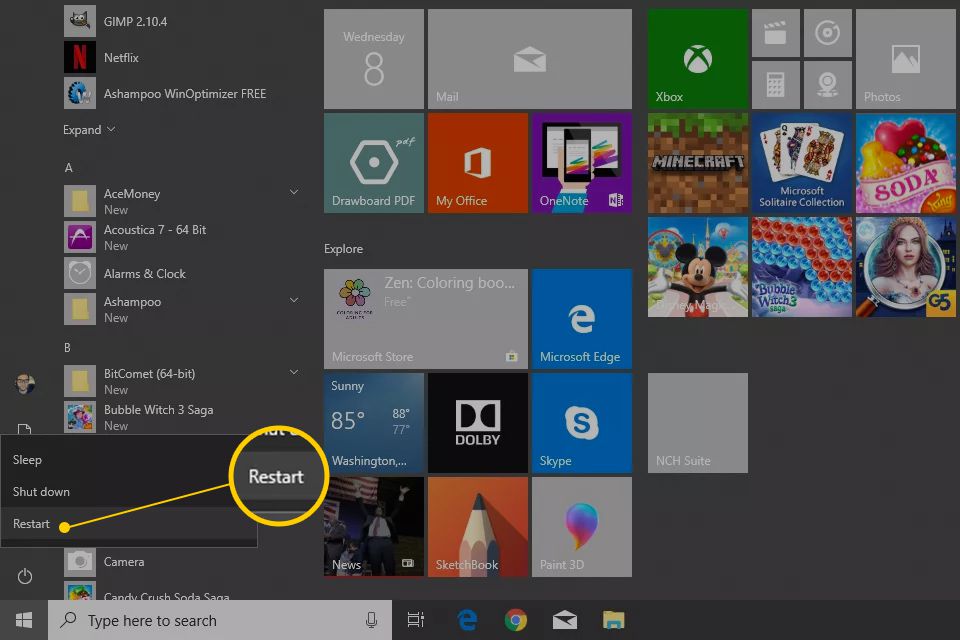
- Lastly, once the updates are installed, restart the computer and then open QuickBooks again.
If the Quickbooks Desktop update loop issue still persists, try the next solution.
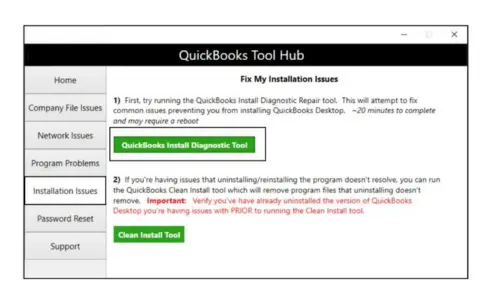
Solution 2: Run the QuickBooks Install Diagnostic Tool
Common installation issues, such as incomplete or partial installation, are among the leading causes of the QuickBooks Desktop 2020 update loop error. Let’s download the QuickBooks Install Diagnostic tool to eliminate the error instantly.
Learn how to run the QuickBooks Install Diagnostic tool effortlessly with minimal effort by clicking the link above.
If QuickBooks still requires that you reboot loop despite running the QuickBooks Install Diagnostic tool, move to the next solution.
Solution 3: Clean Install QuickBooks Desktop
Clean installing QuickBooks Desktop may significantly help if QuickBooks 2023 requires that you reboot loop. Let’s follow the comprehensive steps below for the same.
Step 1. Remove QuickBooks from the System
- Firstly, press the Windows Start key and type ‘Control Panel’ into the search bar.
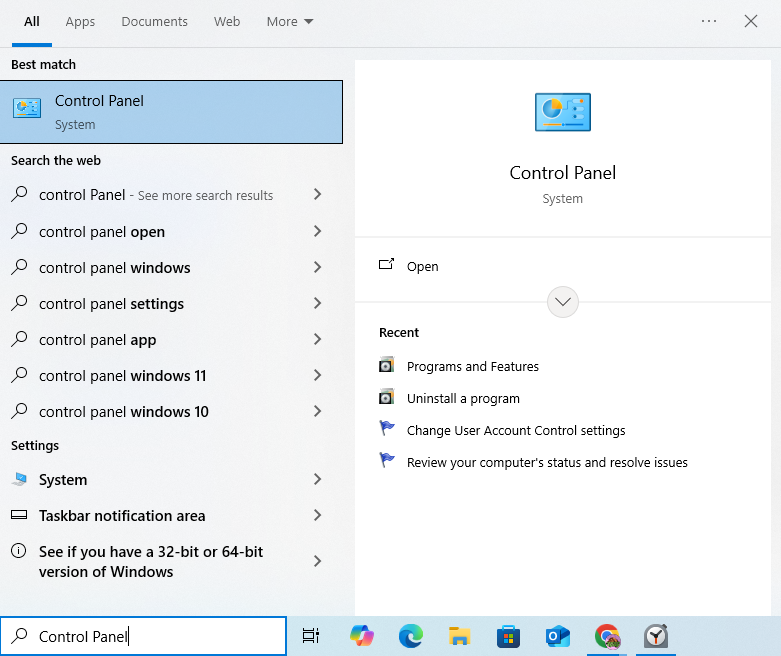
- When the Control Panel icon appears in the search result, click to open it.
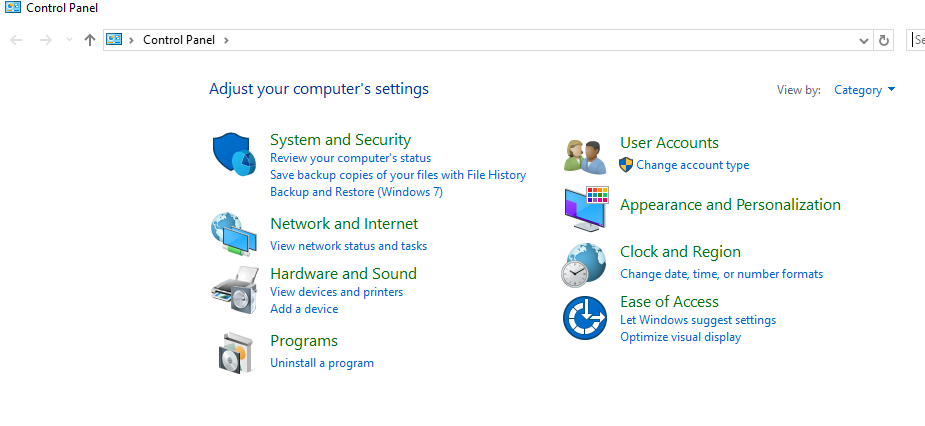
- Further, select Programs and Features or Uninstall a Program to continue.
- Next, a list of programs will appear on the screen; select the version of QuickBooks you want to remove from the system.
- Lastly, select Uninstall/Change, Remove, and then hit Next to conclude the uninstallation procedure.
Step 2. Rename the Installation Folders
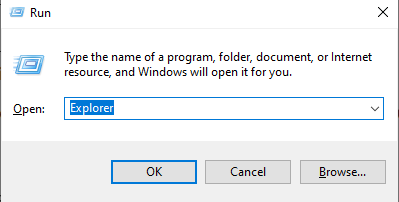
- Firstly, open Explorer by hitting Windows + R simultaneously on the keyboard.
- Further, open the folder that contains the company files. These folders can be found in one of the following locations:
- C:\ProgramData\Intuit\QuickBooks (year)
- C:\Users\(current user)\AppData\Local\Intuit\QuickBooks (year)
- C:\Program Files\Intuit\QuickBooks (year)
- 64-bit version C:\Program Files (x86)\Intuit\QuickBooks (year)
- The next step is to right-click the QuickBooks folder and select Rename.
- Lastly, consider adding “old” at the end of the folder name; this prevents QuickBooks from using it when you reinstall.
Step 3. Install QuickBooks on the System
- Firstly, download the latest version of QuickBooks from the Customer Account Management Portal (CAMPs) or the download site.
- The next step is to save the installer on the desktop so that it can be easily accessed.
- Next, make sure to keep the license number handy, as you’ll need to use it later.
Note: In order to get the license number, check the original package in case you have bought QuickBooks offline. However, if you have bought it online, you need to check the purchase confirmation email. - Now, open the QuickBooks.exe file and choose the Express install option.
- Select Next, then select Install, and when the installation procedure finishes, select Open QuickBooks.
If performing this specific solution also doesn’t help, as your QuickBooks still requires that you reboot to complete the installation loop, try the next solution.
Solution 4: Configure Firewall Settings Manually
Misconfigured Firewall settings may block internet access for specific QuickBooks programs or files, triggering unexpected glitches or errors. If your QuickBooks update requires that you reboot loop, you must ensure that the firewall settings are appropriately configured. Let’s follow the comprehensive steps below for the same.
Add Firewall Port Exception for QuickBooks
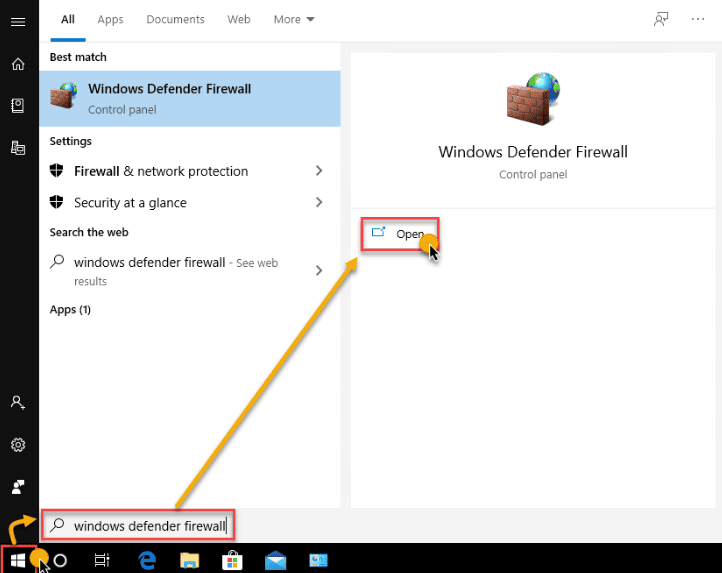
- First and foremost, open the Windows Start menu, enter Windows Defender Firewall into the search panel, and then click the Firewall icon from the search result to open it.
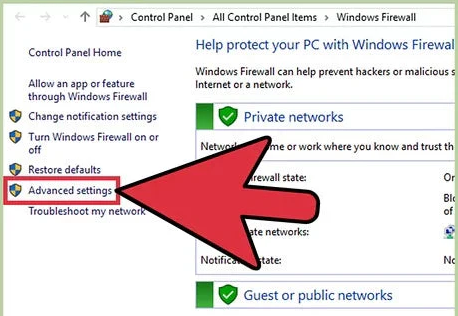
- Then, go to Advanced Settings, right-click Inbound Rules, and select New Rule.
- Choose Port, then hit Next, and then make sure TCP is selected.
- Further, in the Specific Local Ports field, enter the specific ports required for your QuickBooks year version from the following ports:
- QuickBooks Desktop 2020 and later: 8019, XXXXX.
- QuickBooks Desktop 2019: 8019, XXXXX.
- QuickBooks Desktop 2018: 8019, 56728, 55378-55382.
- QuickBooks Desktop 2017: 8019, 56727, 55373-55377.
Get a Dynamic Port Number - Press the Windows Start key, enter QuickBooks Database Server Manager into the search panel, and click the DBSM icon from the search result to open it.
- Further, move to the Port Monitor tab and find your QuickBooks version.
- Furthermore, note the port number, as you’ll be using this for your firewall port exceptions.
- Enter the port number and then hit Next to continue.
- Select Allow the Connection, followed by clicking Next.
- If you are prompted, make sure all profiles are marked. Then, click Next.
- Now, create a rule and give it a name like “QBPorts(year).”
- Lastly, click Finish to conclude.
There is one more essential task to do, which is creating Outbound Rules. Follow the steps mentioned above in the given order and create Outbound Rules. Remember to select Outbound Rules this time instead of Inbound Rules in step 2.
If this also doesn’t help fix the issue, move to the step below.
Create Windows Firewall Exceptions for QuickBooks Programs
Perform the steps outlined below to create an exception for each executable in the table:
- Open the Windows Start menu, enter “Windows Firewall” into the search panel, and click to open it from the search results.
- Next, select Advanced Settings, right-click Inbound Rules, and select New Rule.
- Further, select Program and then hit Next.
- Select This Program Path and then browse.
- Find and select one of the executable files mentioned in the table below, then select Next.
- Select Allow the connection, then choose Next.
- If prompted, make sure all profiles are marked, then hit Next to continue.
- Create a rule. Give it a name like “QBFirewallException(name.exe).”
Remember, repeat the same steps mentioned above to create Outbound rules.Also, make sure that you select Outbound Rules instead of Inbound Rules this time in step 2.
| Executable files | Location |
| AutoBackupExe.exe | C:\Program Files\Intuit\QUICKBOOKS YEAR |
| Dbmlsync.exe | C:\Program Files\Intuit\QUICKBOOKS YEAR |
| DBManagerExe.exe | C:\Program Files\Intuit\QUICKBOOKS YEAR |
| FileManagement.exe | C:\Program Files\Intuit\QUICKBOOKS YEAR |
| FileMovementExe.exe | C:\Program Files\Intuit\QUICKBOOKS YEAR |
| QuickBooksMessaging.exe | C:\Program Files\Intuit\QUICKBOOKS YEAR |
| QBW32.exe | C:\Program Files\Intuit\QUICKBOOKS YEAR |
| QBDBMgrN.exe | C:\Program Files\Intuit\QUICKBOOKS YEAR |
| QBServerUtilityMgr.exe | C:\Program Files\Common Files\Intuit\QuickBooks |
| QBCFMonitorService.exe | C:\Program Files\Common Files\Intuit\QuickBooks |
| ,QBLaunch.exe | C:\Program Files\Common Files\Intuit\QuickBooks |
| QBUpdate.exe | C:\Program Files\Common Files\Intuit\QuickBooks\QBUpdate |
| IntuitSyncManager.exe | C:\Program Files\Common Files\Intuit\Sync |
| OnlineBackup.exe | C:\Program Files\QuickBooks Online Backup |
Configure the Antivirus Settings
If configuring the Windows Firewall settings doesn’t help, as QuickBooks still requires that you reboot your computer loop, you must properly configure the antivirus you are currently using. To do so, visit the official website of the antivirus you are currently using and look for the instructions to configure it appropriately. If that seems complex for you, you can also get in touch with the nearest vendor for further assistance.
If configuring the Windows Firewall and antivirus settings also doesn’t help resolve the QuickBooks requires that you reboot loop 2023 error, move to the next solution.
Solution 5: Rename the Network Data and Transaction Log Files
The .ND and .TLG files are configuration files that allow QuickBooks to access a company file in a single-user or multi-user environment. When these files get damaged, you may encounter critical issues in QuickBooks, such as QuickBooks requires that you reboot loop 2021 issue. Therefore, in this section, we’ll learn how to rename these files to get rid of the ongoing issue. Let’s carefully perform the intricate steps below.
- Firstly, locate and then open the folder that contains the company file.
- Then, find the files that have the same name as the company file but with .TLG and .ND extensions at the end.
For instance, if the company file is named MyCompany.qbw, find MyCompany.qbw.TLG and MyCompany.qbw.ND files. - Next, right-click each file and select the Rename option.
- Add “.OLD” at the end of each file name.
For instance, rename MyCompany.qbw.TLG to MyCompany.qbw.TLG.OLD and MyCompany.qbw.ND to MyCompany.qbw.ND.OLD. - Finally, try opening QuickBooks and logging in to the company file again to check whether the ‘QuickBooks requires that you reboot loop’ error message still pops up. If so, move to the solution below.
Solution 6. Reinstall Microsoft Visual C++ Redistributable Package
It must be remembered that a damaged Microsoft Visual C++ Redistributable package may cause the ‘QuickBooks requires that you reboot loop update error. When it comes to the solution, reinstalling the same can help significantly get rid of the error. Let’s follow the comprehensive steps below carefully for the same.
- Firstly, choose the latest Microsoft Visual C++ Redistributables from official sources and then tap the correct file (32-bit, 64-bit, ARM64).
- Secondly, remember installing and importing the company from QuickBooks 2019 after the VC_redist.x64 will take around 30 minutes.
Now, let’s have a quick look at the installation steps. It’s for those who have installed QuickBooks Desktop via CD:
- Begin by inserting the QuickBooks CD into your CD drive. In case the QuickBooks installation window appears, close it.
- Further, press the Windows + E keys on the keyboard to open the File Explorer window.
- Furthermore, navigate to D:\ThirdParty\CRT9 or D:\ThirdParty\CRT8; here, D demonstrates your CD drive letter.
- Finally, double-click ‘vc_red.msi‘ or ‘vcredist_x86.exe‘ and then consider performing the on-screen prompts to install the software.
If you do not have a QuickBooks Desktop CD, try downloading and installing Microsoft Visual C++ from the official Microsoft website. However, choose the appropriate version carefully:
- Microsoft Visual C++ 2013 Redistributable Package (choose ‘vcredist_x86.exe’)
- Microsoft Visual C++ 2008 Redistributable Package
- Microsoft Visual C++ 2005 Redistributable Package
Solution 7: Turn the .NET Framework 3.5 On
- Firstly, log in to Windows using your administrative account.
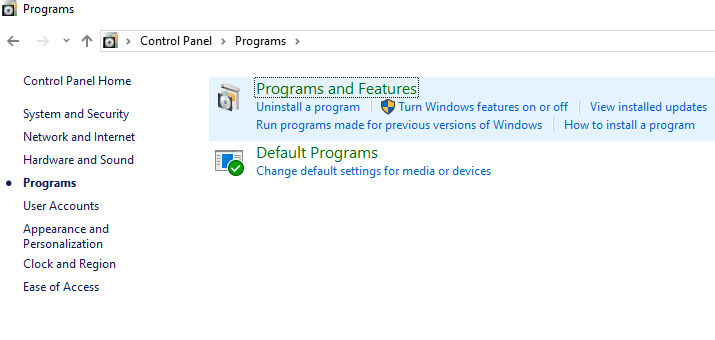
- Next, move to the Windows Start menu, then select the Control Panel, and click on Programs.
- Further, choose to turn Windows features on or off as per requirement.
- Turn on .NET Framework 3.5 and then reboot your system.
Now, try launching QuickBooks as admin to install the updates again and check whether QuickBooks still requires that you reboot loop.
What Triggers QuickBooks Reboot Loop Error
Several reasons force QuickBooks to require a reboot. We’ve listed all of them below:
- When the Hard Disk is corrupted or damaged
- When the QBWUSER.INI file is either damaged or missing
- The company file name is too lengthy, exceeding the character limit
- Incorrect or incomplete Installation of QuickBooks Desktop
- An old or outdated operating system may also cause the ‘QuickBooks requires that you reboot loop’ issue
FAQs
QuickBooks keeps saying it has an update, so when I launch it as admin to install the updates, it just says to reboot to install the update; however, rebooting doesn’t actually do anything. What should I do?
You can try implementing proven solutions such as clean installing QuickBooks, renaming the .ND and .TLG files, updating the software, configuring Firewall settings manually, etc. However, you can also go through this blog for more effective solutions.
QuickBooks keeps saying to reboot when launching as Admin to install updates. Should I keep on rebooting?
No, instead of rebooting the system repeatedly, try the solution mentioned in this blog for an instant fix.
Is there any alternate way to repair QuickBooks to fix the reboot loop error?
Apart from running the QuickBooks install diagnostic tool, you can repair QuickBooks from the control panel. All you need to do is press the Windows + R keys, enter the command appwiz.cpl, and press Enter. Find and select QuickBooks in the list of programs, select the Uninstall/Remove option, and select Repair in the next window. Now, follow the on-screen instructions to repair QuickBooks and check if the reboot loop error is resolved.
You May Also Read-
QuickBooks Payroll Not Working – Troubleshoot Common Errors and Their Solutions
Fix QuickBooks Error 15106 by Repairing the Damaged Program
Fix QuickBooks Error 1603- Problem Installing Microsoft .NET
QuickBooks Error 15227: Updated Practical Solutions (2025)
Fix QuickBooks Error 6000 83- Can’t Access the Company File

James Richard is a skilled technical writer with 16 years of experience at QuickBooks Data Migration. His expertise covers data migration, conversion, and desktop errors for QuickBooks. He excels at explaining complex technical topics clearly and simply for readers. Through engaging, informative blog posts, James makes even the most challenging QuickBooks issues feel manageable. With his passion for writing and deep knowledge, he is a trusted resource for anyone seeking clarity on accounting software problems.