Many users have reported that their QuickBooks is not printing correctly. Although printing issues in QuickBooks are vast, we have mainly covered “template printing”,
“Invoice printing” and ‘check printing’ issues comprehensively in this detailed blog. When it comes to solutions, we have mentioned solutions that are recommended by experts, including updating the printer driver, testing the printer setup, and many more. Read this extensive blog till the end and get rid of the printing issue instantly.
General Solutions to Resolve Printing Issues in QuickBooks Desktop on Windows
Let’s first look at the general solutions below to eliminate the ‘QuickBooks not printing correctly’ issue.
Solution 1. Update Printer Driver Using the Device Manager
In this section, we’ll learn how to update a printer driver using the Device Manager by following the steps outlined below.
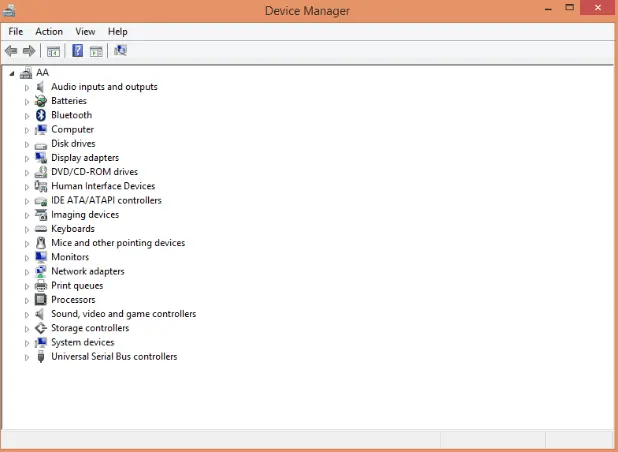
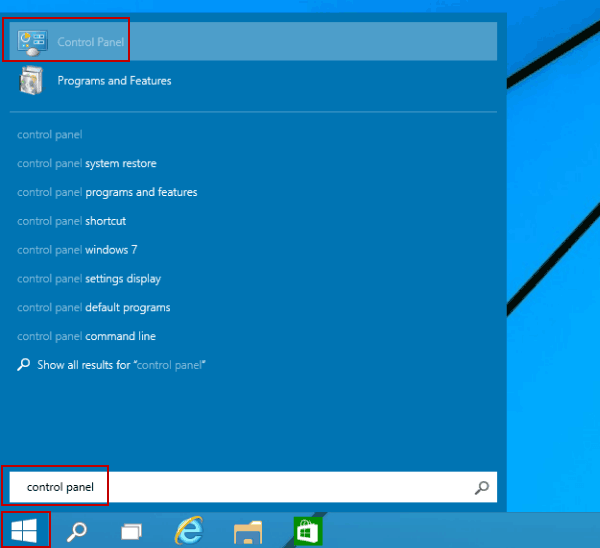
- Press the Windows Start button and enter “Device Manager” in the search bar.

- Click on Device Manager in the search results and expand the Printers category.
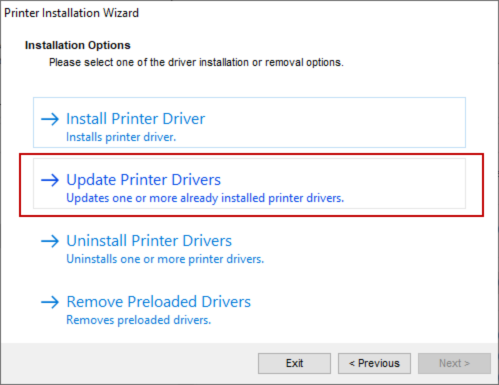
- Right-click the printer you want to update drivers for and then choose Update Driver.
- Choose Search automatically for updated driver software.
- If Windows finds one, follow the on-screen instructions to complete the installation process. On the other hand, if Windows can’t find one, check the printer manufacturer’s website to see whether the printer driver is updated. If not, consider updating the printer driver.
If this doesn’t help you resolve the quickbooks unable to print checks issues, move to the next solution.
Solution 2: Print from Another Program
Let’s ensure you can print from any other program other than QuickBooks. In this solution, we have taken Notepad as a program. However, you can take any program you have. Let’s implement the steps below to print.
- Press the Windows Start button and search and select Notepad.
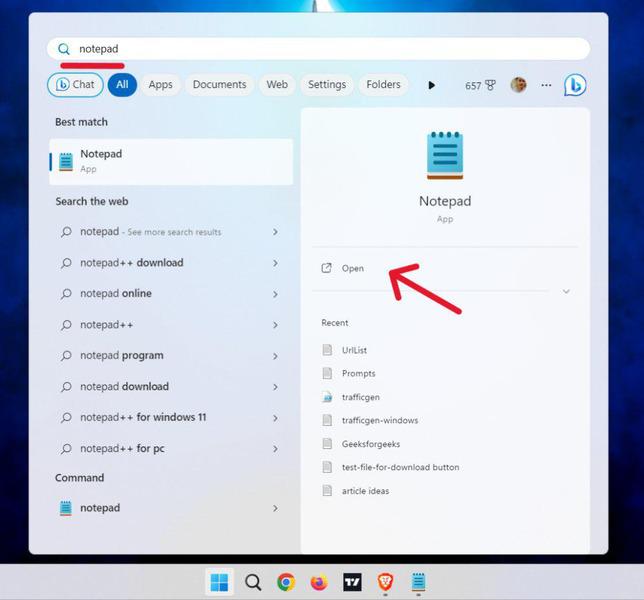
- Write down something in the Notepad, go to File, then select Print.
- Lastly, select the correct printer and then choose Print.
If Notepad as a program doesn’t print, move to solution 2 below. However, if it does print successfully, move to solution 3.
Solution 3: Test the Printer Setup
Let’s follow the steps below to test the printer’s setup.
Step 1: Ensure the Printer is Set Correctly
- First, turn off the printer, then restart the system, and then turn the printer back on.
- After turning the printer back on, ensure you have loaded the printer paper correctly.
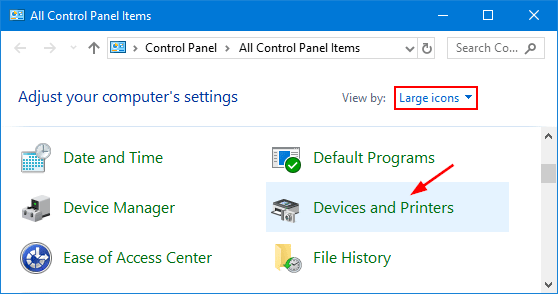
- Select the Windows Start button, open the Control Panel, then double-click Printers and Faxes.
- If the printer shows Offline, right-click the printer and choose Use Printer Online.
- Double-click the printer and check if print jobs are displaying in the queue. Then select Printer and then Cancel All Documents.
- Close the window, right-click the printer, then select Properties, and then select Print Test Page.
Note: Remember, if the printer is a network printer and the test page doesn’t print, network issues may have caused this print issue.
Step 2: Ensure the Printer is an Appropriate One
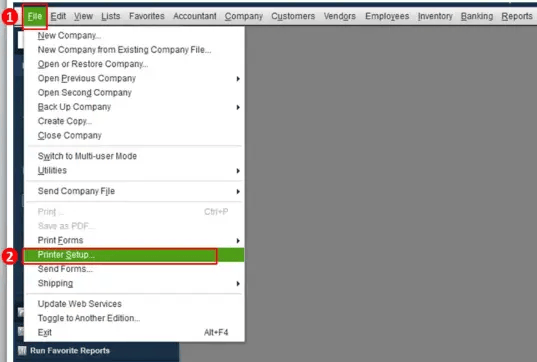
- Open QuickBooks, move to the File menu, and then select Printer Setup.
- Then, select the form you want to print and ensure the printer name matches the exact name of the printer you want to use. In case it doesn’t match, you first need to correct the setup within the computer’s Printer Setup.
Lastly, select Help in this area for additional help on these settings.
Step 3: Print to a Different Printer
- Open QuickBooks, move to the File menu at the top, then select Printer Setup.
- Select the form you want to print and then choose a different printer, like the Microsoft XP printer.
- Lastly, select Help in this area for more help with these settings.
If this solution doesn’t work, move to the next solution.
Solution 4: Test the Company File and QuickBooks Installation
- Print a different form, or try a standard form or report if you’re using customized forms or memorized reports.
- Let’s try to print a single form if you were printing a batch of forms in QuickBooks. If you are successful in doing that, try to print smaller batches.
Open a sample company file in QuickBooks and try to print the same type of form or report. If it works, it simply means there may be data damage in the company file. Consider resolving data damage in the company file by running the repair tools whose steps have been mentioned right below, and then try to print again. On the other hand, if you still can’t print using a sample file, move to Solution 5 directly.
Fix Data Damage in the QuickBooks Desktop Company File
In this section, we’ll learn how to repair data damage or corruption in the company file using tools such as the Rebuild utility, QuickBooks File Doctor tool, etc. Let’s follow the steps below carefully and repair the QB company file.
Method 1. Run the Rebuild Data Tool
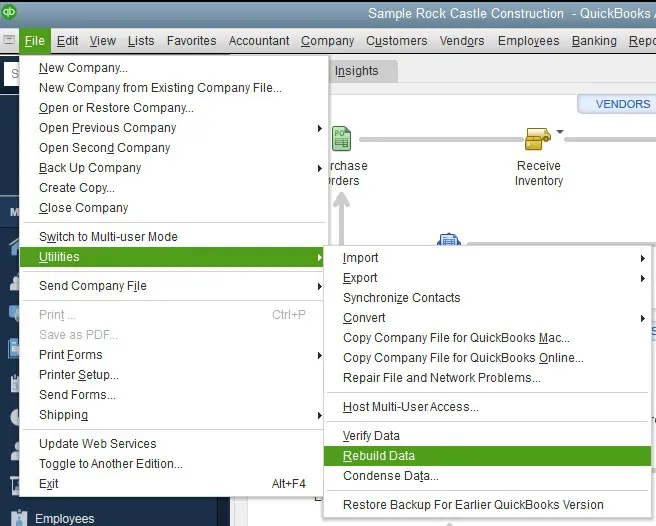
- Open the QBDT, move to the File menu, then hover over Utilities and finally select Rebuild Data.
- Hit OK on the QuickBooks Information window and follow the onscreen steps to save a backup.
- Let the tool run and repair the company file; it may take some time.
- When the tool finishes the repair procedure, hit OK and move to the File menu again.
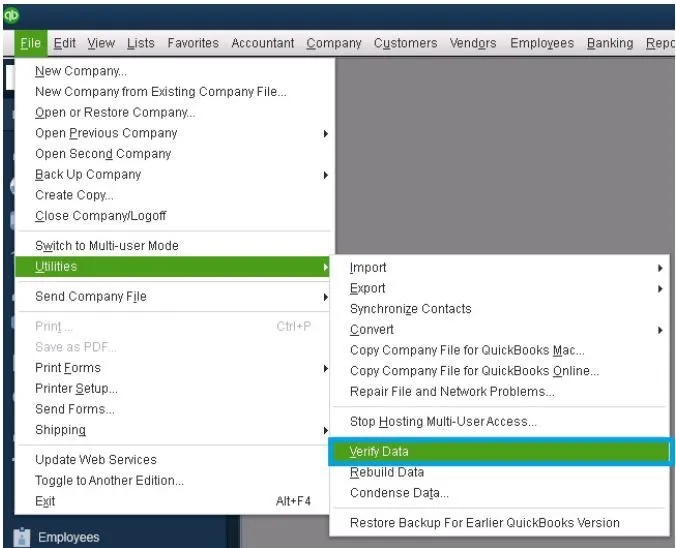
- Then, hover over Utilities, select Verify Data, and let the tool check the file for data issues.
If QuickBooks doesn’t find any issues with the company file, hit OK. You can use the company file as it doesn’t have data damage.
On the other hand, if QuickBooks finds an issue with the company file, select Rebuild Now. However, if quickbooks not printing checks correctly , the issue still doesn’t get resolved. try again.
Method 2: Run the QuickBooks File Doctor Tool
Running the File Doctor tool helps resolve common company file issues. It scans the company file for data damage and then runs a quick repair. Let’s learn how to run this tool effortlessly.
Step 1. Download and Install the QuickBooks Tool Hub
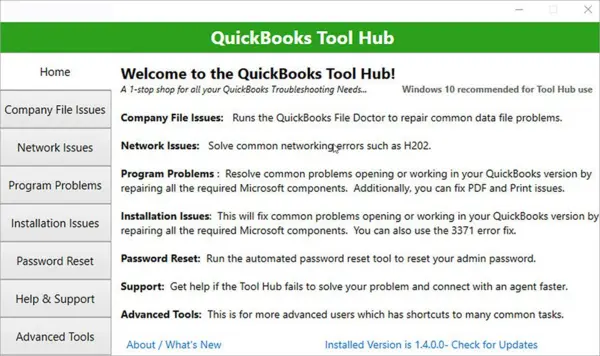
- Exit QuickBooks and download the most recent version (1.6.0.5) of the QuickBooks Tool Hub from HERE.
- Save the QuickBooksToolHub.exe file to a location that is easily accessible, such as the desktop or the downloads folder.
- Open the QuickBooksToolHub.exe file, follow the on-screen steps to install and then agree to the terms and conditions.
- Finally, when the installation finishes, double-click the Tool Hub icon on the Windows desktop to open it.
Step 2. Run the Quick Fix My File Tool
- Open QuickBooks Tool Hub, select Company File Issues, and then select Quick Fix My File.
- Hit OK when it completes and launch QuickBooks.
Step 3: Run the QuickBooks File Doctor Tool
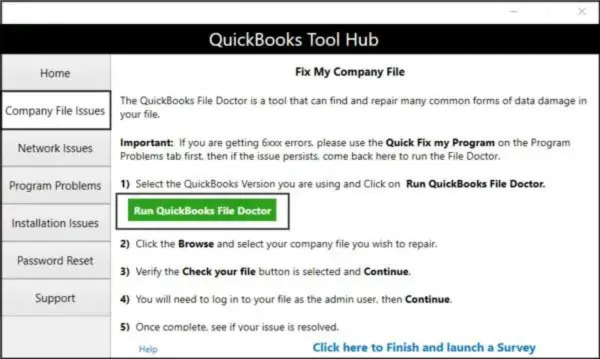
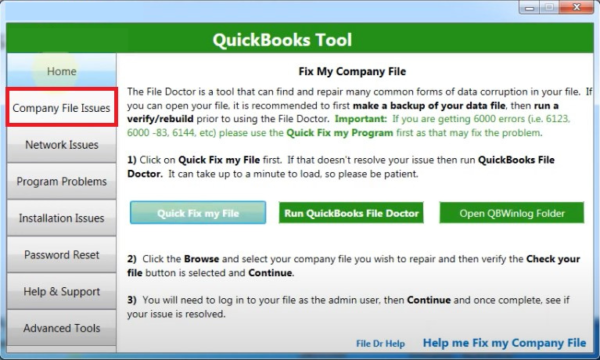
- Launch QuickBooks Tool Hub, select Company File Issues, and hit the Run QuickBooks File Doctor button.
- The File Doctor tool usually takes a minute or two to open. When it opens, select the company file from the drop-down menu.
- In case you don’t see the desired file, select Browse and Search to find the file.
- Select Check your file (the middle option out of three options) and then hit Continue.
- Enter the QuickBooks admin password and then hit Next to conclude.
The File Doctor tool may take up to 15 minutes to scan the company file. However, this depends entirely on the size of the company file once the tool closes automatically, open QuickBooks and then the data File.
Method 3: Manually Repair the Company File after Verifying the Data
You can manually fix the errors found in the Verify Results. However, before getting started, you must back up the company file. Now, let’s implement the steps below to fix the data errors manually.
- Open QuickBooks, and move to the File menu at the top. Then, click Utilities and then select Verify Data.
- Let the tool check the company file for data issues.
- In the Verify Results screen, select Expand All to view the errors.
- Lastly, select See Online Article in order to see the steps to fix the error.
If this also doesn’t help resolve the ‘QuickBooks not printing correctly’ issue, move to the next solution.
Solution 5: Update QuickBooks to the Newest Release
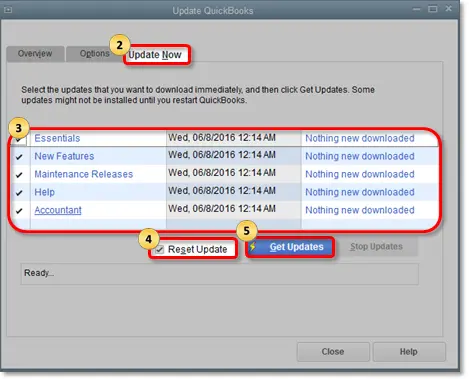
- Open QuickBooks, move to the menu bar at the top, and click the Help menu.
- Select Update QuickBooks Desktop from the drop-down and select the Update Now section to continue.
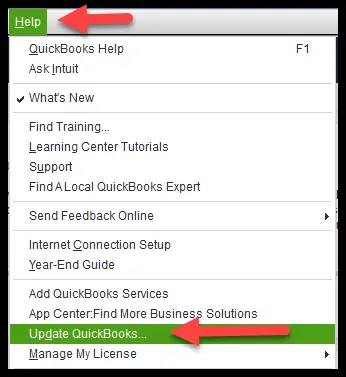
- Check the Reset Update box, click Get Updates, and then hit OK to confirm.
If updating QuickBooks also doesn’t help, move to the solution below.
Solution 6. Reinstall QuickBooks Desktop
If none of the solutions work, consider reinstalling QuickBooks Desktop on the system. Let’s follow the detailed steps below and reinstall QuickBooks.
Step 1: Remove QuickBooks
- Open the Control Panel by pressing the Windows Start button.
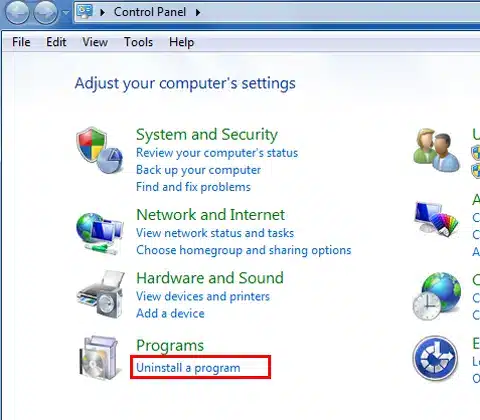
- Select Programs and Features or Uninstall a Program depending on the Windows version you have.
- A list of programs will appear on the screen; select the version of QuickBooks you want to remove from the system.
- Choose Uninstall/Change, Remove, and then hit Next to conclude.
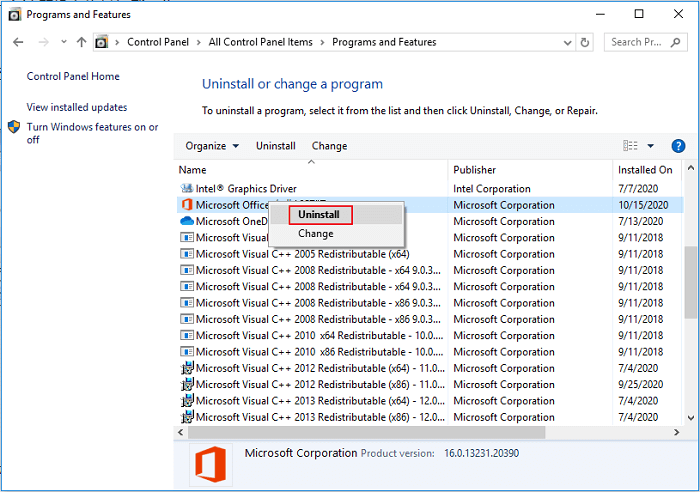
Note: If you can’t see this option, sign out and then sign back in as an administrator.
Step 2: Rename Installation Folders Manually
- Open File Explorer by pressing the Windows + E keys on the keyboard.
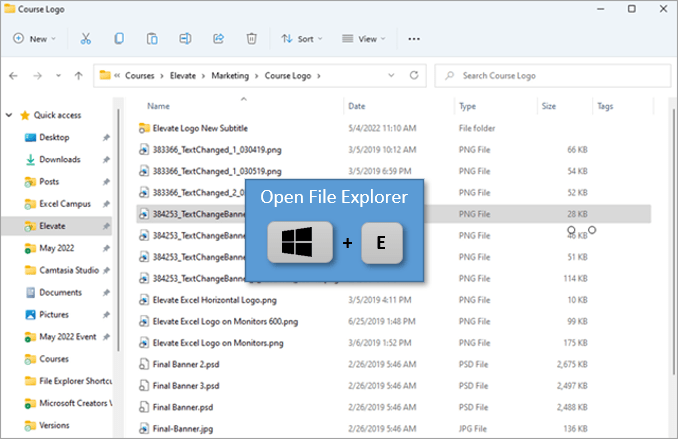
- Look for and open the QuickBooks folder that contains the company files. This QuickBooks folder is found in one of the following locations.
- C:\ProgramData\Intuit\QuickBooks (year)
- C:\ProgramData\Intuit\QuickBooks (year)
- C:\Users\(current user)\AppData\Local\Intuit\QuickBooks (year)
- C:\Program Files\Intuit\QuickBooks (year)
- 64-bit version C:\Program Files (x86)\Intuit\QuickBooks (year)
Right-click the folder, select Rename, and add “old” at the end of the folder name to prevent QB from opening this folder when you reinstall.
Step 3. Reinstall QuickBooks on the System
- Download the installer for the version of QuickBooks you are currently using. You can download it from the Customer Account Management Portal (CAMPs) or the download site.
- Save the downloaded file to an easily accessible location, for instance, the desktop or the downloads folder.
- Remember to have the license number ready. You can obtain it in two ways. If you purchased QuickBooks online, it must be in the purchase confirmation email. On the other hand, if you purchased QuickBooks offline, you can find it in the original package. Also, ensure your computer meets the minimum system requirements to run QuickBooks.
- Now, open the QuickBooks.exe file and select Express Install.
- Hit Next and then select Install.
- Lastly, when it finishes, select Open QuickBooks.
These were all the general troubleshooting solutions that could help resolve quickbooks checks not printing correctly issues in most cases. However, if you are still struggling to print from QuickBooks, follow the case-specific advanced troubleshooting solutions below.
Case 1. What to Do If QuickBooks Check is Not Printing Correctly
Many users have reported that they can’t print checks in QuickBooks. Though this is a common issue, implementing relevant troubleshooting solutions is essential. In this section, we have mentioned working solutions to deal effectively with the check printing issue.
Solution 1: Run the Print and PDF Repair Tool from the QuickBooks Tool Hub
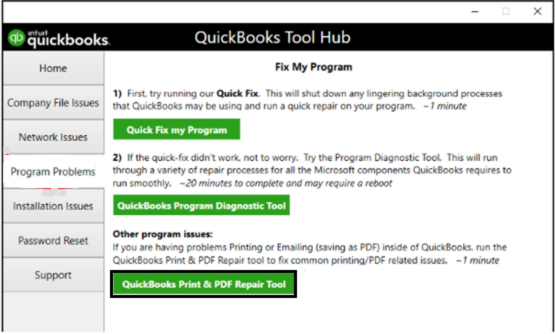
If QuickBooks Checks are not printing correctly, running the Print and PDF repair tool from QuickBooks Tool Hub may help significantly. However, you first need to download and install QuickBooks Tool Hub to access this tool. See Step 1. Download and install the QuickBooks Tool Hub above for the same. Further, let’s follow the steps below and run the Print and PDF tool effortlessly to fix check printing issues in QuickBooks.
- Launch QuickBooks Tool Hub, select Program Problems, and select QuickBooks PDF & Print Repair Tool.
- Finally, try printing or saving as a PDF from the QBDT again.
Rename the QBPrint.QBP File Manually
- Look for the QBPrint.qbp:
- Windows 10 and newer: C:\ProgramData\Intuit\QuickBooks 20xx(20xx represents the version of your QuickBooks.)
- Server 2012 and newer: C:\Program Data\Intuit\QuickBooks YEAR and C:\Users\**remote user**\AppData\Roaming\Intuit\ YEAR VERSION\TSPrinterSettings
- Rename the QBprint.qbp File
- Right-click on the QBprint.qbp file for your QuickBooks version, and then select Rename.
- Add “OLD” at the end of the file name, for instance, QBPrint.qbp.old.
- Open QuickBooks Desktop, move to File, and then select Printer Setup.
- Choose any transaction in the Form Name list and hit OK. This creates a new QBprint.qbp file.
Note: Ensure this must not be done for every transaction. - Lastly, try printing a check. If this solution is ineffective, move to the solution below.
Solution 2. Align the Checks Manually
In this section, we’ll learn how to fix print alignment for paychecks in QuickBooks. Firstly, we’ll update QuickBooks to the latest release and then try to align the checks in proper order. As discussed above, see Solution 5: Update QuickBooks to the Newest Release in the General Solutions section above to update the software. Now, follow the steps below and try aligning the checks.
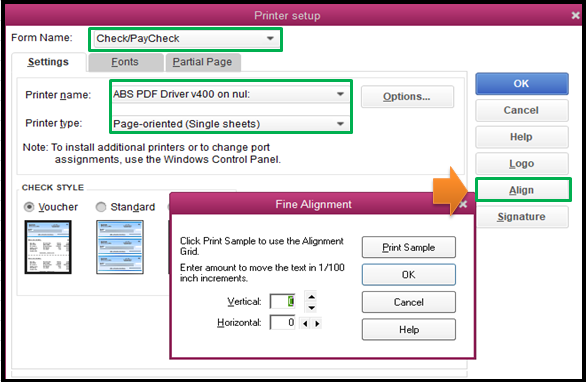
- Move to the File menu at the top and select Printer Setup.
- Choose Check/Paycheck at the Form Name drop-down.
- Select Voucher check for the check style and click Align on the right.
- Now, consider printing a sample and compare it to the pre-printed checks.
- Adjust the horizontal and vertical settings using the grid on the sample, then hit OK to continue.
- Click Align once again and print another sample.
- Lastly, compare the sample to the paycheck stock and adjust the alignment again accordingly.
Consider repeating steps 3 to 7 until you obtain the perfect alignment.
Case 2. What to Do If QuickBooks Invoices Are Not Printing Correctly
In this section, we have provided working solutions to resolve QuickBooks printing problems with invoices. Let’s implement the solutions carefully in the given order.
Solution 1: Print from Another Program and Test the Printer Setup
To effectively resolve invoice Printing Issues in QuickBooks, follow Solution 2: Print from Another Program and Solution 3: Test the Printer Setup in the General Solutions section above.
However, if implementing these solutions doesn’t help, move to the next solution.
Solution 2. Update and Repair Adobe Reader
If QuickBooks is not printing lines on invoices, updating and repairing Adobe Reader may significantly help resolve this quickbooks won’t print checks issue. To update Adobe Reader, consider visiting the Adobe website. Once the Adobe Reader is updated, follow the steps outlined below to repair it.
- Close all the open web browser windows and then press the Windows Start button on the lower left-hand corner of the screen.
- Type Control Panel in the search bar, and then hit Enter to continue.
- Select Programs and Features, then select Adobe or Adobe Reader, and then click Uninstall/Change.
- Click Next in the Setup dialog box.
- Select Repair > Next, and then Install, then hit Finish when the repair is complete.
Once you are done, log back into QuickBooks and try printing the invoices again. If this doesn’t help, proceed to the next solution.
Solution 3. Run the Print and PDF Repair Tool
As discussed above, see Solution 1: Run the Print and PDF Repair Tool from the QuickBooks Tool Hub of Case 1. What to Do If QuickBooks Check is Not Printing Correctly above for the same.
Solution 4. Align the Invoices Manually
In this section, we’ll discuss how to manually align the invoices. Follow the steps outlined below to effortlessly align the invoices.
- Open QuickBooks Desktop and then open an invoice that you want to print.
- Click the Print drop-down arrow and select Invoice.
- Click the Align tab and then select a template to use for alignment. Then, hit OK.
- Enter the amount to move the text both vertically and horizontally on the alignment window.
- Lastly, select Print Sample to check whether the alignment that you want is correct.
Case 3. What to Do If QuickBooks Template is Not Printing Correctly
If the QuickBooks template is not printing correctly in QuickBooks Desktop, implement the tried and tested solutions mentioned in this section to tackle the issue effortlessly.
Solution 1. Align the Checks Manually
As discussed above, see Solution 2. Align the Checks Manually for Case 1. What to Do If QuickBooks Check is Not Printing Correctly above for the same.
If aligning the checks doesn’t resolve the ‘QuickBooks not printing correctly’ issue, implement the next solution.
Solution 2. Run the Print and PDF tool
As discussed above, see Solution 1: Run the Print and PDF Repair Tool from the QuickBooks Tool Hub of Case 1 What to Do If QuickBooks Check is Not Printing Correctly to navigate through the template issue in QuickBooks.
Troubleshooting Solution to Resolve Printing Issues in Mac
Update the Printer Software
If the printer has a printing problem on Mac, consider updating the printer software by implementing the solutions outlined below.
- Choose the Apple menu on the Mac, choose System Settings, and then click Printers & Scanners in the sidebar.
- Then, control-click the printer in the list on the right, select Remove Printer, and then select Remove Printer.
- Select the Add Printer, Scanner, or Fax button. A dialog will appear on the screen, listing any IP, shared, and Open Directory printers on your local network. Remember, your printer may take a while to appear.
- Once your printer appears in the list, select it and do one of the following:
- Use AirPrint: If you have connected an AirPrint-enabled printer through a USB cable, select the Use pop-up menu and choose AirPrint. Remember, in case AirPrint isn’t in the pop-up menu, it simply means your printer doesn’t support it.
- Use printer software installed on the Mac: Firstly, choose the Use pop-up menu, and then choose Select Software.
- Use printer software from a file on Mac: Opt for the Use pop-up menu, choose Other, then Select the file, and lastly, click Add.
Prerequisites to Consider Before Fixing QuickBooks is Not Printing Correctly Issues
Certain prerequisites must be fulfilled before you proceed with the troubleshooting. Sometimes, just fulfilling the necessary printing requirements eliminates even the most complex printing Issues in QuickBooks.
- Ensure that the QBDT is updated to the latest release
- Your system must be connected to the printer
- Ensure that you have updated the latest printer driver as per the latest release
- Ensure no error messages or warning lights on your printer
If you still can’t print from QuickBooks, follow the troubleshooting solutions mentioned in the section below.
Conclusion
We are concluding our troubleshooting blog here in the hope that the solutions curated in have proved to be effective for you.
FAQs
What issues may be encountered if QuickBooks invoices are not printing correctly on Mac?
Multiple issues can be encountered if Quickbooks invoices are not printing correctly on Mac, such as lines going missing on invoices, dollar amounts on invoices not showing cents, etc.
Why do we run the Print and PDF Repair Tool?
The Print and PDF Repair tool works excellently to resolve the common printing issues in QuickBooks.
Checks are not printing correctly in QuickBooks online. What other issues can I encounter?
You can encounter issues, including
Printed output is fuzzy
Checks print in the wrong order
The printer icon goes missing from the preview screen
You May Also Like To Read-
QuickBooks Auto Data Recovery- Recover Lost Data with Ease
QBCFMonitorService Not Running On This Computer! 12 Hacks
Your Guide to Set Windows Permissions to Share Company Files
Fix QuickBooks Activation Problem with Instant Solutions
Cloud Migration Services: A Complete Guide to Seamless Transition

James Richard is a skilled technical writer with 16 years of experience at QuickBooks Data Migration. His expertise covers data migration, conversion, and desktop errors for QuickBooks. He excels at explaining complex technical topics clearly and simply for readers. Through engaging, informative blog posts, James makes even the most challenging QuickBooks issues feel manageable. With his passion for writing and deep knowledge, he is a trusted resource for anyone seeking clarity on accounting software problems.